Whimstar Map
Description
Every stylist’s thought is unique, colliding with the world to create a splash of imaginative brilliance.
Interactive Map Locations
1. Miraland Map
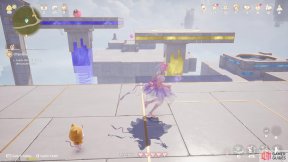
North of ![]() Relic Hill, before the river. Enter the Curio and lead the ball to the goal. Tip: Place two crates on the left and one on the right.
Relic Hill, before the river. Enter the Curio and lead the ball to the goal. Tip: Place two crates on the left and one on the right.
2. Miraland Map
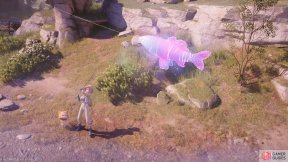
South of the ![]() Village Fork. Near the southern bridge. Use the fishing outfit to reel in the glowing fish.
Village Fork. Near the southern bridge. Use the fishing outfit to reel in the glowing fish.
3. Miraland Map
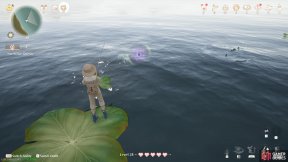
East of the ![]() Queen’s Palace Ruins. Hop across the lily pads and use the fishing outfit to catch the glowing fish.
Queen’s Palace Ruins. Hop across the lily pads and use the fishing outfit to catch the glowing fish.
4. Miraland Map
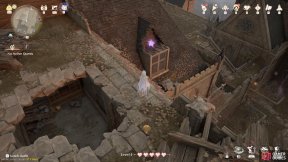
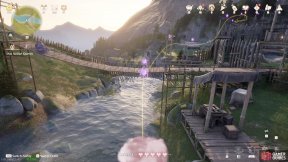
South-west of the ![]() Queen’s Palace Ruins Front Yard Warp Spire, high up. You can head south from the aforementioned Warp Spire, enter the small room and climb up from there. Touch the incomplete star and collect the lesser stars.
Queen’s Palace Ruins Front Yard Warp Spire, high up. You can head south from the aforementioned Warp Spire, enter the small room and climb up from there. Touch the incomplete star and collect the lesser stars.
5. Miraland Map
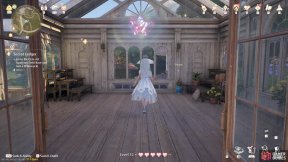
North-west from the ![]() Abandoned Fanatic Wisher Camp Warp Spire. Touch the incomplete star, then collect the small stars while riding/following the cloud.
Abandoned Fanatic Wisher Camp Warp Spire. Touch the incomplete star, then collect the small stars while riding/following the cloud.
6. Miraland Map
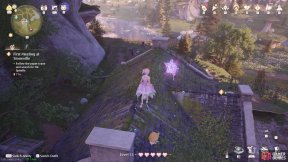
North of ![]() Florawish Lane. Push the wooden crate away from the door, then enter the greenhouse.
Florawish Lane. Push the wooden crate away from the door, then enter the greenhouse.
7. Miraland Map
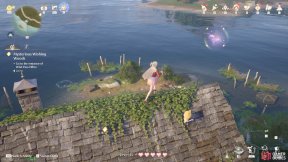
East of ![]() Village Fork. Touch the incomplete star on the rooftop, then collect all of the smaller stars.
Village Fork. Touch the incomplete star on the rooftop, then collect all of the smaller stars.
8. Miraland Map
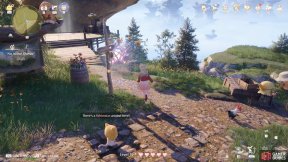
South from ![]() Sanctum of the Observant. Catch the Whimflutter at the top of the house.
Sanctum of the Observant. Catch the Whimflutter at the top of the house.
9. Miraland Map
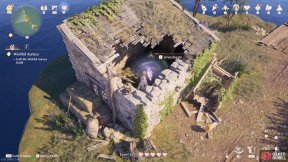
North-west from ![]() Stellar Fishing Ground Peak. On the top level of the central medium stonetree. Use a jumping attack to break the wooden box near the north side, then chase after the fleeing star.
Stellar Fishing Ground Peak. On the top level of the central medium stonetree. Use a jumping attack to break the wooden box near the north side, then chase after the fleeing star.
10. Miraland Map
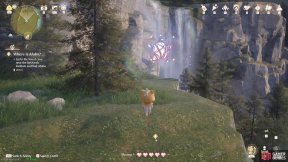
Small stonetree halfway between the ![]() Market of Mirth stonetree and the Stellar Fishing Grounds stonetree. Use a jumping attack to break the wooden boards on the roof.
Market of Mirth stonetree and the Stellar Fishing Grounds stonetree. Use a jumping attack to break the wooden boards on the roof.
11. Miraland Map
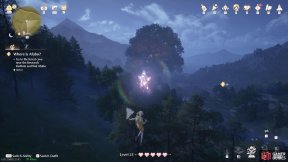
North-west from ![]() Timis’s Beauty Lab. Climb the rope near a Pounceria plant.
Timis’s Beauty Lab. Climb the rope near a Pounceria plant.
12. Miraland Map
Short distance north from the ![]() Workshop Waterwheel. Catch the Whimflutter.
Workshop Waterwheel. Catch the Whimflutter.
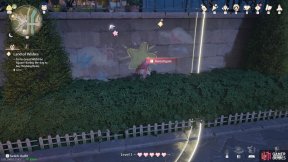
13. Miraland Map
East side of Great Wishtree Square. Touch the glowing ball above the parasol, then investigate the nearby star-shaped graffiti.
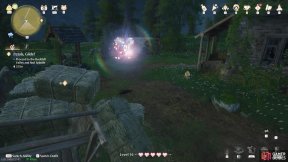
14. Miraland Map
South-west from ![]() Beside the Golden Fields. Glowing wooden box near two houses. Smash it with a jumping attack, then give chase.
Beside the Golden Fields. Glowing wooden box near two houses. Smash it with a jumping attack, then give chase.
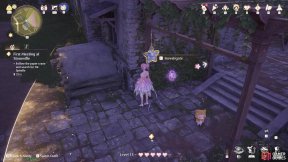
15. Miraland Map
North-east of ![]() Village Fork. Touch the glowing ball above the cart, then look for star-shaped hanging ornament to the north-west.
Village Fork. Touch the glowing ball above the cart, then look for star-shaped hanging ornament to the north-west.
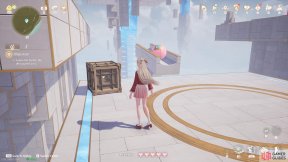
16. Miraland Map
South-east from ![]() Bug Catcher’s Cabin. Enter the Curio and guide the ball to the goal. Tip: Move the crate to the 2nd platform, activate the switch to release the ball, then stand on the 2nd platform. When the ball reaches the 2nd platform, jump off the platform (or float up).
Bug Catcher’s Cabin. Enter the Curio and guide the ball to the goal. Tip: Move the crate to the 2nd platform, activate the switch to release the ball, then stand on the 2nd platform. When the ball reaches the 2nd platform, jump off the platform (or float up).
17. Miraland Map
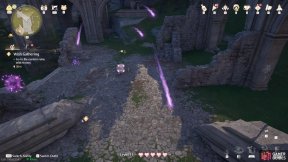
At the ruins east from the ![]() Secret Base. Open the suspicious treasure chest and defeat the Esselings that spawn.
Secret Base. Open the suspicious treasure chest and defeat the Esselings that spawn.
18. Miraland Map
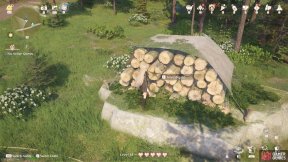
Cottage west from ![]() Lakeside Hill Lane. Touch the glowing ball, then look for a star shape among the log pile.
Lakeside Hill Lane. Touch the glowing ball, then look for a star shape among the log pile.
19. Miraland Map
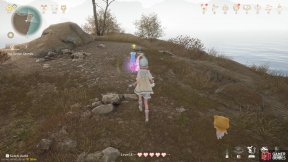
North-east of the ![]() Queen’s Palace Ruins. Slowly approach the Whimink by the cliff edge and groom it.
Queen’s Palace Ruins. Slowly approach the Whimink by the cliff edge and groom it.
20. Miraland Map
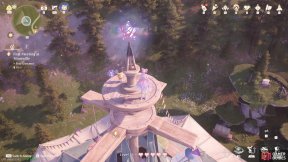
West of the ![]() Village Fork. At the very top of the big tent building. You can jump up from the boxes at the front, the nearby wagon etc.
Village Fork. At the very top of the big tent building. You can jump up from the boxes at the front, the nearby wagon etc.
21. Miraland Map
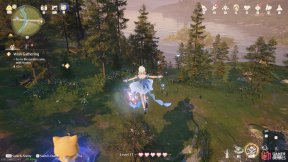
East from the ![]() Secret Base, floating high up near a bridge. Use the ramp to the north-west to get some height.
Secret Base, floating high up near a bridge. Use the ramp to the north-west to get some height.
22. Miraland Map
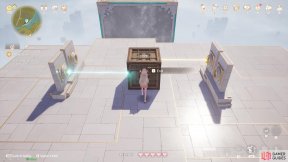
Short distance east from ![]() Forgotten Village Dwelling. Curio on a ledge lower down.
Forgotten Village Dwelling. Curio on a ledge lower down.
Solution:
- Push the big crate into the nearby laser.
- Drag the smaller crate so it covers the same laser.
- Push the big crate forward so it blocks both of the next two lasers.
23. Miraland Map
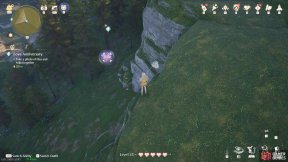
East of the ![]() Mayor’s Residence. Whimflutter on a high up ledge. You’ll probably need to jump/float to catch it.
Mayor’s Residence. Whimflutter on a high up ledge. You’ll probably need to jump/float to catch it.
24. Miraland Map
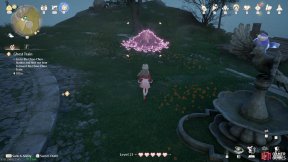
West from ![]() Volunteer Corps Jail, on level 1F. Look for a pile of leaves, then use the purification outfit to blow the leaves away.
Volunteer Corps Jail, on level 1F. Look for a pile of leaves, then use the purification outfit to blow the leaves away.
25. Miraland Map
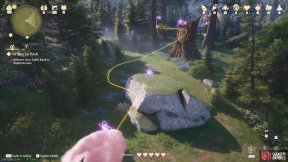
South from ![]() Desperation Orb Warehouse. Touch the incomplete star, then collect the small stars while riding/following the cloud. There’s a part halfway through where you need to climb a rope as Momo that can be annoying. (We didn’t try, but you could try jumping up and floating down as Nikki instead.)
Desperation Orb Warehouse. Touch the incomplete star, then collect the small stars while riding/following the cloud. There’s a part halfway through where you need to climb a rope as Momo that can be annoying. (We didn’t try, but you could try jumping up and floating down as Nikki instead.)
26. Miraland Map
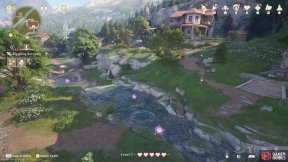
North-west corner of ![]() Daisy Inn. Touch the incomplete star, then collect all of the small stars within the time limit. You may find it easier at night.
Daisy Inn. Touch the incomplete star, then collect all of the small stars within the time limit. You may find it easier at night.
27. Miraland Map
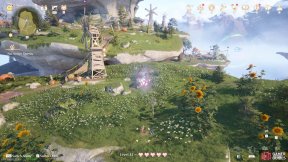
North-east from ![]() Windrider Mill Mid-Level, on the middle level. You need to trap a
Windrider Mill Mid-Level, on the middle level. You need to trap a ![]() Scarf Worm. Look for two holes near the item shop. Grab a nearby crate and cover one of the holes, then stand on the remaining hole. This will push the star out.
Scarf Worm. Look for two holes near the item shop. Grab a nearby crate and cover one of the holes, then stand on the remaining hole. This will push the star out.
28. Miraland Map
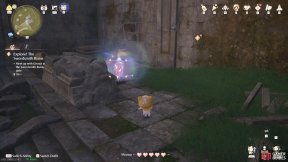
Second set of ruins south from ![]() Swordsmith Ruins Entrance. Past some more Iron Squirrel statues.
Swordsmith Ruins Entrance. Past some more Iron Squirrel statues.
29. Miraland Map
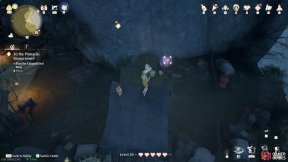
South-west from ![]() Volunteer Corps Jail. On level 3F. Catch the Whimflutter atop a wooden watchtower by the west-facing ledge. There’s a wishnet nearby to jump from.
Volunteer Corps Jail. On level 3F. Catch the Whimflutter atop a wooden watchtower by the west-facing ledge. There’s a wishnet nearby to jump from.

30. Miraland Map
West of ![]() Florawish Lane, among some small ruins. Open the glowing treasure chest, then defeat the Esselings that spawn.
Florawish Lane, among some small ruins. Open the glowing treasure chest, then defeat the Esselings that spawn.
31. Miraland Map
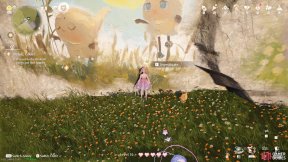
North of ![]() Beside the Golden Fields. Under the stonetree canopy. Touch the glowing ball, then search for a star shape near the ground. Can be hard to see; you need to search around the grass next to the Piecey on the right.
Beside the Golden Fields. Under the stonetree canopy. Touch the glowing ball, then search for a star shape near the ground. Can be hard to see; you need to search around the grass next to the Piecey on the right.
32. Miraland Map
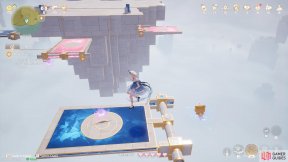
South from the ![]() Beside the Golden Fields Warp Spire. Underneath the stonetree canopy. Enter the curio to find a fiendish challenge. You have to collect the small stars while navigating the flip-swap platforms. Tip: It’s slightly inelegant, but we suggest ignoring the switch that alters which platforms flip. This means one small star won’t have a platform underneath. What you can do is make that your final star–the
Beside the Golden Fields Warp Spire. Underneath the stonetree canopy. Enter the curio to find a fiendish challenge. You have to collect the small stars while navigating the flip-swap platforms. Tip: It’s slightly inelegant, but we suggest ignoring the switch that alters which platforms flip. This means one small star won’t have a platform underneath. What you can do is make that your final star–the ![]() Whimstar will spawn as you grab it and fall into the void, but it’ll remain there.
Whimstar will spawn as you grab it and fall into the void, but it’ll remain there.
33. Miraland Map
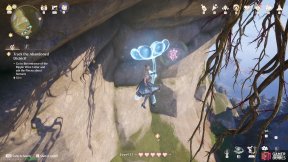
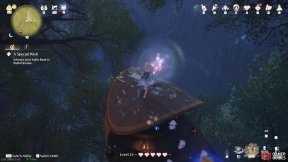
West of ![]() Beside the Ripple Wine Cellar, high up just underneath the stonetree canopy. Nearby, there’s an Esseling holding onto a spore. Defeat it and the spore will grow into an air-blowing plant that you can use to glide up.
Beside the Ripple Wine Cellar, high up just underneath the stonetree canopy. Nearby, there’s an Esseling holding onto a spore. Defeat it and the spore will grow into an air-blowing plant that you can use to glide up.
34. Miraland Map
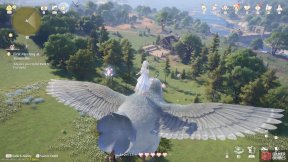
East from ![]() Garrison of the Paladins, lower down. At the
Garrison of the Paladins, lower down. At the ![]() Wishball field, atop the northernmost spectator tower. You can float across from a nearby tower with a climbable rope.
Wishball field, atop the northernmost spectator tower. You can float across from a nearby tower with a climbable rope.
35. Miraland Map
West of the ![]() Meadow Activity Support Center, high up in the sky. Look for a
Meadow Activity Support Center, high up in the sky. Look for a ![]() Sky Monarch to the north-west. Give it a nice groom, then ride it here.
Sky Monarch to the north-west. Give it a nice groom, then ride it here.
36. Miraland Map
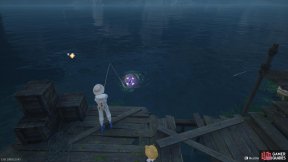
South of the ![]() Golden Fields Old Dock. Reel in the glowing fish at the corner of the wooden pier.
Golden Fields Old Dock. Reel in the glowing fish at the corner of the wooden pier.
37. Miraland Map
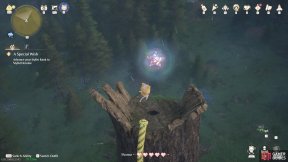
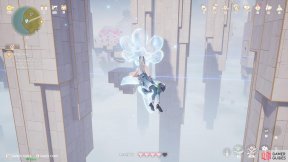
North from ![]() Flower Valley Waterfall. Atop a tall tree stump. There’s a wishnet to the south that you can jump from. You should Shrink to Momo-size beforehand and double jump near the end of your flight.
Flower Valley Waterfall. Atop a tall tree stump. There’s a wishnet to the south that you can jump from. You should Shrink to Momo-size beforehand and double jump near the end of your flight.
38. Miraland Map
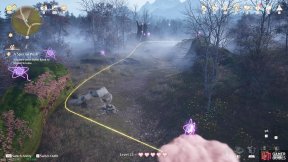
North-west from the ![]() Golden Fields Old Dock. On the lower level. Enter the curio at the end of the northern path. You need to align the 3 platforms so that you can reach the far-off
Golden Fields Old Dock. On the lower level. Enter the curio at the end of the northern path. You need to align the 3 platforms so that you can reach the far-off ![]() Whimstar. Tip: Don’t forget you can glide!
Whimstar. Tip: Don’t forget you can glide!
39. Miraland Map
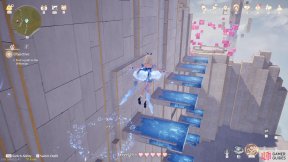
South from ![]() Bizarre Wish Hills. Touch the incomplete star, then collect the small stars while following the cloud. You should be prepared to Shrink at the end.
Bizarre Wish Hills. Touch the incomplete star, then collect the small stars while following the cloud. You should be prepared to Shrink at the end.
40. Miraland Map
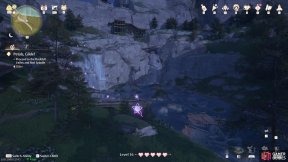
North of the ![]() Bug Catcher’s Cabin. Enter the Curio and float to the top. Avoid the red platforms, but keep in mind the color disappears when you begin. Tip: On the first and third row, jump 2 spaces at a time. On the second row, jump 1 space at a time.
Bug Catcher’s Cabin. Enter the Curio and float to the top. Avoid the red platforms, but keep in mind the color disappears when you begin. Tip: On the first and third row, jump 2 spaces at a time. On the second row, jump 1 space at a time.
41. Miraland Map
South-east of the ![]() Rockfall Valley Warp Spire. Touch the incomplete star at the south side of the river. Then go all around, collecting the small stars.
Rockfall Valley Warp Spire. Touch the incomplete star at the south side of the river. Then go all around, collecting the small stars.
42. Miraland Map
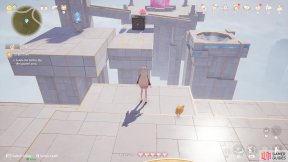
West of ![]() The Leisureely Anglers Florawish Branch. Curio near a fork in the path. Push the wooden crate between the two chutes so the ball reaches the goal.
The Leisureely Anglers Florawish Branch. Curio near a fork in the path. Push the wooden crate between the two chutes so the ball reaches the goal.
43. Miraland Map
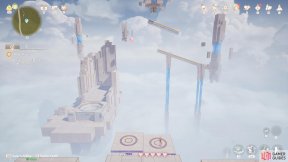
Curio south-west from ![]() Meadow Wharf. Use the two platforms to flip the ball into the goal.
Meadow Wharf. Use the two platforms to flip the ball into the goal.
44. Miraland Map
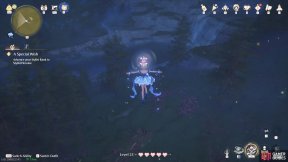
Short distance west from ![]() Ascetic Camp, floating high up. You can float from atop the central tall tree stump.
Ascetic Camp, floating high up. You can float from atop the central tall tree stump.
45. Miraland Map
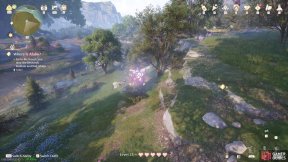
North and slightly west from ![]() Shoal Slope. Smash the wooden crate with a jumping attack, then chase after the star.
Shoal Slope. Smash the wooden crate with a jumping attack, then chase after the star.
46. Miraland Map
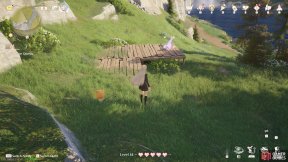
Near the lake west from the ![]() Abandoned Fanatic Wisher Camp. Cautiously approach and groom the Whimink.
Abandoned Fanatic Wisher Camp. Cautiously approach and groom the Whimink.
47. Miraland Map
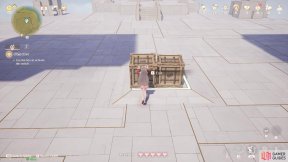
East from the ![]() Stone Seles Warp Spire, on the middle level. Curio on a slightly lower down ledge. Inside, place two crates on the pressure switch. Tip: Move the first crate onto the right platform, then climb up to the second crate. Push this crate to the ground. Later, return to the first crate and also push it to the ground.
Stone Seles Warp Spire, on the middle level. Curio on a slightly lower down ledge. Inside, place two crates on the pressure switch. Tip: Move the first crate onto the right platform, then climb up to the second crate. Push this crate to the ground. Later, return to the first crate and also push it to the ground.
48. Miraland Map
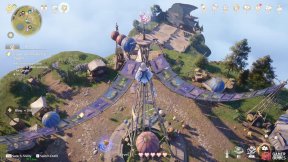
Short distance south from the ![]() Handsome Lads Circus Warp Spire. Atop the central flagpole. Jump on the balloons from the circus tent to get up.
Handsome Lads Circus Warp Spire. Atop the central flagpole. Jump on the balloons from the circus tent to get up.
49. Miraland Map
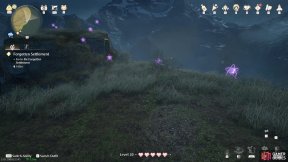
South-east of ![]() Stone Seles. On the top level, on higher ground. Touch the incomplete star, then collect the smaller stars. Pretty easy stuff.
Stone Seles. On the top level, on higher ground. Touch the incomplete star, then collect the smaller stars. Pretty easy stuff.
50. Miraland Map
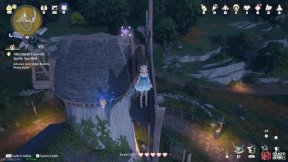
At the ![]() Bug Catcher’s Cabin. Catch the Whimflutter at the top of the Windmill. You can jump on the back of the windmill blades to get up. If the Whimflutter isn’t there, advance the time with Run, Pear-Pal.
Bug Catcher’s Cabin. Catch the Whimflutter at the top of the Windmill. You can jump on the back of the windmill blades to get up. If the Whimflutter isn’t there, advance the time with Run, Pear-Pal.
51. Miraland Map
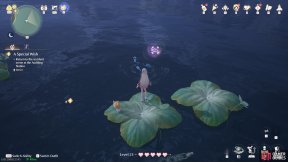
East from ![]() Secluded Cave. Jump across the lily pad path and reel in the glowing fish.
Secluded Cave. Jump across the lily pad path and reel in the glowing fish.
52. Miraland Map
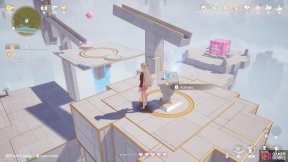
Curio east from ![]() Timis’s Beauty Lab. Shove the crate off the platform. Then Shrink and use the launch pad to reach the right-hand side chute. Continue towards the switch, then activate it.
Timis’s Beauty Lab. Shove the crate off the platform. Then Shrink and use the launch pad to reach the right-hand side chute. Continue towards the switch, then activate it.
53. Miraland Map
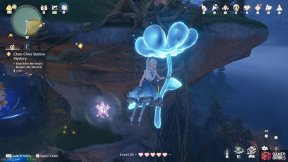
North-west of ![]() Choo-Choo Station Old Platform. At the north-west corner of the medium stonetree, underneath the canopy. Glide down to grab it.
Choo-Choo Station Old Platform. At the north-west corner of the medium stonetree, underneath the canopy. Glide down to grab it.
54. Miraland Map
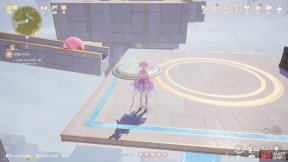
North-west from ![]() Relic Hill. Enter the curio and lead the ball to the goal. Tip: Push the crate onto the platform, then jump onto the platform after activating the trigger.
Relic Hill. Enter the curio and lead the ball to the goal. Tip: Push the crate onto the platform, then jump onto the platform after activating the trigger.
55. Miraland Map
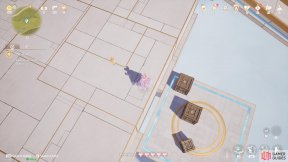
East from ![]() Abandoned Fanatic Wisher Camp. Enter the curio. For the first part, shove the wooden crate off the platform. For the second part, place three wooden crates on the platform, activate the switch below, then shove all of the crates off.
Abandoned Fanatic Wisher Camp. Enter the curio. For the first part, shove the wooden crate off the platform. For the second part, place three wooden crates on the platform, activate the switch below, then shove all of the crates off.
56. Miraland Map
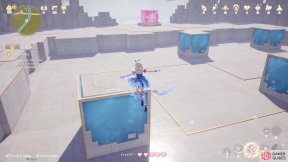
Inside the cave where the ![]() Well of Fortune is. Head west from the Warp Spire to find a way up. Enter the Curio on the other side, then land on top of all the cubes to unlock the
Well of Fortune is. Head west from the Warp Spire to find a way up. Enter the Curio on the other side, then land on top of all the cubes to unlock the ![]() Whimstar.
Whimstar.
57. Miraland Map
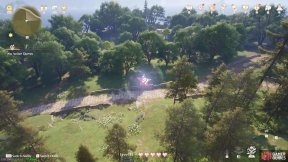
North-east from ![]() Lakeside Hill Lane. Whimflutter high in the air. There’s a leaf trampoline nearby.
Lakeside Hill Lane. Whimflutter high in the air. There’s a leaf trampoline nearby.
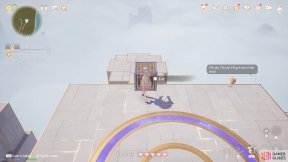
58. Miraland Map
Curio north and slightly east from ![]() Secluded Cave.
Secluded Cave.
- Stand on the right platform and pull the nearby crate onto it. Place it near the edge on your left (direction of the pressure pad).
- Jump onto the left platform and pull the crate over there onto the platform. Also place it near the edge in the direction of the pressure pad.
- Stand off the platform and pull the crate towards the pressure pad.
- Return to the previous crate and pull that towards the pressure pad as well.
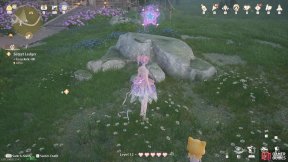
59. Miraland Map
In front of the ![]() Meadow Activity Support Center. Touch the incomplete star, then collect all the small stars all over the building.
Meadow Activity Support Center. Touch the incomplete star, then collect all the small stars all over the building.
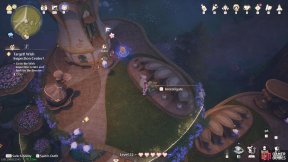
60. Miraland Map
Short distance north-east from the ![]() Wishcraft Lab Warp Spire. Touch the glowing ball atop the tallest building. Then look for a star-shaped wooden stand nearby.
Wishcraft Lab Warp Spire. Touch the glowing ball atop the tallest building. Then look for a star-shaped wooden stand nearby.
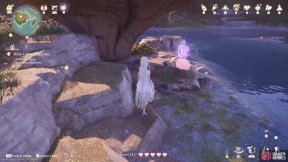
61. Miraland Map
South of the ![]() Village Fork. East side of the lake stonetree. Touch the incomplete star, then collect the small stars while following the moving cloud.
Village Fork. East side of the lake stonetree. Touch the incomplete star, then collect the small stars while following the moving cloud.
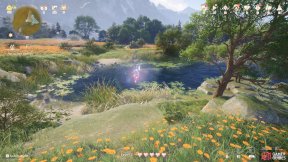
62. Miraland Map
East from the ![]() Bug Catcher’s Cabin. Break the wooden crate with a jumping attack, then chase the
Bug Catcher’s Cabin. Break the wooden crate with a jumping attack, then chase the ![]() Whimstar around the pond. C’mere, you!
Whimstar around the pond. C’mere, you!
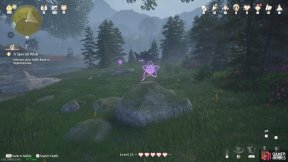
63. Miraland Map
North from ![]() Ascetic Camp, near the
Ascetic Camp, near the ![]() Grand Millewish Tree. Touch the incomplete star, then collect the small stars.
Grand Millewish Tree. Touch the incomplete star, then collect the small stars.
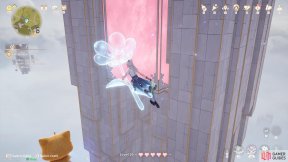
64. Miraland Map
Short distance north-west of ![]() Ghost Train Entrance, partway up. Enter the curio and glide to the exit, while considering the moving platforms.
Ghost Train Entrance, partway up. Enter the curio and glide to the exit, while considering the moving platforms.
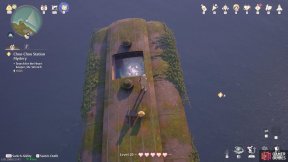
65. Miraland Map
North-east from ![]() Choo-Choo Station Stonetree Top. At the end of a train carriage at the far north-east corner.
Choo-Choo Station Stonetree Top. At the end of a train carriage at the far north-east corner.
66. Miraland Map
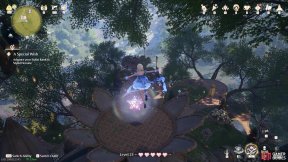
Atop the ![]() Temple of Wishes (Building). From the entrance, head north-east and climb the rope to reach a confetti cannon. Use the cannon to reach a higher platform with another cannon. From that platform, you can jump over to the star.
Temple of Wishes (Building). From the entrance, head north-east and climb the rope to reach a confetti cannon. Use the cannon to reach a higher platform with another cannon. From that platform, you can jump over to the star.
67. Miraland Map
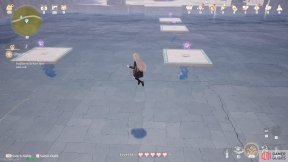
Curio west from ![]() Lakeside Hill Lane. Inside, touch the incomplete star, then collect the small stars on the sinking platforms. Tip: After landing on the 2nd platform, jump diagonally left (or right). Then head all the way right (or left) and jump diagonally again.
Lakeside Hill Lane. Inside, touch the incomplete star, then collect the small stars on the sinking platforms. Tip: After landing on the 2nd platform, jump diagonally left (or right). Then head all the way right (or left) and jump diagonally again.
68. Miraland Map
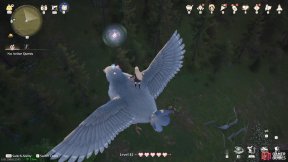
East from the ![]() Wish Pass Office. Groom the
Wish Pass Office. Groom the ![]() Sky Monarch to the south-east and ride it up here.
Sky Monarch to the south-east and ride it up here.
69. Miraland Map
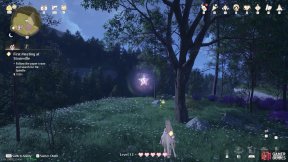
Short distance north-east from the ![]() Flamecrest Stonetree Warp Spire. Use a purifying attack to blow away the leaf pile.
Flamecrest Stonetree Warp Spire. Use a purifying attack to blow away the leaf pile.
70. Miraland Map
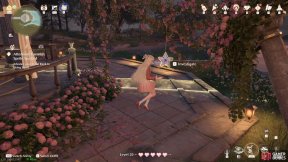
At the ![]() Swan Gazebo. Touch the glowing ball, then investigate the hanging star-shaped ornament.
Swan Gazebo. Touch the glowing ball, then investigate the hanging star-shaped ornament.
71. Miraland Map
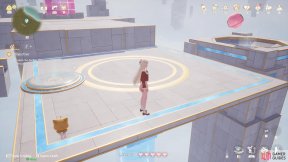
South of ![]() The Leisureely Anglers Florawish Branch. Curio east from the roadside. Inside, guide the ball to the goal. Tip: Activate the switch, then jump onto the platform ahead before the ball reaches it, and stay there.
The Leisureely Anglers Florawish Branch. Curio east from the roadside. Inside, guide the ball to the goal. Tip: Activate the switch, then jump onto the platform ahead before the ball reaches it, and stay there.
72. Miraland Map
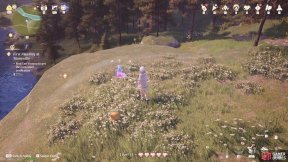
West from the ![]() Village Fork. Look for a Whimink by a ledge on the south side of the river. Slowly approach and groom it.
Village Fork. Look for a Whimink by a ledge on the south side of the river. Slowly approach and groom it.
73. Miraland Map
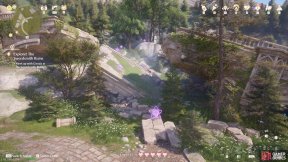
North-east from ![]() Swordsmith Ruins Gate. Touch the incomplete star, then collect the small stars.
Swordsmith Ruins Gate. Touch the incomplete star, then collect the small stars.
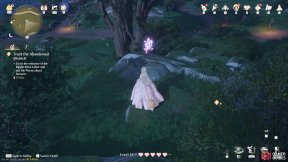
74. Miraland Map
South-west of ![]() Florawish Lane. Touch the incomplete star, then collect all of the smaller stars.
Florawish Lane. Touch the incomplete star, then collect all of the smaller stars.
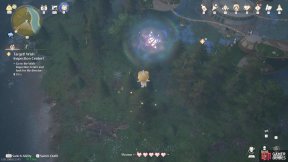
75. Miraland Map
North-east from the ![]() Wish Auditing Station. High up in the air. Look for some nearby wishnets to jump from. You’ll need to Shrink before jumping and also double jump at the end.
Wish Auditing Station. High up in the air. Look for some nearby wishnets to jump from. You’ll need to Shrink before jumping and also double jump at the end.
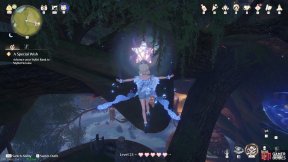
76. Miraland Map
West from the ![]() Temple of Wishes. Underneath the restaurant. If you go the serving counter, you can drop down to the left. Jump on the wishnet, then fall down until you’re near the star, then begin floating.
Temple of Wishes. Underneath the restaurant. If you go the serving counter, you can drop down to the left. Jump on the wishnet, then fall down until you’re near the star, then begin floating.
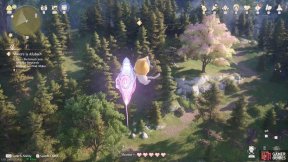
77. Miraland Map
Short distance south-west from ![]() Shoal Slope. Extremely high up. Use the a jumping attack on the catapult to launch yourself, while Shrinking.
Shoal Slope. Extremely high up. Use the a jumping attack on the catapult to launch yourself, while Shrinking.
78. Miraland Map
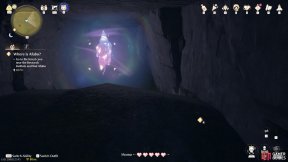
North-east from ![]() Farm Entrance. Inside a Momo-sized tunnel. Enter from the east side, through a hollow tree trunk.
Farm Entrance. Inside a Momo-sized tunnel. Enter from the east side, through a hollow tree trunk.
79. Miraland Map
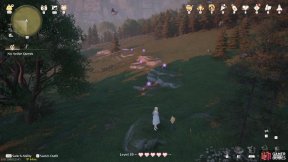
North-west from the ![]() Meadow Activity Support Center. Touch the incomplete star, then collect the smaller stars.
Meadow Activity Support Center. Touch the incomplete star, then collect the smaller stars.
80. Miraland Map
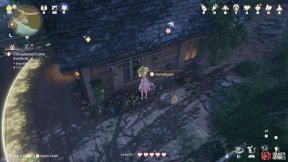
South from the ![]() Kingdom Guards’ Office. Touch the glowing ball on the roof, then investigate the nearby star-shaped ornament.
Kingdom Guards’ Office. Touch the glowing ball on the roof, then investigate the nearby star-shaped ornament.
81. Miraland Map
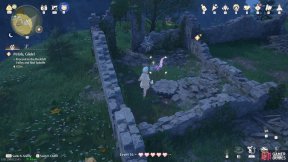
East of ![]() Golden Fields Stonetree Top. Groom the Whimink at the small ruins.
Golden Fields Stonetree Top. Groom the Whimink at the small ruins.
82. Miraland Map
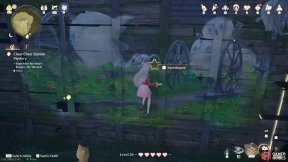
East of ![]() Choo-Choo Station Stonetree Top. Touch the glowing ball on top of the train carriage, then search for a star shape near the center of the painting on the east side of the carriage.
Choo-Choo Station Stonetree Top. Touch the glowing ball on top of the train carriage, then search for a star shape near the center of the painting on the east side of the carriage.
83. Miraland Map
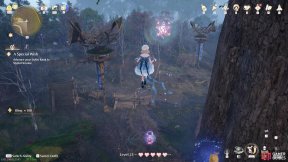
East and slightly north from the ![]() Desperation Orb Warehouse Warp Spire. High up near the east side of the building. There’s a tree that you can climb up from.
Desperation Orb Warehouse Warp Spire. High up near the east side of the building. There’s a tree that you can climb up from.
84. Miraland Map
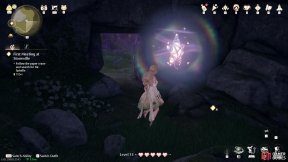
North-east from the ![]() Village Fork. Near the base of the big stonetree, around the east side. Inside a small cave guarded by an Esseling. Look for a gap that you can enter from above, where the
Village Fork. Near the base of the big stonetree, around the east side. Inside a small cave guarded by an Esseling. Look for a gap that you can enter from above, where the ![]() Bling is.
Bling is.
85. Miraland Map
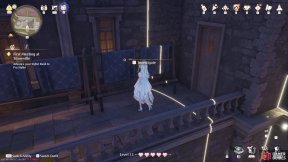
North side of the ![]() Dye Workshop. Touch the glowing ball, then look for a star among the hanging fabrics.
Dye Workshop. Touch the glowing ball, then look for a star among the hanging fabrics.
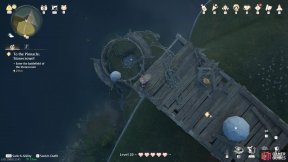
86. Miraland Map
North of ![]() Stonecrown Peak, near ground level. Buried under some rocks. Head south and push a boulder down to destroy the rocks.
Stonecrown Peak, near ground level. Buried under some rocks. Head south and push a boulder down to destroy the rocks.
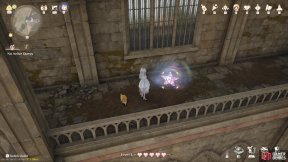
87. Miraland Map
South-west from the ![]() Queen’s Palace Ruins High Tower, high up. Float down from the broken windows at the top of the tower.
Queen’s Palace Ruins High Tower, high up. Float down from the broken windows at the top of the tower.
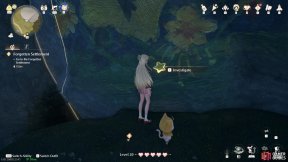
89. Miraland Map
North-east of ![]() Prosperville Entrance, on the middle level. Touch the glowing ball, then search for the star shape near the bottom of the wall painting.
Prosperville Entrance, on the middle level. Touch the glowing ball, then search for the star shape near the bottom of the wall painting.
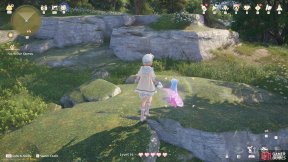
90. Miraland Map
West of the ![]() Bug Catcher’s Cabin. Slowly approach the Whimink and groom it with the animal-grooming outfit.
Bug Catcher’s Cabin. Slowly approach the Whimink and groom it with the animal-grooming outfit.
91. Miraland Map
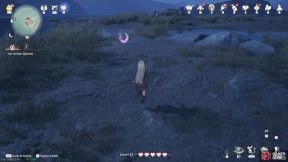
Small island south from ![]() Forest’s Edge Cavern. Carefully approach the Whimink and groom it.
Forest’s Edge Cavern. Carefully approach the Whimink and groom it.
92. Miraland Map
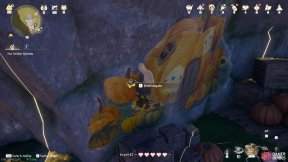
South-west from ![]() Windrider Mill Mid-Level, on the middle level. Touch the glowing ball, the look for a star-shaped drawing on the wall painting.
Windrider Mill Mid-Level, on the middle level. Touch the glowing ball, the look for a star-shaped drawing on the wall painting.
93. Miraland Map
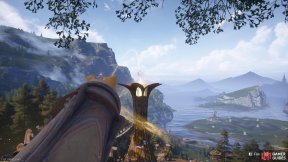
At the ![]() Wish Celebration Center. At the very top of the central building. To the north, there’s a confetti cannon you can use as Momo to reach the star. To get to the cannon, Shrink before jumping on the leaf trampoline.
Wish Celebration Center. At the very top of the central building. To the north, there’s a confetti cannon you can use as Momo to reach the star. To get to the cannon, Shrink before jumping on the leaf trampoline.
94. Miraland Map
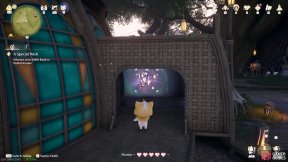
Atop the ![]() Grand Millewish Tree. South from
Grand Millewish Tree. South from ![]() Grand Tree Residential Area. At the next big platform south-west from the
Grand Tree Residential Area. At the next big platform south-west from the ![]() Wishball field. In a narrow space at the side of a building. Break the wooden crate to enter.
Wishball field. In a narrow space at the side of a building. Break the wooden crate to enter.
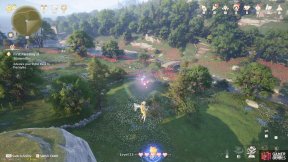
95. Miraland Map
North-east from ![]() Stoneville Entrance. Use the bug catching outfit to grab the Whimflutter by the ledge.
Stoneville Entrance. Use the bug catching outfit to grab the Whimflutter by the ledge.
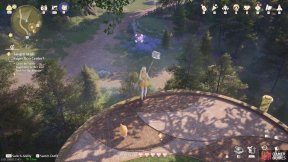
96. Miraland Map
North from ![]() In Front of the Wish Inspection Center. Use the bug-catching outfit to catch the Whimflutter.
In Front of the Wish Inspection Center. Use the bug-catching outfit to catch the Whimflutter.
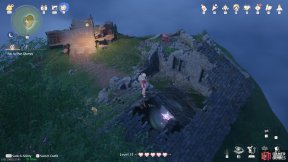
97. Miraland Map
Small stonetree west from the ![]() Golden Fields stonetree. You can glide over there. In the center of the ruined house at the top. Several Esselings are nearby.
Golden Fields stonetree. You can glide over there. In the center of the ruined house at the top. Several Esselings are nearby.
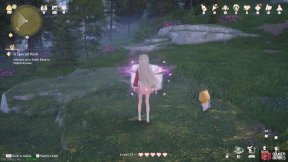
98. Miraland Map
Short distance north-east from ![]() Ascetic Camp. Open the glowing treasure chest and greet (defeat) the Esselings that spawn.
Ascetic Camp. Open the glowing treasure chest and greet (defeat) the Esselings that spawn.
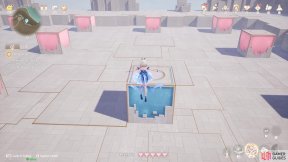
99. Miraland Map
East from the ![]() Queen’s Palace Ruins Entrance. Enter the curio and land on all the big cubes. Tip: Start from the bottom-left corner and begin by going right.
Queen’s Palace Ruins Entrance. Enter the curio and land on all the big cubes. Tip: Start from the bottom-left corner and begin by going right.
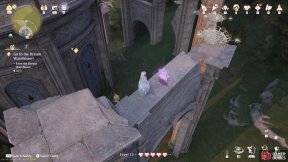
100. Miraland Map
North of the ![]() Dream Warehouse Rooftop. Touch the incomplete star, then collect the smaller stars.
Dream Warehouse Rooftop. Touch the incomplete star, then collect the smaller stars.
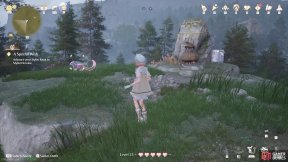
101. Miraland Map
North from ![]() Ascetic Camp. Carefully approach the Whimink and groom it.
Ascetic Camp. Carefully approach the Whimink and groom it.
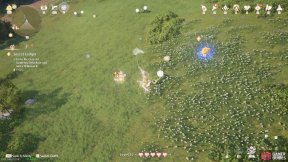
102. Miraland Map
North-east from ![]() Cicia Art Academy Field Base. Catch the Whimflutter.
Cicia Art Academy Field Base. Catch the Whimflutter.
103. Miraland Map
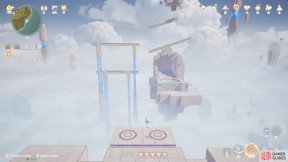
East from ![]() Waterspouts Observatory, on ground level. Curio near the shore. Inside, jump on the two platforms to manipulate the slides and guide the ball to the goal. Tip: We only used the right platform and ignored the left one. Regardless of the method, it can take several attempts to succeed; just don’t give up!
Waterspouts Observatory, on ground level. Curio near the shore. Inside, jump on the two platforms to manipulate the slides and guide the ball to the goal. Tip: We only used the right platform and ignored the left one. Regardless of the method, it can take several attempts to succeed; just don’t give up!
104. Miraland Map
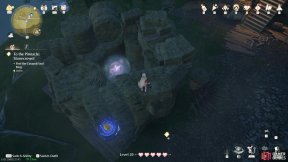
Short distance south-west of ![]() Volunteer Corps Watchtower (west). On level 2F. In the center of the haystack ring.
Volunteer Corps Watchtower (west). On level 2F. In the center of the haystack ring.
105. Miraland Map
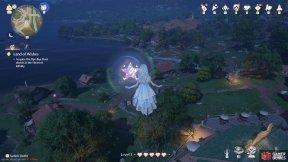
Floating high above the entrance to ![]() Bibcoon’s Chuckle Club. Use the balloon on the rooftop to bounce up.
Bibcoon’s Chuckle Club. Use the balloon on the rooftop to bounce up.
106. Miraland Map
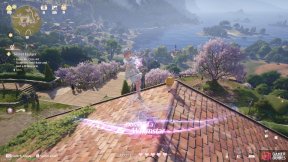
Roof of the ![]() Cicia Art Academy Field Base. Carefully approach the Whimink and groom it.
Cicia Art Academy Field Base. Carefully approach the Whimink and groom it.
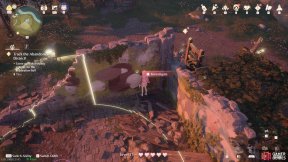
107. Miraland Map
Atop the stonetree north of ![]() Beside the Ripple Wine Cellar. Touch the glowing ball, then search for the small star symbol near the south-west corner.
Beside the Ripple Wine Cellar. Touch the glowing ball, then search for the small star symbol near the south-west corner.
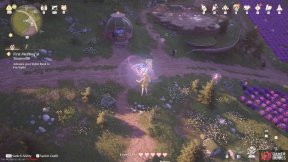
108. Miraland Map
Near the ![]() Lavenfringe Fields Warp Spire. Use the bug catching outfit to grab the Whimflutter flying above the nearby greenhouse dome.
Lavenfringe Fields Warp Spire. Use the bug catching outfit to grab the Whimflutter flying above the nearby greenhouse dome.
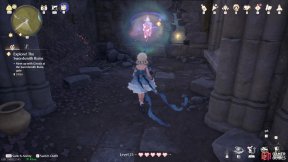
109. Miraland Map
Small ruins south and slightly east from ![]() Swordsmith Ruins Entrance. Past an Iron Squirrel statue. This is just the warm up.
Swordsmith Ruins Entrance. Past an Iron Squirrel statue. This is just the warm up.
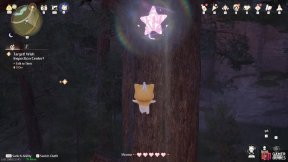
110. Miraland Map
East from ![]() Elderwood Riverbank. High up, with a leaf trampoline nearby. Nikki can’t reach normally; Shrink before jumping.
Elderwood Riverbank. High up, with a leaf trampoline nearby. Nikki can’t reach normally; Shrink before jumping.
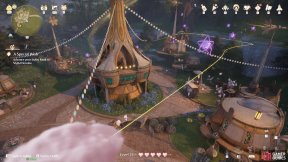
111. Miraland Map
South-east corner of the ![]() Wish Celebration Center. Touch the incomplete star, then collect the small stars while riding/following the cloud.
Wish Celebration Center. Touch the incomplete star, then collect the small stars while riding/following the cloud.
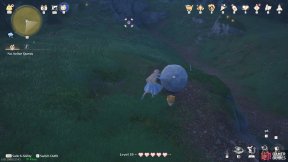
112. Miraland Map
West from the ![]() Meadow Activity Support Center. Push a nearby boulder to destroy the rubble that’s obstructing the star.
Meadow Activity Support Center. Push a nearby boulder to destroy the rubble that’s obstructing the star.
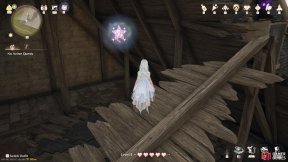
113. Miraland Map
South end of the ![]() Queen’s Palace Ruins, under a collapsed roof. From the central plaza, head south then at the end, go through the east doorway. From there, go around and climb up.
Queen’s Palace Ruins, under a collapsed roof. From the central plaza, head south then at the end, go through the east doorway. From there, go around and climb up.
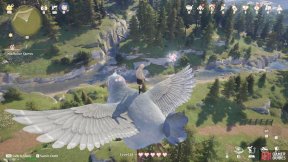
114. Miraland Map
North-east from ![]() Abandoned Fanatic Wisher Camp Outpost. Extremely high up. Look for a
Abandoned Fanatic Wisher Camp Outpost. Extremely high up. Look for a ![]() Sky Monarch to the north-east, groom it and ride it here.
Sky Monarch to the north-east, groom it and ride it here.
115. Miraland Map
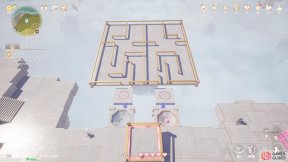
North-west from ![]() Volunteer Corps Jail, on level 1F. Curio atop a somewhat tall stonetree. Inside, stand on the pivoting platform to manipulate the maze platform and get both balls into their respective holes. Tip: You can focus on one ball at a time. Also, the balls can roll into the abyss, so make sure you get the direction spot on at the very end!
Volunteer Corps Jail, on level 1F. Curio atop a somewhat tall stonetree. Inside, stand on the pivoting platform to manipulate the maze platform and get both balls into their respective holes. Tip: You can focus on one ball at a time. Also, the balls can roll into the abyss, so make sure you get the direction spot on at the very end!
116. Miraland Map
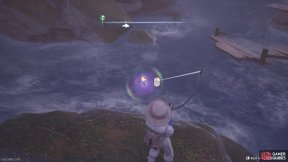
West from the ![]() Dye Workshop Stonetree. At the section of the river where there’s a cascade. Use the fishing outfit to reel in the glowing fish.
Dye Workshop Stonetree. At the section of the river where there’s a cascade. Use the fishing outfit to reel in the glowing fish.
117. Miraland Map
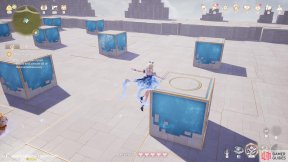
East from ![]() Stoneville Entrance. Enter the curio and land on top of all the blue cubes.
Stoneville Entrance. Enter the curio and land on top of all the blue cubes.
118. Miraland Map
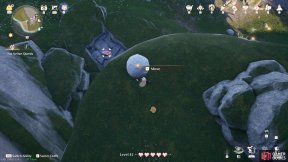
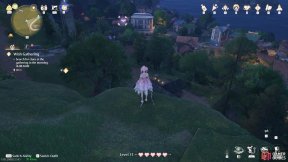
Short distance south-west from ![]() Windrider Mill Top, on ground level. Shove a boulder from higher up to get to the
Windrider Mill Top, on ground level. Shove a boulder from higher up to get to the ![]() Whimstar.
Whimstar.
119. Miraland Map
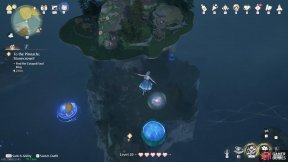
South from the ![]() Dream Warehouse Tower. Use the bug-catching outfit to snag the Whimflutter by the cliff edge. You’ll probably need to jump.
Dream Warehouse Tower. Use the bug-catching outfit to snag the Whimflutter by the cliff edge. You’ll probably need to jump.
120. Miraland Map
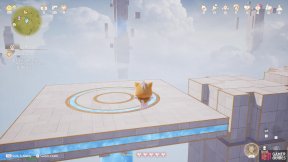
South-west of ![]() Volunteer Corps Watchtower (west). Floating high in the sky along the way to the next medium stonetree. Above a bouncy plant. You can glide from the north-east.
Volunteer Corps Watchtower (west). Floating high in the sky along the way to the next medium stonetree. Above a bouncy plant. You can glide from the north-east.
121. Miraland Map
Atop the ![]() Grand Millewish Tree. East and slightly south from
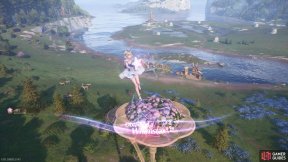
Grand Millewish Tree. East and slightly south from ![]() Grand Tree Residential Area. Curio just under the main platform. There’s a rope dangling down nearby. Inside, shove two crates onto the left platform and one crate onto the right platform. Then Shrink and use the launch pads to reach the star.
Grand Tree Residential Area. Curio just under the main platform. There’s a rope dangling down nearby. Inside, shove two crates onto the left platform and one crate onto the right platform. Then Shrink and use the launch pads to reach the star.
122. Miraland Map
North from ![]() Aurosa Valley. Atop a high up flower platform. You can climb up the ropes as Momo to get up.
Aurosa Valley. Atop a high up flower platform. You can climb up the ropes as Momo to get up.
123. Miraland Map
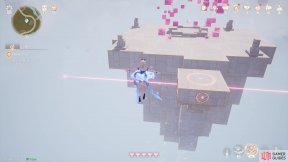
East from ![]() Florawish Lane. Enter the Curio and use the floating outfit to reach the end.
Florawish Lane. Enter the Curio and use the floating outfit to reach the end.
124. Miraland Map
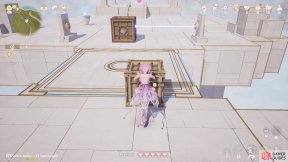
North-west of the ![]() Cicchetto Manor Warp Spire. Enter the curio and use the boxes to reach the top. Tip: Use the big box to block the laser, then drag the smaller box across and use that to block the laser. Next, drag the big box across to the end.
Cicchetto Manor Warp Spire. Enter the curio and use the boxes to reach the top. Tip: Use the big box to block the laser, then drag the smaller box across and use that to block the laser. Next, drag the big box across to the end.
125. Miraland Map
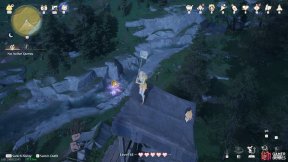
West from ![]() Abandoned Fanatic Wisher Camp Outpost, across the river. Catch the Whimflutter atop the watchtower.
Abandoned Fanatic Wisher Camp Outpost, across the river. Catch the Whimflutter atop the watchtower.
126. Miraland Map
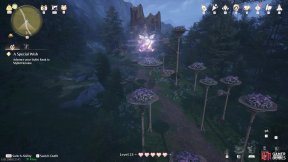
South-east from ![]() Wish Celebration Center. Smash the glowing crate with a jumping attack, then chase after the star.
Wish Celebration Center. Smash the glowing crate with a jumping attack, then chase after the star.
127. Miraland Map
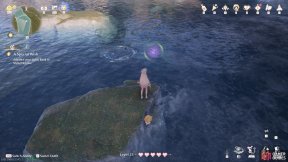
South from ![]() Flower Valley Waterfall. Reel in the glowing fish near the bottom of a cascade.
Flower Valley Waterfall. Reel in the glowing fish near the bottom of a cascade.
128. Miraland Map
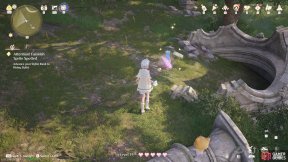
North of ![]() Cicia Art Academy Field Base. Whimink loitering around some rubble. Slowly approach and give it some TLC with the animal-grooming outfit.
Cicia Art Academy Field Base. Whimink loitering around some rubble. Slowly approach and give it some TLC with the animal-grooming outfit.
129. Miraland Map
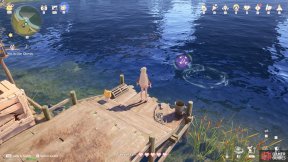
North-west from ![]() Stellar Fishing Ground Trail. Use the fishing outfit to hook the glowing fish.
Stellar Fishing Ground Trail. Use the fishing outfit to hook the glowing fish.
130. Miraland Map
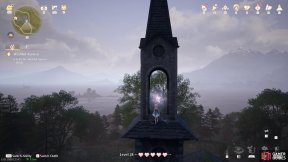
Next to the ![]() Sanctum of the Observant. Ride the cloud as it travels around the top of the building, collecting the mini stars along the way.
Sanctum of the Observant. Ride the cloud as it travels around the top of the building, collecting the mini stars along the way.
131. Miraland Map
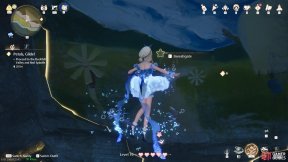
East of the ![]() Golden Fields Old Dock. On the lower level. Touch the glowing orb, then look for the star-shaped drawing. You’ll need to jump to reach it.
Golden Fields Old Dock. On the lower level. Touch the glowing orb, then look for the star-shaped drawing. You’ll need to jump to reach it.
132. Miraland Map
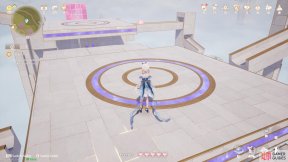
North-east from the ![]() Village Fork. Near the base of the big stonetree, around the north-east side. Enter the curio and guide the ball to the goal. Tip: Jump on the nearby platform after the ball lands on the farther platform. Stay on it until the ball comes to your platform, then jump off.
Village Fork. Near the base of the big stonetree, around the north-east side. Enter the curio and guide the ball to the goal. Tip: Jump on the nearby platform after the ball lands on the farther platform. Stay on it until the ball comes to your platform, then jump off.
133. Miraland Map
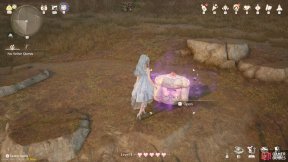
South-west from the ![]() Queen’s Palace Ruins Entrance. Open the glowing chest and defeat the Esselings.
Queen’s Palace Ruins Entrance. Open the glowing chest and defeat the Esselings.
134. Miraland Map
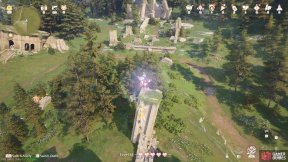
South-east from ![]() Relic Hill. Catch the Whimflutter flying around the top of the pillars. You can jump up using a nearby catapult.
Relic Hill. Catch the Whimflutter flying around the top of the pillars. You can jump up using a nearby catapult.
136. Miraland Map
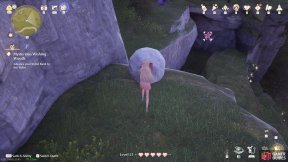
North-east of ![]() Rockfall Valley. Behind a cracked wall. Push a nearby boulder to destroy the wall.
Rockfall Valley. Behind a cracked wall. Push a nearby boulder to destroy the wall.
137. Miraland Map
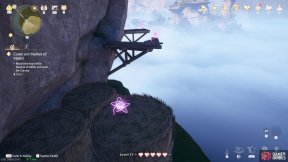
South-west from ![]() Market of Mirth Summit Path. On the middle level, underneath the stonetree canopy. Touch the incomplete star, then grab the small stars. You’ll need to jump across multiple narrow planks. Don’t look down!
Market of Mirth Summit Path. On the middle level, underneath the stonetree canopy. Touch the incomplete star, then grab the small stars. You’ll need to jump across multiple narrow planks. Don’t look down!
138. Miraland Map
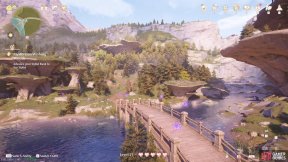
South-east from the ![]() Dye Workshop Stonetree. Near the east end of the bridge. Touch the incomplete star, then collect all of the small stars.
Dye Workshop Stonetree. Near the east end of the bridge. Touch the incomplete star, then collect all of the small stars.
139. Miraland Map
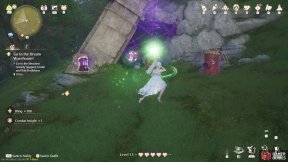
West of the ![]() Dream Warehouse Tower. Defeat the Esselings to unseal the
Dream Warehouse Tower. Defeat the Esselings to unseal the ![]() Whimstar.
Whimstar.
140. Miraland Map
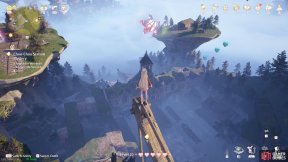
Short distance east of ![]() Choo-Choo Station Shipping Center. High up in the sky, near the top of a crane. Use the air-blowing plants to get up.
Choo-Choo Station Shipping Center. High up in the sky, near the top of a crane. Use the air-blowing plants to get up.
142. Miraland Map
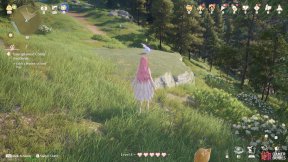
West from the ![]() Stylist’s Guild. Whimink resting on a ledge. Cautiously approach and groom it.
Stylist’s Guild. Whimink resting on a ledge. Cautiously approach and groom it.
143. Miraland Map
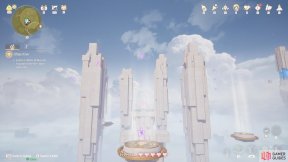
North-west of ![]() Market of Mirth Summit Path. Curio on a high up ledge underneath the stonetree canopy. You can get up from the south. Inside, touch the incomplete star and use the air currents and your gliding skills to collect all of the small stars.
Market of Mirth Summit Path. Curio on a high up ledge underneath the stonetree canopy. You can get up from the south. Inside, touch the incomplete star and use the air currents and your gliding skills to collect all of the small stars.
145. Miraland Map
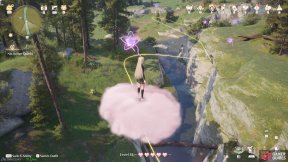
South-east from ![]() Relic Hill, across the river. Touch the incomplete star, then collect the small stars as you ride/follow the cloud.
Relic Hill, across the river. Touch the incomplete star, then collect the small stars as you ride/follow the cloud.
146. Miraland Map
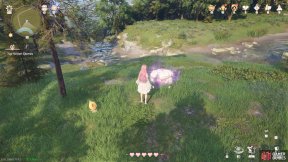
West from the ![]() Stylist’s Guild. Open the glowing chest and defeat the Esselings that spawn.
Stylist’s Guild. Open the glowing chest and defeat the Esselings that spawn.
147. Miraland Map
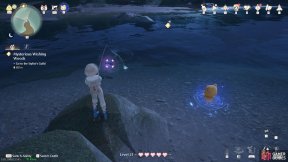
South from the ![]() Swan Gazebo, on a small island at the river mouth. Reel in the glowing fish.
Swan Gazebo, on a small island at the river mouth. Reel in the glowing fish.
148. Miraland Map
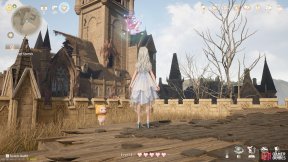
North-west corner of the ![]() Queen’s Palace Ruins, somewhat high up. You can reach it by entering through the nearby door to the east. Beware of Esselings!
Queen’s Palace Ruins, somewhat high up. You can reach it by entering through the nearby door to the east. Beware of Esselings!
149. Miraland Map
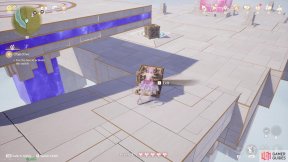
Short distance south-west of the ![]() Gliding Training Stonetree Warp Spire. Enter the curio and place both crates on the switch. Tip: Push the first crate onto the nearby platform, then jump over to the second platform and push the second crate onto the ground. Afterwards, you can return to the first crate and also push it onto the ground.
Gliding Training Stonetree Warp Spire. Enter the curio and place both crates on the switch. Tip: Push the first crate onto the nearby platform, then jump over to the second platform and push the second crate onto the ground. Afterwards, you can return to the first crate and also push it onto the ground.
150. Miraland Map
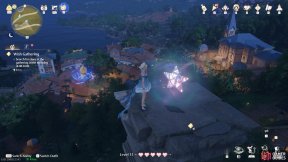
Atop a large stone pillar north of ![]() Marques Boutique. Use the nearby wishnet to propel yourself.
Marques Boutique. Use the nearby wishnet to propel yourself.
151. Miraland Map
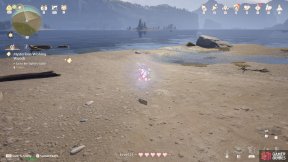
North-east from ![]() Lakeside Hill Lane, on the shore. Smash the wooden crate with a jumping attack, then chase after the star.
Lakeside Hill Lane, on the shore. Smash the wooden crate with a jumping attack, then chase after the star.
152. Miraland Map
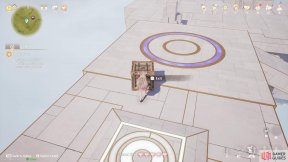
Curio south from ![]() Garrison of the Paladins. Just keep going south from that Warp Spire. Then drop down to a lower platform.
Garrison of the Paladins. Just keep going south from that Warp Spire. Then drop down to a lower platform.
- Push the crate from the first platform onto the second platform.
- Jump over to the first platform, Shrink and enter the gap, where there’s a launch pad.
- At the top, shove the second crate down to the first platform.
- Return to the second platform and begin moving the first crate towards the nearby pressure pad.
- Once the crate is near the edge, move yourself off the platform and pull the crate to the pressure pad.
153. Miraland Map
South-east from the ![]() Queen’s Palace Ruins Entrance. Use a jumping attack to break the wooden crate then chase after the fleeing star. Can take a while to catch up.
Queen’s Palace Ruins Entrance. Use a jumping attack to break the wooden crate then chase after the fleeing star. Can take a while to catch up.
154. Miraland Map
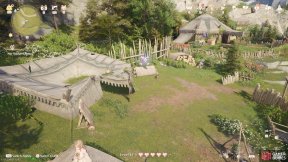
Short distance south-west from the ![]() Abandoned Fanatic Wisher Camp Warp Spire. Use a jumping attack to smash the glowing crate, then pursue the star.
Abandoned Fanatic Wisher Camp Warp Spire. Use a jumping attack to smash the glowing crate, then pursue the star.
155. Miraland Map
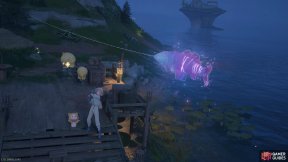
Medium stonetree west of ![]() Market of Mirth Summit Path. Reel in the glowing fish near the northern pier.
Market of Mirth Summit Path. Reel in the glowing fish near the northern pier.
156. Miraland Map
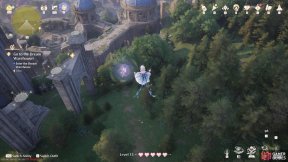
North-west from the ![]() Dream Warehouse Rooftop. High up in the air. Look for a series of wishnets to the north.
Dream Warehouse Rooftop. High up in the air. Look for a series of wishnets to the north.
157. Miraland Map
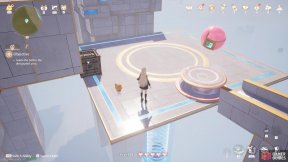
Curio north from ![]() Queen’s Palace Ruins Entrance.
Queen’s Palace Ruins Entrance.
- Push the crate towards the platform on the right.
- Activate the switch, then stand on the left platform until the ball reaches the launch pad.
- Quickly stand on the right platform until the ball reaches the launch pad there.
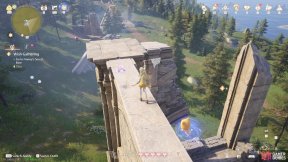
158. Miraland Map
Small ruins east from the ![]() Dream Warehouse Tower. Use the bug-catching outfit to grab the Whimflutter.
Dream Warehouse Tower. Use the bug-catching outfit to grab the Whimflutter.
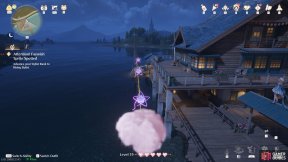
159. Miraland Map
At the wharf south of the ![]() Mayor’s Residence. Touch the incomplete star, then collect the smaller stars while riding/following the cloud.
Mayor’s Residence. Touch the incomplete star, then collect the smaller stars while riding/following the cloud.
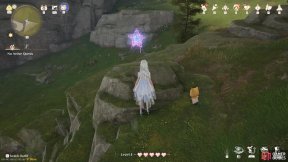
160. Miraland Map
South-east of the ![]() Queen’s Palace Ruins Front Yard. Touch the incomplete star, then collect the smaller stars. Near the end, you need to defeat an Esseling guarding a leaf trampoline.
Queen’s Palace Ruins Front Yard. Touch the incomplete star, then collect the smaller stars. Near the end, you need to defeat an Esseling guarding a leaf trampoline.
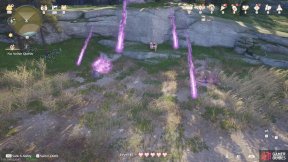
161. Miraland Map
East and slightly south from the ![]() Wish Pass Office. Open the glowing treasure chest and defeat the Esselings that spawn.
Wish Pass Office. Open the glowing treasure chest and defeat the Esselings that spawn.
162. Miraland Map
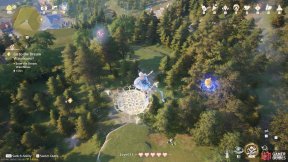
North-west from the ![]() Dream Warehouse Tower Warp Spire. High up in the sky. Look for a series of wishnets to the north.
Dream Warehouse Tower Warp Spire. High up in the sky. Look for a series of wishnets to the north.
163. Miraland Map
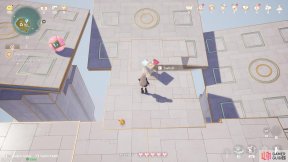
Curio north-east from ![]() Small Stonetree Cavern, under the stonetree canopy. Adjust the position of the three platforms by standing on them, then use the middle switch to fix them in place. Then activate the left switch to release the ball. Keep trying until something works. You can refer to our screenshot for guidance.
Small Stonetree Cavern, under the stonetree canopy. Adjust the position of the three platforms by standing on them, then use the middle switch to fix them in place. Then activate the left switch to release the ball. Keep trying until something works. You can refer to our screenshot for guidance.
164. Miraland Map
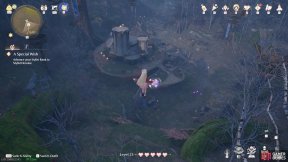
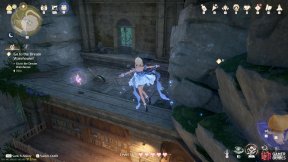
Short distance north-west from the ![]() Desperation Orb Warehouse Cavern. Catch the Whimflutter that’s high in the air. There’s a leaf trampoline nearby.
Desperation Orb Warehouse Cavern. Catch the Whimflutter that’s high in the air. There’s a leaf trampoline nearby.
165. Miraland Map
Underneath the ![]() Florawish gathering spot. Look for a cracked wooden board east of the central statue that you can break with a jumping attack.
Florawish gathering spot. Look for a cracked wooden board east of the central statue that you can break with a jumping attack.
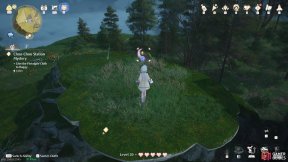
166. Miraland Map
West of ![]() Choo-Choo Station Stonetree Top. Groom the Whimink on a small stonetree next to the shelter roof.
Choo-Choo Station Stonetree Top. Groom the Whimink on a small stonetree next to the shelter roof.
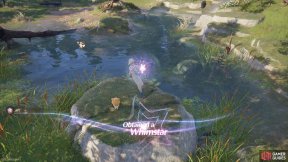
167. Miraland Map
South-west of ![]() Meadow Wharf, at
Meadow Wharf, at ![]() Shimmer Pond. Reel in the glowing fish.
Shimmer Pond. Reel in the glowing fish.
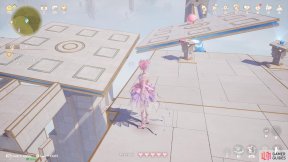
168. Miraland Map
Short distance north-east of the ![]() Dye Workshop Stonetree Warp Spire. Enter the curio and use the two movable platforms to guide the ball. It’s a little fiddly, but you can refer to our screenshot for a solution.
Dye Workshop Stonetree Warp Spire. Enter the curio and use the two movable platforms to guide the ball. It’s a little fiddly, but you can refer to our screenshot for a solution.
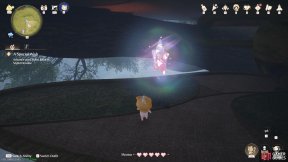
169. Miraland Map
Atop the ![]() Grand Millewish Tree. North from
Grand Millewish Tree. North from ![]() Grand Tree Residential Area. Underneath the big platform. You can access it from the north side, where there’s a Momo-friendly rope dangling down.
Grand Tree Residential Area. Underneath the big platform. You can access it from the north side, where there’s a Momo-friendly rope dangling down.
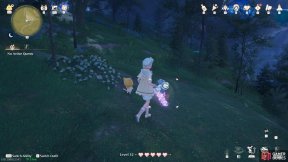
170. Miraland Map
North-west from ![]() Stellar Fishing Ground Trail. South-west of the central medium stonetree. Approach the Whimink slowly, then give it a nice groom.
Stellar Fishing Ground Trail. South-west of the central medium stonetree. Approach the Whimink slowly, then give it a nice groom.
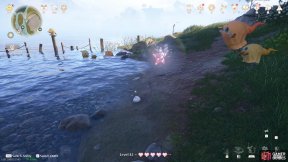
171. Miraland Map
North-east from ![]() Windrider Mill Mid-Level, on ground level. Use a jumping attack to break the glowing crate, then chase after the star. Having the floral gliding outfit ready helps.
Windrider Mill Mid-Level, on ground level. Use a jumping attack to break the glowing crate, then chase after the star. Having the floral gliding outfit ready helps.
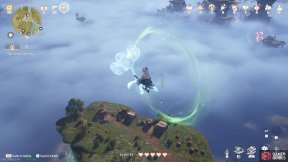
172. Miraland Map
North-east from ![]() Windrider Mill Top, extremely high up. Climb up the windmill north from Windrider Mill Top. Defeat the Esseling holding the spore, then glide up the newly born air-blowing plant. Next, glide into the wind circle when it’s at its highest position to reach the star.
Windrider Mill Top, extremely high up. Climb up the windmill north from Windrider Mill Top. Defeat the Esseling holding the spore, then glide up the newly born air-blowing plant. Next, glide into the wind circle when it’s at its highest position to reach the star.
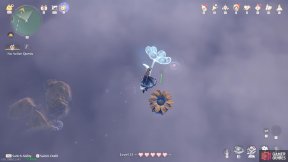
173. Miraland Map
North of ![]() Barrel Home, floating high above the sea. Activate and ride the northward gliding path. About halfway along, there’s a air-blowing plant on the right, with this
Barrel Home, floating high above the sea. Activate and ride the northward gliding path. About halfway along, there’s a air-blowing plant on the right, with this ![]() Whimstar above it. Simply glide over in that direction.
Whimstar above it. Simply glide over in that direction.
174. Miraland Map
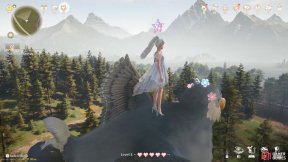
South-west from ![]() Queen’s Palace Ruins Entrance, high up in the sky. Seek the
Queen’s Palace Ruins Entrance, high up in the sky. Seek the ![]() Sky Monarch to the west, groom it and then ride it here.
Sky Monarch to the west, groom it and then ride it here.
175. Miraland Map
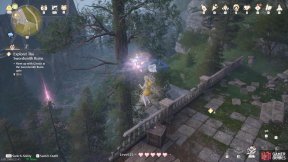
Short distance south-east from ![]() Swordsmith Ruins Gate. Catch the Whimflutter at the top of the ruins. There’s a leaf trampoline around the west side.
Swordsmith Ruins Gate. Catch the Whimflutter at the top of the ruins. There’s a leaf trampoline around the west side.
176. Miraland Map
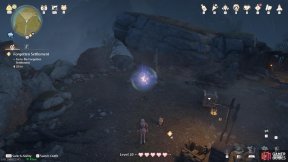
North of ![]() Forgotten Village Dwelling. Cover one of the holes with a nearby wooden crate, then stand on the remaining non-glowing hole.
Forgotten Village Dwelling. Cover one of the holes with a nearby wooden crate, then stand on the remaining non-glowing hole.
177. Miraland Map
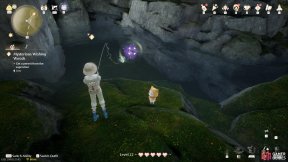
Tunnel to the ![]() Wishing Woods. On the left side, just before Lupabo and the entrance where you need to Shrink to enter. Reel in the glowing fish.
Wishing Woods. On the left side, just before Lupabo and the entrance where you need to Shrink to enter. Reel in the glowing fish.
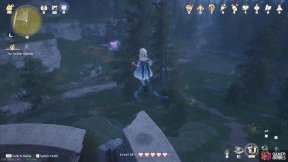
178. Miraland Map
North and slightly east from the ![]() Heartcraft Kingdom Outpost. Use the bug-catching outfit to catch the Whimflutter at the top of the small ruins.
Heartcraft Kingdom Outpost. Use the bug-catching outfit to catch the Whimflutter at the top of the small ruins.
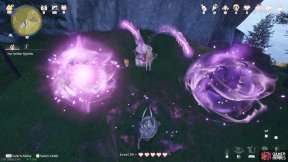
179. Miraland Map
Short distance north-east of ![]() Stellar Fishing Ground Peak, lower down. Open the glowing treasure chest and confront the Esselings that spawn.
Stellar Fishing Ground Peak, lower down. Open the glowing treasure chest and confront the Esselings that spawn.
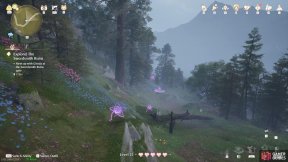
180. Miraland Map
North-west from ![]() Secluded Cave. Touch the incomplete star, then quickly gather the small stars.
Secluded Cave. Touch the incomplete star, then quickly gather the small stars.
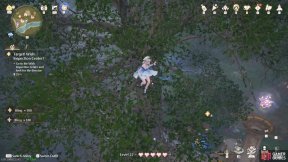
181. Miraland Map
Near ![]() In Front of the Wish Inspection Center, at the top of a building. There’s a wishnet near the top.
In Front of the Wish Inspection Center, at the top of a building. There’s a wishnet near the top.
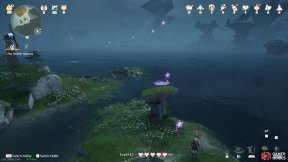
182. Miraland Map
Small island east from ![]() Windrider Mill Entrance. Touch the incomplete star, then quickly gather the small stars. You’ll need the floral gliding outfit.
Windrider Mill Entrance. Touch the incomplete star, then quickly gather the small stars. You’ll need the floral gliding outfit.
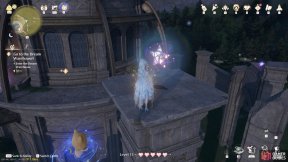
184. Miraland Map
Short distance north-east from the ![]() Dream Warehouse Rooftop. Keep jumping along the outer ring.
Dream Warehouse Rooftop. Keep jumping along the outer ring.
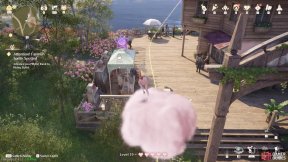
185. Miraland Map
At the ![]() The Leisureely Anglers Florawish Branch. Touch the incomplete star at the front, then collect the small stars while you ride/follow the cloud.
The Leisureely Anglers Florawish Branch. Touch the incomplete star at the front, then collect the small stars while you ride/follow the cloud.
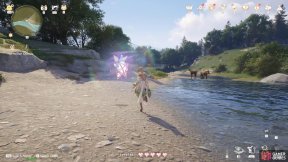
186. Miraland Map
North-west from ![]() Lakeside Hill Lane, across the river. Smash the wooden crate, then chase after the star.
Lakeside Hill Lane, across the river. Smash the wooden crate, then chase after the star.
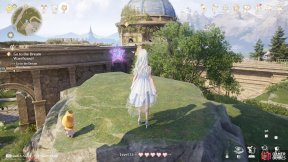
187. Miraland Map
East of ![]() Dream Warehouse Tower. North-west corner of the
Dream Warehouse Tower. North-west corner of the ![]() Florawish gathering spot. Touch the incomplete star, then go around and collect the smaller stars.
Florawish gathering spot. Touch the incomplete star, then go around and collect the smaller stars.
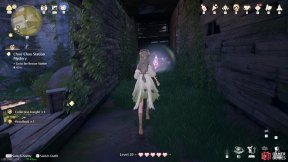
188. Miraland Map
Short distance north-east from ![]() Choo-Choo Station Shipping Center. Inside an overgrown train carriage. Enter by destroying the nearby wooden boxes with a jumping attack.
Choo-Choo Station Shipping Center. Inside an overgrown train carriage. Enter by destroying the nearby wooden boxes with a jumping attack.
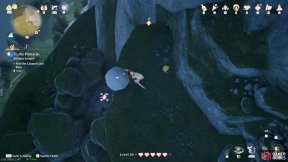
189. Miraland Map
North of ![]() Volunteer Corps Watchtower (west). On level 2F. Buried under some rocks. Look for a boulder slightly higher up that you can push to break the rocks.
Volunteer Corps Watchtower (west). On level 2F. Buried under some rocks. Look for a boulder slightly higher up that you can push to break the rocks.
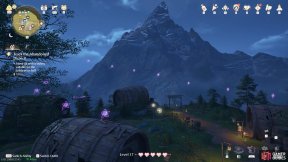
190. Miraland Map
Short distance east from the ![]() Barrel Home Warp Spire. Touch the incomplete star, then collect all of the small stars.
Barrel Home Warp Spire. Touch the incomplete star, then collect all of the small stars.
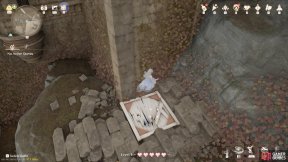
191. Miraland Map
Around north-west corner of the ![]() Queen’s Palace Ruins. Use a jumping attack to break the wooden boards.
Queen’s Palace Ruins. Use a jumping attack to break the wooden boards.
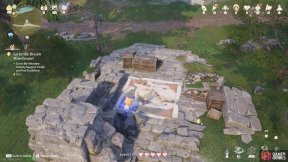
192. Miraland Map
East of ![]() Stoneville Entrance, south-east from a bridge. Use a jumping attack to break the wooden boards to reveal this
Stoneville Entrance, south-east from a bridge. Use a jumping attack to break the wooden boards to reveal this ![]() Whimstar.
Whimstar.
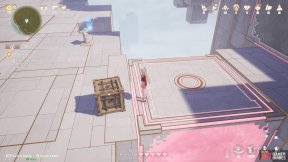
193. Miraland Map
Curio north-west from ![]() Aurosa Valley.
Aurosa Valley.
- Move the higher crate all the way down so it’s between the first pressure pad and the first platform.
- Go back up and move the second crate onto the nearby platform.
- Go down and now move the previous crate onto the nearby pressure pad.
- Go back up (again) and move that crate to the adjacent pressure pad that’s not its original one.
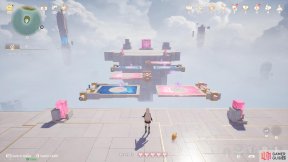
194. Miraland Map
Curio on a small island south from ![]() Windrider Mill Entrance. You need to collect the small stars while jumping across flip-swap platforms. Before starting, jump onto the first blue platform on the left, then jump back. Then activate the switch to lock all of the blue platforms. Now begin.
Windrider Mill Entrance. You need to collect the small stars while jumping across flip-swap platforms. Before starting, jump onto the first blue platform on the left, then jump back. Then activate the switch to lock all of the blue platforms. Now begin.
195. Miraland Map
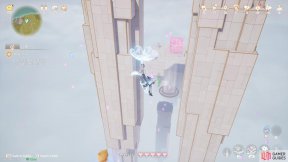
North-west from ![]() Stellar Fishing Ground Peak. Curio on a platform at the north-west side of the central stonetree’s trunk, underneath the canopy. Inside, touch the incomplete star, then skilfully glide to collect all of the small stars. Tip: The first bit is probably the trickiest–you need to get blown by one of the alternating fans so you can begin circling one of the nearby pillars.
Stellar Fishing Ground Peak. Curio on a platform at the north-west side of the central stonetree’s trunk, underneath the canopy. Inside, touch the incomplete star, then skilfully glide to collect all of the small stars. Tip: The first bit is probably the trickiest–you need to get blown by one of the alternating fans so you can begin circling one of the nearby pillars.
196. Miraland Map
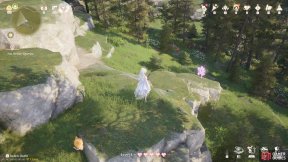
South of ![]() Lakeside Hill Lane. Touch the incomplete star, then collect the smaller stars.
Lakeside Hill Lane. Touch the incomplete star, then collect the smaller stars.
197. Miraland Map
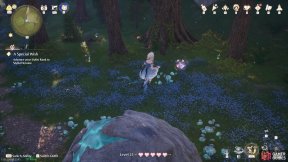
South from the ![]() Land of Starfall Warp Spire. Catch the Whimflutter flying around the mysterious rock.
Land of Starfall Warp Spire. Catch the Whimflutter flying around the mysterious rock.
198. Miraland Map
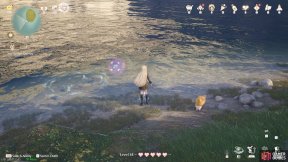
Lake west from the ![]() Abandoned Fanatic Wisher Camp. Reel in the glowing fish at the south-west side of the small island.
Abandoned Fanatic Wisher Camp. Reel in the glowing fish at the south-west side of the small island.
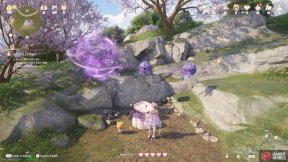
199. Miraland Map
East from ![]() Cicia Art Academy Field Base. Open the glowing treasure chest and dispose of the Esselings that spawn.
Cicia Art Academy Field Base. Open the glowing treasure chest and dispose of the Esselings that spawn.
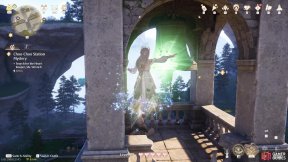
200. Miraland Map
Short distance east from ![]() Choo-Choo Station Old Platform. Use the purification outfit to strike the bell atop the entrance building.
Choo-Choo Station Old Platform. Use the purification outfit to strike the bell atop the entrance building.
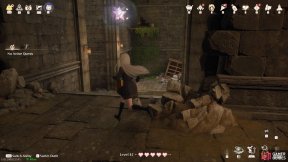
201. Miraland Map
Inside ![]() Outer Swordsmith Ruins Cavern. In the main foyer. Break the glowing wooden crate, then chase after the star. Once you know where it’s going, try to go around and get in front of it.
Outer Swordsmith Ruins Cavern. In the main foyer. Break the glowing wooden crate, then chase after the star. Once you know where it’s going, try to go around and get in front of it.
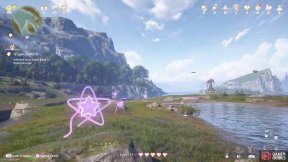
202. Miraland Map
Short distance west from the ![]() Aurosa Valley Warp Spire. Touch the incomplete star, then collect the small stars. Expect to do a lot of jumping between trampolines. Boing!
Aurosa Valley Warp Spire. Touch the incomplete star, then collect the small stars. Expect to do a lot of jumping between trampolines. Boing!
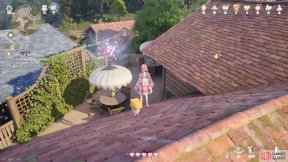
203. Miraland Map
Above a parasol around the rooftops south-west of Great Wishtree Square.
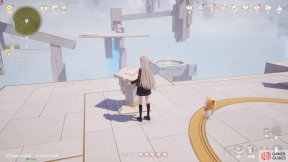
204. Miraland Map
Curio south-east from ![]() Shimmer Pond. Activate the right switch, then wait for the ball to reach the halfway point of the second chute before activating the first switch.
Shimmer Pond. Activate the right switch, then wait for the ball to reach the halfway point of the second chute before activating the first switch.
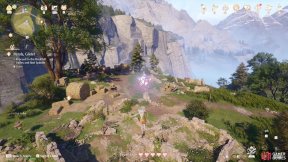
205. Miraland Map
Short distance south of ![]() Beside the Golden Fields, on higher ground. Catch the Whimflutter flying around the small ruins.
Beside the Golden Fields, on higher ground. Catch the Whimflutter flying around the small ruins.
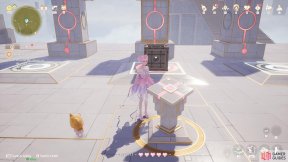
206. Miraland Map
Enter the curio atop the stone pillars north-east of the ![]() Dream Warehouse Tower. First, use the crate to get two of the pillars in sync, then place the crate in front of the remaining pillar.
Dream Warehouse Tower. First, use the crate to get two of the pillars in sync, then place the crate in front of the remaining pillar.
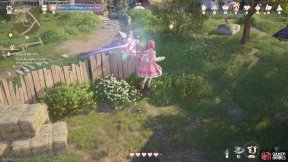
207. Miraland Map
North-east from ![]() Florawish Lane. Smash the wooden box with a jumping attack, then chase after the fleeing
Florawish Lane. Smash the wooden box with a jumping attack, then chase after the fleeing ![]() Whimstar.
Whimstar.
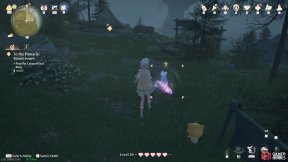
208. Miraland Map
Medium stonetree south of ![]() Stonecrown Peak. Near ground level. Locate the Whimink around the north side and give it a good ol’ grooming session.
Stonecrown Peak. Near ground level. Locate the Whimink around the north side and give it a good ol’ grooming session.
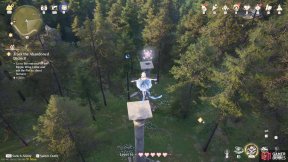
209. Miraland Map
East of the ![]() Old Florawish Memorial, atop a stone pillar. There’s a catapult to the west you can use to fly up. Perform a jumping attack to use it.
Old Florawish Memorial, atop a stone pillar. There’s a catapult to the west you can use to fly up. Perform a jumping attack to use it.
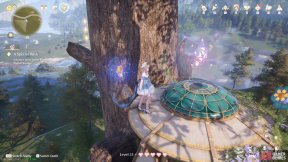
210. Miraland Map
West from the ![]() Wish Celebration Center Warp Spire. Atop a building on a high up platform. To the south-west, there’s a Pounceria plant that you can lure as Momo to begin climbing up.
Wish Celebration Center Warp Spire. Atop a building on a high up platform. To the south-west, there’s a Pounceria plant that you can lure as Momo to begin climbing up.
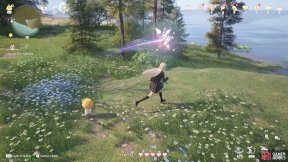
211. Miraland Map
South-east from the ![]() Wish Pass Office. Use a jumping attack to break the wooden crate, then chase after the star.
Wish Pass Office. Use a jumping attack to break the wooden crate, then chase after the star.
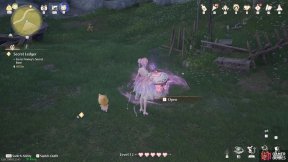
212. Miraland Map
Short distance east from ![]() Abandoned Fanatic Wisher Camp. Open the treasure chest and slay the Esselings.
Abandoned Fanatic Wisher Camp. Open the treasure chest and slay the Esselings.
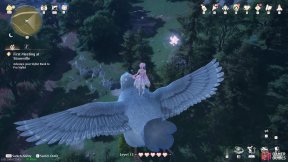
213. Miraland Map
East of ![]() Stoneville Entrance, extremely high up. Groom the
Stoneville Entrance, extremely high up. Groom the ![]() Sky Monarch to the south-west and ride it here.
Sky Monarch to the south-west and ride it here.
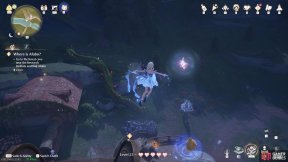
214. Miraland Map
High up in the air near the ![]() Workshop Waterwheel. Jump on the wheel to get up.
Workshop Waterwheel. Jump on the wheel to get up.
215. Miraland Map
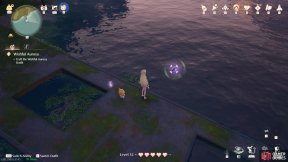
South of ![]() Ghost Train Entrance. Reel in the glowing fish near the submerged train carriage.
Ghost Train Entrance. Reel in the glowing fish near the submerged train carriage.
216. Miraland Map
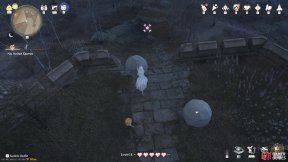
Near the north-west corner of the ![]() Queen’s Palace Ruins. There are boulders to the east that can destroy the obstructions.
Queen’s Palace Ruins. There are boulders to the east that can destroy the obstructions.
217. Miraland Map
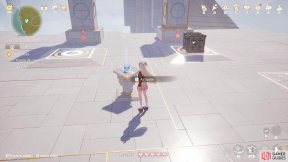
North-west from ![]() Stellar Fishing Ground Trail. Curio around the west side of the area. You need to rotate all four pillars so they face inward.
Stellar Fishing Ground Trail. Curio around the west side of the area. You need to rotate all four pillars so they face inward.
Here’s a solution. Switches are numbered 1 to 4 from left to right.
- Place crate on switch 1, then rotate pillars once.
- Place crate on switch 3, then rotate pillars twice.
- Place crate on switch 4, then rotate pillars thrice.
- Remove crate, then rotate pillars twice.
218. Miraland Map
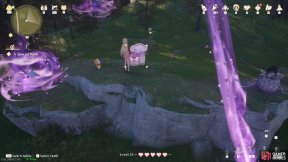
South-east from the ![]() Land of Starfall Warp Spire. Open the glowing treasure chest and defeat the Esselings inside.
Land of Starfall Warp Spire. Open the glowing treasure chest and defeat the Esselings inside.
219. Miraland Map
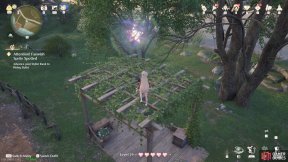
Near ![]() Stitch Street. Atop the veranda in plain sight. You can push a nearby crate and use it as a platform to jump up from.
Stitch Street. Atop the veranda in plain sight. You can push a nearby crate and use it as a platform to jump up from.
220. Miraland Map
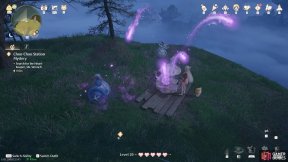
North of ![]() Choo-Choo Station Stonetree Top. Open the glowing chest, then exterminate the Esselings that spawn.
Choo-Choo Station Stonetree Top. Open the glowing chest, then exterminate the Esselings that spawn.
221. Miraland Map
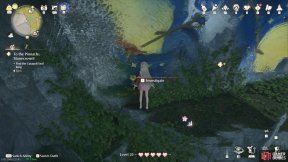
North of ![]() Wishing Well and slightly west. On level 3F. Touch the glowing ball and investigate the star shape near the bottom of the wall painting. Got a little déjà vu here.
Wishing Well and slightly west. On level 3F. Touch the glowing ball and investigate the star shape near the bottom of the wall painting. Got a little déjà vu here.
222. Miraland Map
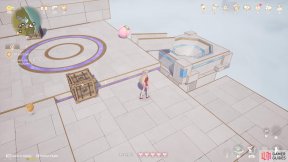
North-east from ![]() Ghost Train Entrance. Curio next to the giant tunnel entrance. Inside, use the crates to guide the ball to the goal.
Ghost Train Entrance. Curio next to the giant tunnel entrance. Inside, use the crates to guide the ball to the goal.
Solution:
- Move the second crate onto the first platform.
- Activate the switch, then jump on the first platform. Wait for the ball to cross the second platform.
- Quickly move one of the crates off the first platform.
- Stand on the first platform until the ball arrives, then jump off once it lands on the platform.
223. Miraland Map
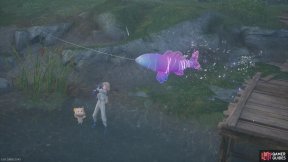
South from ![]() Bug Catcher’s Cabin. Reel in the glowing fish at the south side of the river.
Bug Catcher’s Cabin. Reel in the glowing fish at the south side of the river.
224. Miraland Map
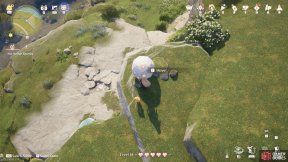
West and slightly north from the ![]() Abandoned Fanatic Wisher Camp Warp Spire. Buried under some rocks. There’s a leaf trampoline nearby that’ll launch you up near a pushable boulder. Try to the push the boulder from the right, because you can miss the
Abandoned Fanatic Wisher Camp Warp Spire. Buried under some rocks. There’s a leaf trampoline nearby that’ll launch you up near a pushable boulder. Try to the push the boulder from the right, because you can miss the ![]() Whimstar.
Whimstar.
226. Miraland Map
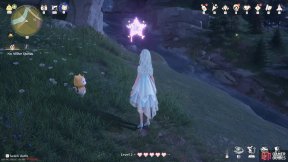
West from ![]() Stoneville Entrance, before the river. Touch the incomplete star, then collect the smaller stars.
Stoneville Entrance, before the river. Touch the incomplete star, then collect the smaller stars.
227. Miraland Map
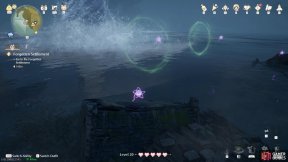
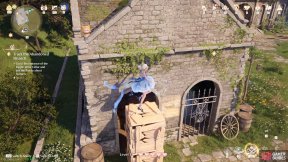
North of ![]() Prosperville Entrance, at the west side of this stonetree cluster. Touch the incomplete star, then collect the smaller stars. You’ll need to glide a bit.
Prosperville Entrance, at the west side of this stonetree cluster. Touch the incomplete star, then collect the smaller stars. You’ll need to glide a bit.
228. Miraland Map
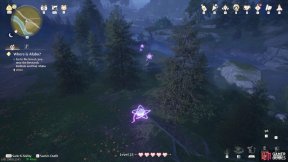
South of ![]() Beside the Ripple Wine Cellar. Use a jumping attack to destroy the wooden crates and access the imprisoned
Beside the Ripple Wine Cellar. Use a jumping attack to destroy the wooden crates and access the imprisoned ![]() Whimstar.
Whimstar.
229. Miraland Map
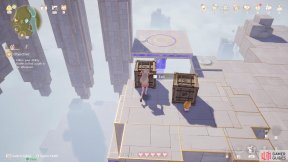
East and slightly south from the ![]() Workshop Waterwheel. Touch the incomplete star, then collect the small stars before time’s up.
Workshop Waterwheel. Touch the incomplete star, then collect the small stars before time’s up.
230. Miraland Map
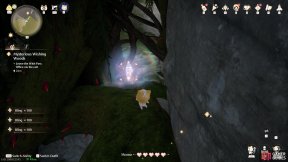
Curio east from the ![]() Wishcraft Lab Warp Spire. First, shove the crate off the first platform. Shrink, then use the nearby launch pad to get to the top. Shove both of the crates onto the first platform. Now float to the second platform (if you miss, it’s OK). Shrink and use the launch pad(s) to reach the end.
Wishcraft Lab Warp Spire. First, shove the crate off the first platform. Shrink, then use the nearby launch pad to get to the top. Shove both of the crates onto the first platform. Now float to the second platform (if you miss, it’s OK). Shrink and use the launch pad(s) to reach the end.
231. Miraland Map
Tunnel to the ![]() Wishing Woods. After climbing up the first rope, on the right side, higher up. You can reach by climbing some more ropes, but watch out for the spiky parts.
Wishing Woods. After climbing up the first rope, on the right side, higher up. You can reach by climbing some more ropes, but watch out for the spiky parts.
232. Miraland Map
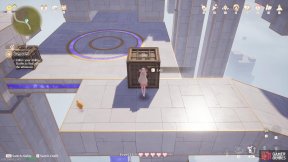
Curio east from ![]() Desperation Orb Warehouse.
Desperation Orb Warehouse.
- Move the left crate onto the left platform.
- Shrink and enter the nearby gap, then head over to the right platform.
- Move the right crate onto the right platform, then continue moving it to the left platform. Place it below the gap.
- Shrink, jump and enter the gap and return to the right platform. Enter the gap there and continue to the end.
233. Miraland Map
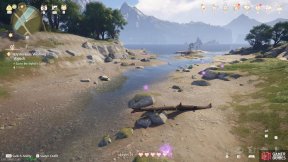
North of ![]() Lakeside Hill Lane, near the bridge. Touch the incomplete star, then gather the small stars.
Lakeside Hill Lane, near the bridge. Touch the incomplete star, then gather the small stars.
234. Miraland Map
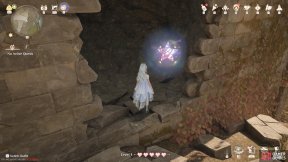
North-east of ![]() Queen’s Palace Ruins Front Yard, inside a crack in the wall. You can head north from the minigame stall.
Queen’s Palace Ruins Front Yard, inside a crack in the wall. You can head north from the minigame stall.
235. Miraland Map
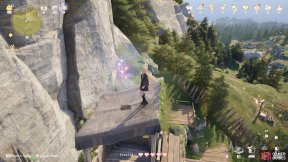
North and slightly west from the ![]() Abandoned Fanatic Wisher Camp Warp Spire. Atop a watchtower at the back. Look for a nearby crate, then drag it to the west side of the watchtower, so you can climb up.
Abandoned Fanatic Wisher Camp Warp Spire. Atop a watchtower at the back. Look for a nearby crate, then drag it to the west side of the watchtower, so you can climb up.
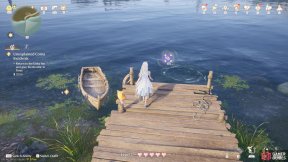
236. Miraland Map
East of ![]() Florawish Lane. Use the fishing outfit to reel in the glowing fish.
Florawish Lane. Use the fishing outfit to reel in the glowing fish.
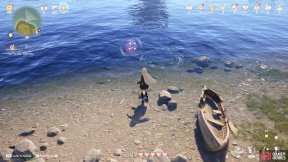
237. Miraland Map
North-east from ![]() Windrider Mill Mid-Level. Reel in the glowing fish. It’d better not be called a Whimfish. Wait, it’s a Whimfin…?
Windrider Mill Mid-Level. Reel in the glowing fish. It’d better not be called a Whimfish. Wait, it’s a Whimfin…?
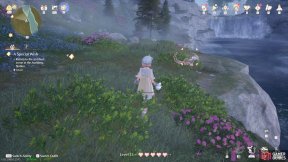
238. Miraland Map
South-west from ![]() Ascetic Camp. Groom the Whimink across the river.
Ascetic Camp. Groom the Whimink across the river.
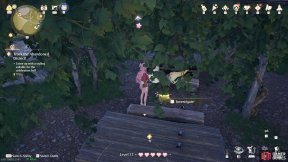
239. Miraland Map
South of ![]() Barrel Grove, under the stonetree canopy. Touch the glowing ball and investigate the matches shaped like a star near the two Pieceys. Sorry for the bad screenshot angle.
Barrel Grove, under the stonetree canopy. Touch the glowing ball and investigate the matches shaped like a star near the two Pieceys. Sorry for the bad screenshot angle.
241. Miraland Map
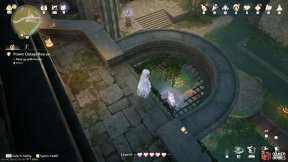
Inside the cave where the ![]() Well of Fortune is. From the Warp Spire, go west to find a way up.
Well of Fortune is. From the Warp Spire, go west to find a way up.
242. Miraland Map
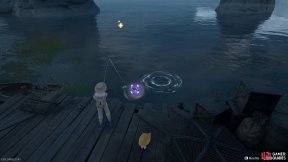
North-east of ![]() Prosperville Entrance, on the lower level, by the shore. Reel in the glowing fish.
Prosperville Entrance, on the lower level, by the shore. Reel in the glowing fish.
243. Miraland Map
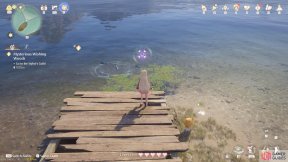
North-east from ![]() Lakeside Hill Lane, on a small island at the river mouth. Reel in the glowing fish.
Lakeside Hill Lane, on a small island at the river mouth. Reel in the glowing fish.
244. Miraland Map
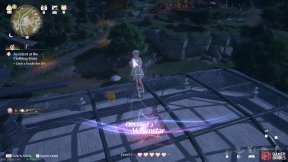
Atop ![]() Ray and Wing’s. Carefully approach the Whimink and groom it.
Ray and Wing’s. Carefully approach the Whimink and groom it.
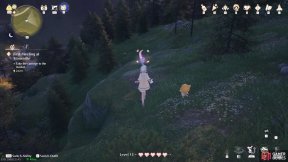
245. Miraland Map
West from ![]() Stoneville Entrance. Slowly approach the Whimink and lovingly groom it.
Stoneville Entrance. Slowly approach the Whimink and lovingly groom it.
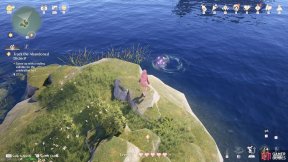
246. Miraland Map
Small islands north of ![]() Barrel Home. You can get there by jumping across the lily pads from the south-west. Use the fishing outfit to hook the glowing fish.
Barrel Home. You can get there by jumping across the lily pads from the south-west. Use the fishing outfit to hook the glowing fish.
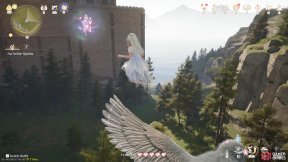
247. Miraland Map
South of ![]() Queen’s Palace Ruins High Tower, high up in the sky. Groom the
Queen’s Palace Ruins High Tower, high up in the sky. Groom the ![]() Sky Monarch to the east and ride it here. Took us a few tries to nail the jump. The Sky Monarch will circle the tree a few times.
Sky Monarch to the east and ride it here. Took us a few tries to nail the jump. The Sky Monarch will circle the tree a few times.
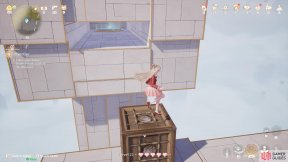
248. Miraland Map
Tunnel to the ![]() Wishing Woods. After exiting the big water area, there’s a Curio through a Momo-sized tunnel on the left. Inside, grab a crate and place it near the left-hand side tall platform. Then Shrink and enter the gap, where there’s a launch pad. Next, float to the opposite tall platform where the switch is.
Wishing Woods. After exiting the big water area, there’s a Curio through a Momo-sized tunnel on the left. Inside, grab a crate and place it near the left-hand side tall platform. Then Shrink and enter the gap, where there’s a launch pad. Next, float to the opposite tall platform where the switch is.
249. Miraland Map
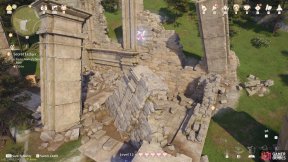
South of ![]() Relic Hill. Smash the wooden crate with a jumping attack, then chase the
Relic Hill. Smash the wooden crate with a jumping attack, then chase the ![]() Whimstar. Can be annoying.
Whimstar. Can be annoying.
250. Miraland Map
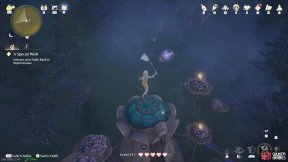
South-east from ![]() Ascetic Camp. Catch the Whimflutter flying near the top of a residence.
Ascetic Camp. Catch the Whimflutter flying near the top of a residence.
251. Miraland Map
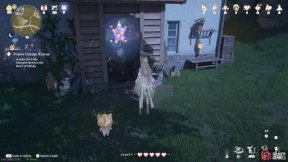
At the house south from the ![]() Kingdom Guards’ Office. Use a jumping attack to break the wooden crates.
Kingdom Guards’ Office. Use a jumping attack to break the wooden crates.
252. Miraland Map
North-east from ![]() Abandoned Fanatic Wisher Camp Outpost. Use a jumping attack to smash the glowing crate, then chase after the star, making smart use of the trampolines.
Abandoned Fanatic Wisher Camp Outpost. Use a jumping attack to smash the glowing crate, then chase after the star, making smart use of the trampolines.
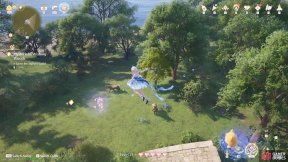
253. Miraland Map
North-east from ![]() Lakeside Hill Lane. Floating high in the sky around some small ruins. There’s a wishnet you can jump from.
Lakeside Hill Lane. Floating high in the sky around some small ruins. There’s a wishnet you can jump from.
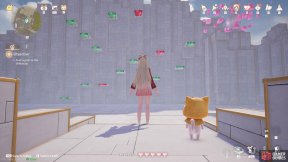
254. Miraland Map
South of the ![]() Queen’s Palace Ruins Front Yard. Somewhat high up. There’s a leaf trampoline to the north that’ll take you up. Enter the curio and navigate the platforms to the top. Avoid the red platforms. The color will disappear when you begin, but you can use our screenshot.
Queen’s Palace Ruins Front Yard. Somewhat high up. There’s a leaf trampoline to the north that’ll take you up. Enter the curio and navigate the platforms to the top. Avoid the red platforms. The color will disappear when you begin, but you can use our screenshot.
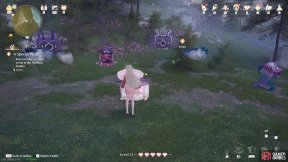
255. Miraland Map
North-east from ![]() Ruins of the Guardians. Near the river. Open the glowing treasure chest, then show the Esselings who’s boss.
Ruins of the Guardians. Near the river. Open the glowing treasure chest, then show the Esselings who’s boss.
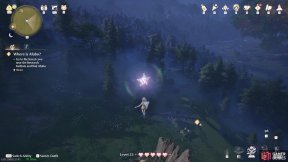
256. Miraland Map
South-east from ![]() Farm Entrance. Catch the Whimflutter atop the tree stump.
Farm Entrance. Catch the Whimflutter atop the tree stump.
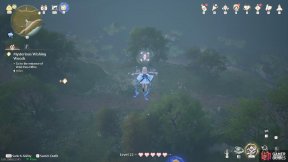
257. Miraland Map
South-east from ![]() Sanctum of the Observant. High up in the sky. Defeat the nearby Esselings to the north-west to release a wishnet.
Sanctum of the Observant. High up in the sky. Defeat the nearby Esselings to the north-west to release a wishnet.
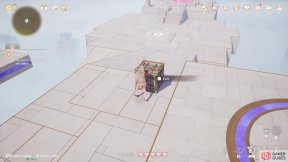
258. Miraland Map
Curio east and slightly south from ![]() Bizarre Wish Hills.
Bizarre Wish Hills.
- Go to the right crate and move it onto the right platform.
- Go to the left crate and move it onto the left platform.
- Return to the right crate and push it off the platform, towards the pressure pad.
- Do the same with the left crate.
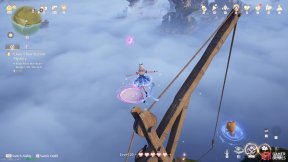
259. Miraland Map
Near ![]() Choo-Choo Station Repair Station. Touch the incomplete star, then go around collecting the small stars. Towards the end, you’ll need to glide.
Choo-Choo Station Repair Station. Touch the incomplete star, then go around collecting the small stars. Towards the end, you’ll need to glide.
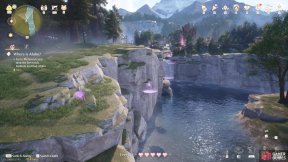
260. Miraland Map
South from ![]() Timis’s Beauty Lab. Touch the incomplete star, then quickly gather the small stars.
Timis’s Beauty Lab. Touch the incomplete star, then quickly gather the small stars.
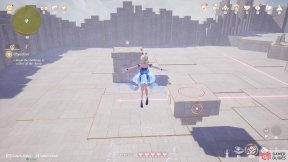
261. Miraland Map
South of the ![]() Bullquet Habitat. Enter the curio and collect the 4 small stars. The time limit is relatively short, although it’s probably longer than you expect.
Bullquet Habitat. Enter the curio and collect the 4 small stars. The time limit is relatively short, although it’s probably longer than you expect.
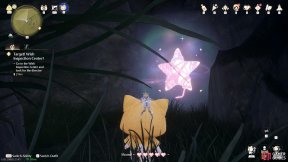
262. Miraland Map
West and slightly north from the ![]() Research Institute Cavern. Inside a crevice.
Research Institute Cavern. Inside a crevice.
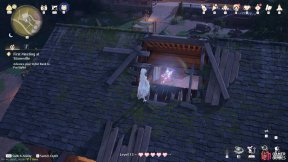
263. Miraland Map
West of the ![]() Dye Workshop entrance. Inside the crack on the roof.
Dye Workshop entrance. Inside the crack on the roof.
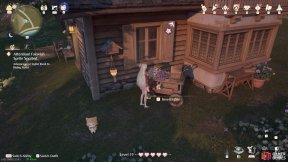
264. Miraland Map
House east of the ![]() Mayor’s Residence. Touch the glowing ball, then investigate the star shape on the wheel of the wheelbarrow.
Mayor’s Residence. Touch the glowing ball, then investigate the star shape on the wheel of the wheelbarrow.
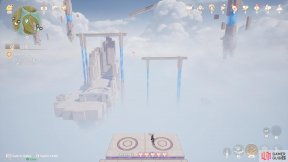
265. Miraland Map
Curio short distance north-west from ![]() Windrider Mill Entrance. Stand on the two platforms to guide the ball to the goal.
Windrider Mill Entrance. Stand on the two platforms to guide the ball to the goal.
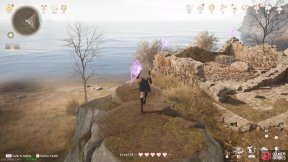
266. Miraland Map
Short distance north from ![]() Queen’s Palace Ruins Entrance. Touch the incomplete star, then go around and collect the small stars.
Queen’s Palace Ruins Entrance. Touch the incomplete star, then go around and collect the small stars.
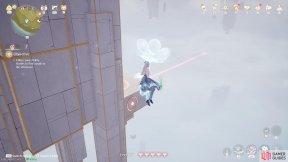
267. Miraland Map
South from ![]() Barrel Grove, on the lower level. Enter the curio and glide to the endpoint. Can be tricky. Tip: There might be a better way, but for the 2nd to last platform, you can try gliding around the pillar when it goes under it, like in our screenshot. Then when it reverses direction, wait until the last moment before gliding to the final platform.
Barrel Grove, on the lower level. Enter the curio and glide to the endpoint. Can be tricky. Tip: There might be a better way, but for the 2nd to last platform, you can try gliding around the pillar when it goes under it, like in our screenshot. Then when it reverses direction, wait until the last moment before gliding to the final platform.
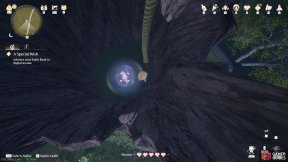
268. Miraland Map
East from ![]() Aurosa Valley. Inside a hollow tree. Jump on the Pounceria plant as Momo to reach the wishnets.
Aurosa Valley. Inside a hollow tree. Jump on the Pounceria plant as Momo to reach the wishnets.
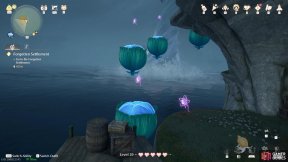
269. Miraland Map
Far-off small stonetree north-west of ![]() Forgotten Village Dwelling. Touch the incomplete star, then bounce around collecting the small stars.
Forgotten Village Dwelling. Touch the incomplete star, then bounce around collecting the small stars.
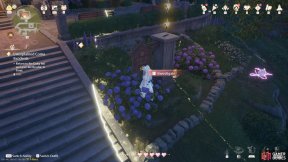
270. Miraland Map
South-east corner of ![]() Daisy Inn. Touch the glowing ball, then investigate the star on the signboard.
Daisy Inn. Touch the glowing ball, then investigate the star on the signboard.
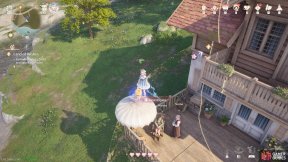
271. Miraland Map
Touch the glowing ball above the rooftop, then investigate the parasol on the ground.
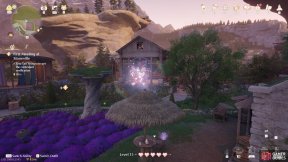
272. Miraland Map
North-west of the ![]() Dye Workshop. Use a jumping attack to destroy the wooden box, then chase after the fleeing star. Get back over ’ere!
Dye Workshop. Use a jumping attack to destroy the wooden box, then chase after the fleeing star. Get back over ’ere!
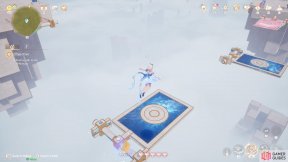
273. Miraland Map
North of ![]() Abandoned Fanatic Wisher Camp Outpost. Enter the curio and navigate the switching platforms.
Abandoned Fanatic Wisher Camp Outpost. Enter the curio and navigate the switching platforms.
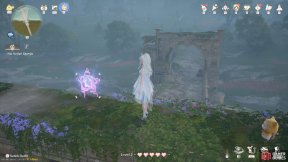
274. Miraland Map
Atop the south end of the big bridge south of the ![]() Bug Catcher’s Cabin. Touch the incomplete star, then collect the smaller stars.
Bug Catcher’s Cabin. Touch the incomplete star, then collect the smaller stars.
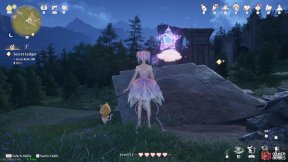
275. Miraland Map
North-west from ![]() Relic Hill. Touch the incomplete star, then ride the cloud, collecting the small stars along the way.
Relic Hill. Touch the incomplete star, then ride the cloud, collecting the small stars along the way.
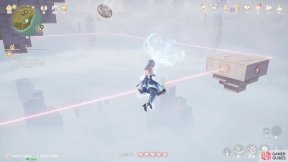
276. Miraland Map
At the medium stonetree south-west from ![]() Volunteer Corps Watchtower (west). Curio on a ledge just below the peak. Inside, you need to glide with careful timing to reach the moving platforms.
Volunteer Corps Watchtower (west). Curio on a ledge just below the peak. Inside, you need to glide with careful timing to reach the moving platforms.
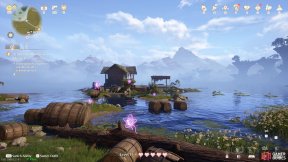
277. Miraland Map
North of ![]() Barrel Home, in front of the half-submerged train station. Touch the incomplete star, then quickly collect the smaller stars.
Barrel Home, in front of the half-submerged train station. Touch the incomplete star, then quickly collect the smaller stars.
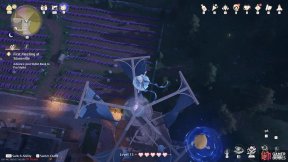
278. Miraland Map
North-east side of the ![]() Dye Workshop. Atop the windmill. You can jump from atop the nearby stonetree. There’s also a
Dye Workshop. Atop the windmill. You can jump from atop the nearby stonetree. There’s also a ![]() Sky Monarch nearby.
Sky Monarch nearby.
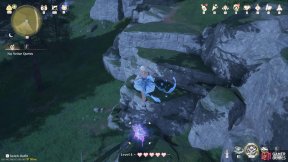
279. Miraland Map
North of ![]() Heartcraft Kingdom Outpost. Touch the incomplete star, then grab the small stars.
Heartcraft Kingdom Outpost. Touch the incomplete star, then grab the small stars.
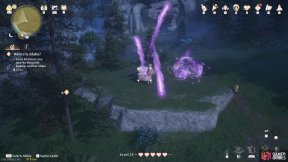
281. Miraland Map
North-west from the ![]() Workshop Waterwheel. Open the glowing chest and confront the Esselings that spawn.
Workshop Waterwheel. Open the glowing chest and confront the Esselings that spawn.
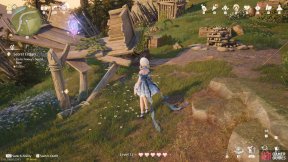
282. Miraland Map
A short distance east of ![]() Abandoned Fanatic Wisher Camp Outpost. Touch the incomplete star, then grab the small stars.
Abandoned Fanatic Wisher Camp Outpost. Touch the incomplete star, then grab the small stars.
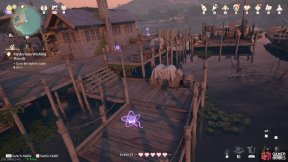
283. Miraland Map
At ![]() Meadow Wharf, east from the Warp Spire. Touch the incomplete star on the small boat, then collect the small stars.
Meadow Wharf, east from the Warp Spire. Touch the incomplete star on the small boat, then collect the small stars.
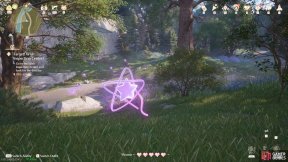
284. Miraland Map
South from the ![]() Wish Auditing Station, before crossing the river. Incomplete star under a wooden ramp. Shrink to touch it, then collect the small stars.
Wish Auditing Station, before crossing the river. Incomplete star under a wooden ramp. Shrink to touch it, then collect the small stars.
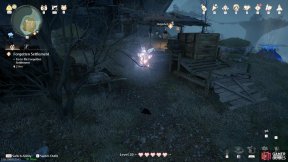
285. Miraland Map
South of ![]() Forgotten Village Dwelling. Use a jumping attack to break the glowing crate, then quickly catch the fleeing star.
Forgotten Village Dwelling. Use a jumping attack to break the glowing crate, then quickly catch the fleeing star.
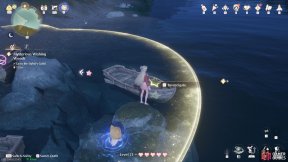
286. Miraland Map
North-west from ![]() Meadow Wharf, at the shore. Touch the glowing ball, then look for a star-shaped drawing on the side of a rowboat.
Meadow Wharf, at the shore. Touch the glowing ball, then look for a star-shaped drawing on the side of a rowboat.
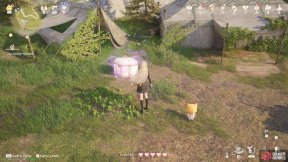
287. Miraland Map
South-west from the ![]() Abandoned Fanatic Wisher Camp Warp Spire. Open the glowing chest and exterminate the Esselings that spawn.
Abandoned Fanatic Wisher Camp Warp Spire. Open the glowing chest and exterminate the Esselings that spawn.
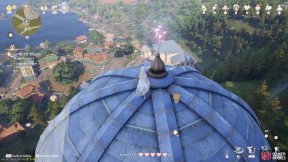
288. Miraland Map
South-east of the ![]() Dream Warehouse Tower Warp Spire. Atop the roof spire. Use the wishnets near the other roof to jump here.
Dream Warehouse Tower Warp Spire. Atop the roof spire. Use the wishnets near the other roof to jump here.
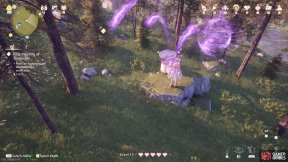
289. Miraland Map
East of the ![]() Gliding Training Stonetree Warp Spire. Open the glowing chest and prepare to slay the Esselings.
Gliding Training Stonetree Warp Spire. Open the glowing chest and prepare to slay the Esselings.
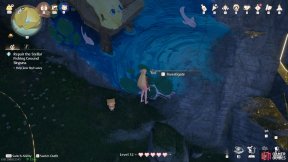
290. Miraland Map
Short distance south-east of ![]() Stellar Fishing Ground Peak. On ground level. Touch the glowing orb, then search for a star shape at the nearby wall painting.
Stellar Fishing Ground Peak. On ground level. Touch the glowing orb, then search for a star shape at the nearby wall painting.
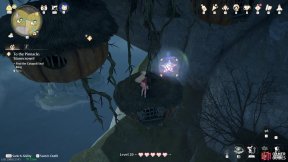
291. Miraland Map
Short distance east of ![]() Volunteer Corps Jail, higher up. On level 3F. Atop one of the dangling pumpkin houses. You can use the nearby
Volunteer Corps Jail, higher up. On level 3F. Atop one of the dangling pumpkin houses. You can use the nearby ![]() Catapult Seal to propel yourself up.
Catapult Seal to propel yourself up.
292. Miraland Map
North-east from ![]() Bizarre Wish Hills. Shrink to reach the incomplete star under the rocks, then collect the small stars. There are Pounceria plants along the route, eager to gobble up Momo.
Bizarre Wish Hills. Shrink to reach the incomplete star under the rocks, then collect the small stars. There are Pounceria plants along the route, eager to gobble up Momo.
293. Miraland Map
South-east from ![]() Queen’s Palace Ruins West Forest, floating high up. Use a Whimcycle to hit the nearby Speed Booster. You can rent a Whimcycle from
Queen’s Palace Ruins West Forest, floating high up. Use a Whimcycle to hit the nearby Speed Booster. You can rent a Whimcycle from ![]() Lakeside Hill Lane.
Lakeside Hill Lane.
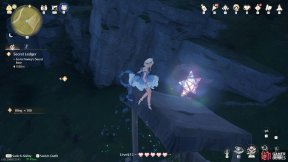
294. Miraland Map
South of ![]() Abandoned Fanatic Wisher Camp Outpost. Atop a wooden stand. You can grab a wooden crate and drag it to the base of the stand. Or you can jump from higher ground.
Abandoned Fanatic Wisher Camp Outpost. Atop a wooden stand. You can grab a wooden crate and drag it to the base of the stand. Or you can jump from higher ground.
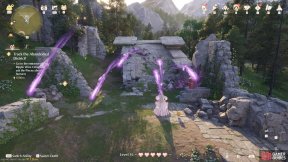
295. Miraland Map
West of ![]() Florawish Lane, among some small ruins. Open the glowing treasure chest, then defeat the Esselings that spawn.
Florawish Lane, among some small ruins. Open the glowing treasure chest, then defeat the Esselings that spawn.
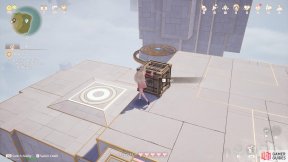
296. Miraland Map
East of ![]() Handsome Lads Circus. Curio on ground level, near the shore.
Handsome Lads Circus. Curio on ground level, near the shore.
Solution:
- Place the first crate on the left switch.
- Glide up and push the second crate as far right as it’ll go. (So it’s past the first platform.)
- Place the first crate on the right switch.
- Push the second crate forward, so it falls onto the second platform.
- Move the first crate off the right switch.
- Push the second crate forward some more, then left and onto the final switch.
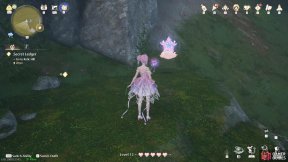
297. Miraland Map
South-east from ![]() Stoneville Entrance. Touch the incomplete star, then ride the cloud, collecting the small stars along the way.
Stoneville Entrance. Touch the incomplete star, then ride the cloud, collecting the small stars along the way.
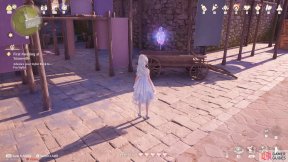
298. Miraland Map
East of the ![]() Dye Workshop Stonetree. Touch the incomplete star and collect all of the small stars.
Dye Workshop Stonetree. Touch the incomplete star and collect all of the small stars.
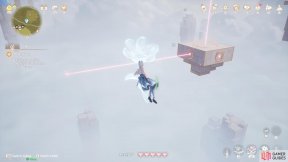
299. Miraland Map
North-west of ![]() Beside the Ripple Wine Cellar. South-west side of a medium stonetree, partway up. Enter the curio and glide to the endpoint. Tip: You need to glide before each platform reaches you.
Beside the Ripple Wine Cellar. South-west side of a medium stonetree, partway up. Enter the curio and glide to the endpoint. Tip: You need to glide before each platform reaches you.
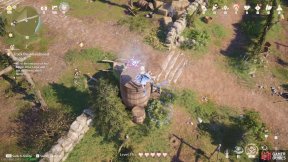
300. Miraland Map
East of ![]() Beside the Ripple Wine Cellar. Grab two wooden boxes and use them to cover two holes where a
Beside the Ripple Wine Cellar. Grab two wooden boxes and use them to cover two holes where a ![]() Scarf Worm emerges from. Next, stand on a third hole. The worm will push the
Scarf Worm emerges from. Next, stand on a third hole. The worm will push the ![]() Whimstar out.
Whimstar out.
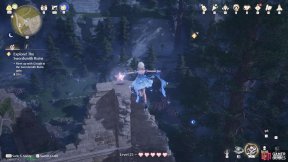
301. Miraland Map
At the endpoint of ![]() Ruins of the Guardians, past several Iron Squirrel statues.
Ruins of the Guardians, past several Iron Squirrel statues.
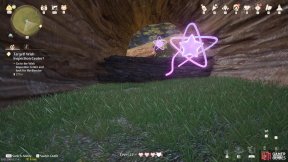
302. Miraland Map
West from the ![]() Research Institute Cavern. Inside a fallen tree trunk. Touch the incomplete star, then collect the small stars.
Research Institute Cavern. Inside a fallen tree trunk. Touch the incomplete star, then collect the small stars.
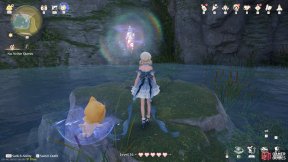
303. Miraland Map
North-east of the first Warp Spire, ![]() By the Stylist Guild’s Memorial. Across the pond.
By the Stylist Guild’s Memorial. Across the pond.
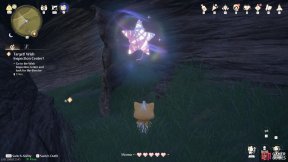
304. Miraland Map
North and slightly east from the ![]() Research Institute Cavern. Inside a collapsed tree trunk. Shrink to enter.
Research Institute Cavern. Inside a collapsed tree trunk. Shrink to enter.
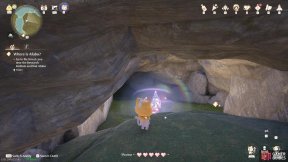
305. Miraland Map
North and slightly west from ![]() Timis’s Beauty Lab. At the end of a short, narrow tunnel. Enter from the north-east side, where some wooden crates are.
Timis’s Beauty Lab. At the end of a short, narrow tunnel. Enter from the north-east side, where some wooden crates are.
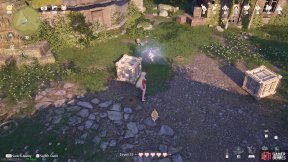
306. Miraland Map
West of ![]() Golden Fields Stonetree Top. Near the windmill. Place wooden crates over the holes where the
Golden Fields Stonetree Top. Near the windmill. Place wooden crates over the holes where the ![]() Scarf Worm emerges from. If you catch the worm with your net, you’ll need to wait 24 hours for it to respawn.
Scarf Worm emerges from. If you catch the worm with your net, you’ll need to wait 24 hours for it to respawn.
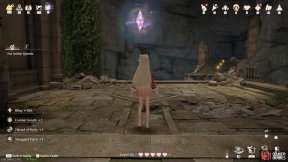
308. Miraland Map
Inside ![]() Relic Hill Cavern. Around the halfway point, guarded by Esselings.
Relic Hill Cavern. Around the halfway point, guarded by Esselings.
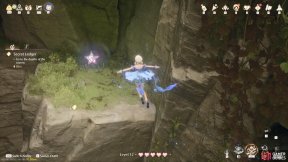
309. Miraland Map
Inside ![]() Hillside Cavern. Take a left. Keep jumping up to find this
Hillside Cavern. Take a left. Keep jumping up to find this ![]() Whimstar.
Whimstar.
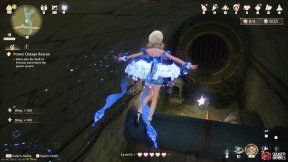
310. Miraland Map
![]() Well of Fortune. At the first checkpoint, Waterway Begins, turn left into the side path. Jump onto the wooden ledges to reach this
Well of Fortune. At the first checkpoint, Waterway Begins, turn left into the side path. Jump onto the wooden ledges to reach this ![]() Whimstar behind a bunch of pipes.
Whimstar behind a bunch of pipes.
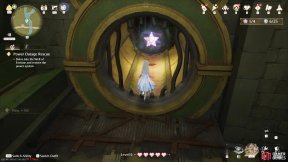
311. Miraland Map
![]() Well of Fortune. In the area where you rescue the Big Croaker. To the right of the exit.
Well of Fortune. In the area where you rescue the Big Croaker. To the right of the exit.
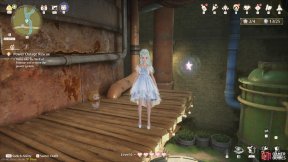
312. Miraland Map
![]() Well of Fortune. In the room with Lil’ Croaker (who’s actually big). Floating high up near the central column. Time to use your jumping skills!
Well of Fortune. In the room with Lil’ Croaker (who’s actually big). Floating high up near the central column. Time to use your jumping skills!
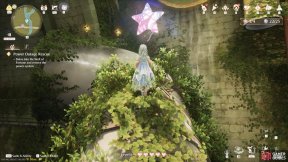
313. Miraland Map
![]() Well of Fortune. In the area with the giant lily pad. Ride the lily pad for a bit, then jump onto the platform on the left. Go up the tree trunk to reach this star.
Well of Fortune. In the area with the giant lily pad. Ride the lily pad for a bit, then jump onto the platform on the left. Go up the tree trunk to reach this star.
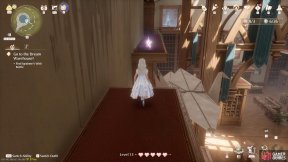
314. Miraland Map
![]() Dream Warehouse Rooftop. In the entrance area. Along the left side of the room, on the highest level.
Dream Warehouse Rooftop. In the entrance area. Along the left side of the room, on the highest level.
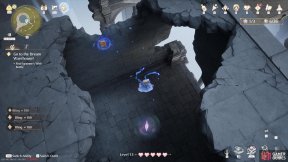
315. Miraland Map
![]() Dream Warehouse Rooftop. In the second area, the Reception Room Back Window. After riding the first platform and jumping across the gap, turn right and ride the platform. The
Dream Warehouse Rooftop. In the second area, the Reception Room Back Window. After riding the first platform and jumping across the gap, turn right and ride the platform. The ![]() Whimstar is inside a broken tower up ahead.
Whimstar is inside a broken tower up ahead.
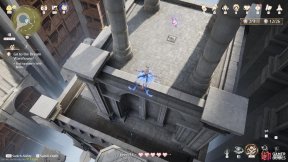
316. Miraland Map
![]() Dream Warehouse Rooftop. After reaching the “After the Corner” checkpoint. Partway through, there’s an elevator lift on the left. After riding it, jump across several paper cranes to find this
Dream Warehouse Rooftop. After reaching the “After the Corner” checkpoint. Partway through, there’s an elevator lift on the left. After riding it, jump across several paper cranes to find this ![]() Whimstar at the top.
Whimstar at the top.
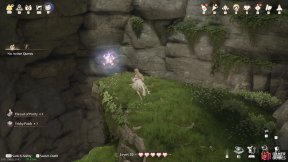
317. Miraland Map
Inside ![]() Warehouse Cavern. At the highest point. You can jump up from
Warehouse Cavern. At the highest point. You can jump up from ![]() Emerald Pond.
Emerald Pond.

318. Miraland Map
The ruins at the start of the game. Automatically acquired after investigating the vines.
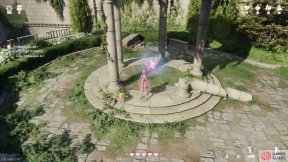
319. Miraland Map
The ruins at the start of the game. On the ground to the left after jumping across.
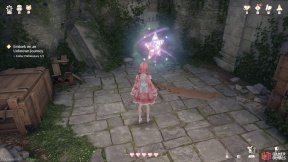
320. Miraland Map
The ruins at the start of the game. At the end of the left-hand side path. Use a jumping attack to break the wooden boards and enter the small area underneath.
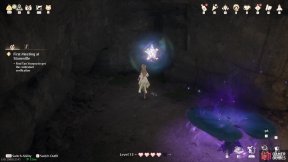
321. Miraland Map
Inside ![]() Stoneville Outskirts Cavern. In the second area where you need to jump up some more stonetrees, look for a hole in the ground in the corner, where a torch is. This
Stoneville Outskirts Cavern. In the second area where you need to jump up some more stonetrees, look for a hole in the ground in the corner, where a torch is. This ![]() Whimstar is at the bottom. There’s a leaf trampoline so you can get back up.
Whimstar is at the bottom. There’s a leaf trampoline so you can get back up.
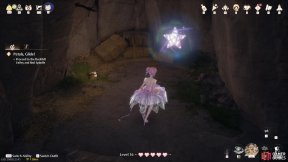
322. Miraland Map
![]() Golden Fields Cavern. Near the top level, where the group of Esselings is. In a nearby alcove.
Golden Fields Cavern. Near the top level, where the group of Esselings is. In a nearby alcove.
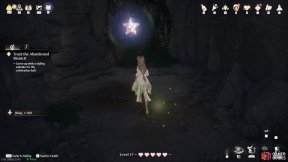
323. Miraland Map
Inside ![]() Ripple Estate Cliffside Cavern. After gliding up from the air-blowing plant, turn left and turn left again.
Ripple Estate Cliffside Cavern. After gliding up from the air-blowing plant, turn left and turn left again.
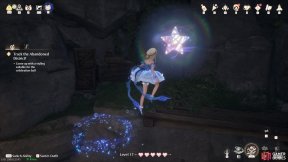
324. Miraland Map
Inside ![]() Estate Roadside Cavern. After defeating the first few Esselings, there’s a point you need to drop down, with a treasure chest and two Esselings below. In the next area, the
Estate Roadside Cavern. After defeating the first few Esselings, there’s a point you need to drop down, with a treasure chest and two Esselings below. In the next area, the ![]() Whimstar is on a ledge at the top.
Whimstar is on a ledge at the top.
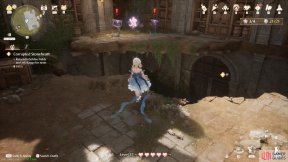
325. Miraland Map
Inside the Ripple Wine Cellar. Near the beginning. Just before the first checkpoint, in the room with a stream in the middle, check the far left corner for an entrance above the barrels. In the next area, this star is across the gap, with two Esselings nearby.
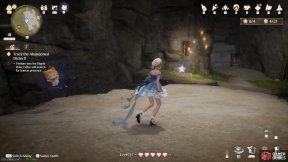
326. Miraland Map
Inside the Ripple Wine Cellar. After the first checkpoint, Transport Path, begin riding the platform train. Then jump and enter the nearby tunnel on the right. This star is near the tunnel’s exit.
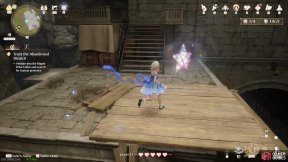
327. Miraland Map
Inside the Ripple Wine Cellar. After the second checkpoint, Reserve Vault. In the area with barrels rolling in a line. Where there’s three lines of barrels, ride the third line towards the end. Next, jump back towards the first line. Follow the path to find this star.
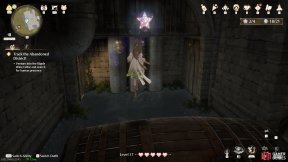
328. Miraland Map
Inside the Ripple Wine Cellar. Before the big staircase, in the area with multiple big barrels that you can roll. Enter the tunnel on the right. This star is at the end, with an Esseling nearby.
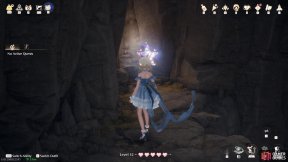
329. Miraland Map
Inside ![]() Stellar Fishing Ground Cavern. In the initial area with the air-blowing plant, enter via one of the two lower entrances. In the next tunnel area, jump across the ledges where the
Stellar Fishing Ground Cavern. In the initial area with the air-blowing plant, enter via one of the two lower entrances. In the next tunnel area, jump across the ledges where the ![]() Bling is. This
Bling is. This ![]() Whimstar is on the opposite side of the final ledge.
Whimstar is on the opposite side of the final ledge.
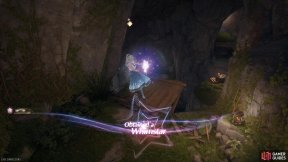
330. Miraland Map
Inside ![]() Market of Mirth Cavern. Halfway through, there’s a section where you jump up some ledges. At the top, there’s an exit leading to an air-blowing plant. Instead, continue left to a different area. Keep going to the end, where there’s a spore held by an Esseling. Release the spore and it’ll grow into an air-blowing plant. Ride the air current to a ledge where this
Market of Mirth Cavern. Halfway through, there’s a section where you jump up some ledges. At the top, there’s an exit leading to an air-blowing plant. Instead, continue left to a different area. Keep going to the end, where there’s a spore held by an Esseling. Release the spore and it’ll grow into an air-blowing plant. Ride the air current to a ledge where this ![]() Whimstar is found.
Whimstar is found.
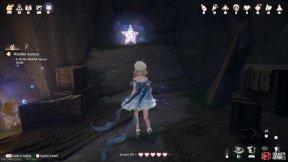
331. Miraland Map
Inside ![]() Market of Mirth Entrance Cavern. In the initial area, enter the entrance just below the north entrance to this cavern–the one blocked by wooden crates (destroy them with a jumping attack). Carefully jump/float across the wooden beams to find this star at the end.
Market of Mirth Entrance Cavern. In the initial area, enter the entrance just below the north entrance to this cavern–the one blocked by wooden crates (destroy them with a jumping attack). Carefully jump/float across the wooden beams to find this star at the end.
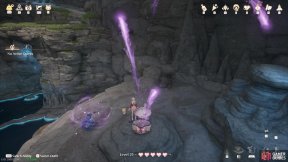
332. Miraland Map
Inside ![]() Campsite Cavern. Near the stepping stone bridge (and the photo spot). If you came from the left path, jump up to higher ground after crossing the bridge. If you came from the right path, it’s just before the slope going down. Open the glowing treasure chest and defeat the Esselings that spawn.
Campsite Cavern. Near the stepping stone bridge (and the photo spot). If you came from the left path, jump up to higher ground after crossing the bridge. If you came from the right path, it’s just before the slope going down. Open the glowing treasure chest and defeat the Esselings that spawn.

333. Miraland Map
Inside ![]() Choo-Choo Station Cavern. After the second set of wind circles (well, just one circle), there’s a group of Esselings including one protecting a spore. Release the spore, so it grows into an air-blowing plant. Then ride the air current up. Turn around and this
Choo-Choo Station Cavern. After the second set of wind circles (well, just one circle), there’s a group of Esselings including one protecting a spore. Release the spore, so it grows into an air-blowing plant. Then ride the air current up. Turn around and this ![]() Whimstar is at the back, guarded by more Esselings.
Whimstar is at the back, guarded by more Esselings.
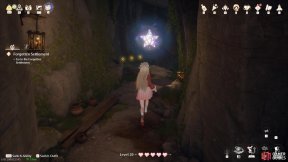
334. Miraland Map
Inside ![]() Prosperville Cavern. At the endpoint. But it’s a short cavern; may take you around 30 seconds to reach from the entrance.
Prosperville Cavern. At the endpoint. But it’s a short cavern; may take you around 30 seconds to reach from the entrance.
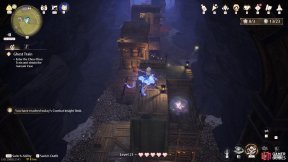
335. Miraland Map
Inside the ![]() Ghost Train. When you reach the Heavy-Duty Flatbed checkpoint. Jump up to the top of the boxes straight ahead, then turn around and go across the wooden plank. This
Ghost Train. When you reach the Heavy-Duty Flatbed checkpoint. Jump up to the top of the boxes straight ahead, then turn around and go across the wooden plank. This ![]() Whimstar is one hop to the right, near an Esseling.
Whimstar is one hop to the right, near an Esseling.
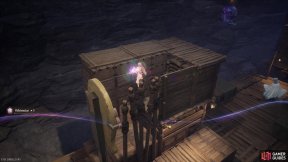
336. Miraland Map
Inside the ![]() Ghost Train. Just before the 2nd checkpoint, there’s a wooden ghost jump scare. Wait for the wooden ghost to go down, then go around the back to find this
Ghost Train. Just before the 2nd checkpoint, there’s a wooden ghost jump scare. Wait for the wooden ghost to go down, then go around the back to find this ![]() Whimstar.
Whimstar.
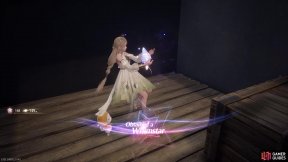
337. Miraland Map
Inside the ![]() Ghost Train. After the 2nd checkpoint, Shipping Boxcar. Near the end of the section where you’re on top of the train carriages with flaming rods in the way. Use a jumping attack to break the wooden board on the carriage roof and reach this final star.
Ghost Train. After the 2nd checkpoint, Shipping Boxcar. Near the end of the section where you’re on top of the train carriages with flaming rods in the way. Use a jumping attack to break the wooden board on the carriage roof and reach this final star.

340. Miraland Map
You can purchase up to 8 ![]() Whimstars from
Whimstars from ![]() Stray Hatty.
Stray Hatty.
The cost increases immensely for each subsequent star:
- 10,000
 Bling
Bling - 100,000 Bling
- 200,000 Bling
- 300,000 Bling
- 500,000 Bling
- 1,000,000 Bling
- 2,000,000 Bling
- 3,000,000 Bling
These Whimstars count towards the tally for ![]() Florawish.
Florawish.
However, there are numerous things that require Bling, such as the ![]() Surprise-O-Matic, so we recommend saving the final stars for much later.
Surprise-O-Matic, so we recommend saving the final stars for much later.
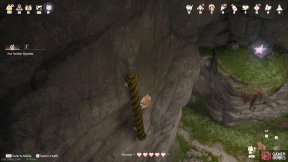
341. Miraland Map
Inside ![]() Deep Swordsmith Ruins Cavern. Area to the left. Jump from rope to rope as Momo to reach the
Deep Swordsmith Ruins Cavern. Area to the left. Jump from rope to rope as Momo to reach the ![]() Whimstar atop a ledge. Can be tricky. Actually, you can skip the whole thing by returning to Nikki after climbing the first rope, then floating left.
Whimstar atop a ledge. Can be tricky. Actually, you can skip the whole thing by returning to Nikki after climbing the first rope, then floating left.
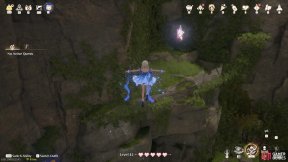
342. Miraland Map
Inside ![]() Inspection Center Cavern. Just before the endpoint. In a room with three crates, at a high up ledge. Move one of the crates to the lower ledge, then jump up from there.
Inspection Center Cavern. Just before the endpoint. In a room with three crates, at a high up ledge. Move one of the crates to the lower ledge, then jump up from there.
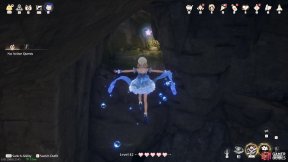
343. Miraland Map
Inside ![]() Volunteer Corps Camp Cavern. After dropping down, you need to jump across the water. Ahead, there’s a Lonely Sack (carrying a shield). The
Volunteer Corps Camp Cavern. After dropping down, you need to jump across the water. Ahead, there’s a Lonely Sack (carrying a shield). The ![]() Whimstar can be found at the end of the path to the left.
Whimstar can be found at the end of the path to the left.
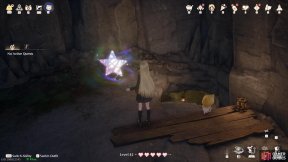
344. Miraland Map
Inside ![]() Windrider Mill Cavern. At the endpoint. Shouldn’t take more than a few minutes to reach.
Windrider Mill Cavern. At the endpoint. Shouldn’t take more than a few minutes to reach.
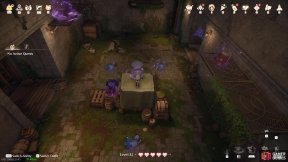
345. Miraland Map
Inside ![]() Small Stonetree Cavern. Room to the right of the chair. Open the glowing treasure chest and vanquish the Esselings.
Small Stonetree Cavern. Room to the right of the chair. Open the glowing treasure chest and vanquish the Esselings.
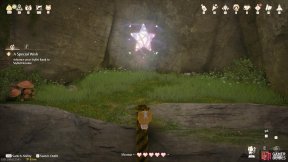
346. Miraland Map
Inside ![]() Waterfall Cavern. At the tall cave, when you’re near the top, keep left. Defeat the Esselings along the way. At the end, lure the Pounceria plant as Momo, jump on its head and leap to the rope to reach the
Waterfall Cavern. At the tall cave, when you’re near the top, keep left. Defeat the Esselings along the way. At the end, lure the Pounceria plant as Momo, jump on its head and leap to the rope to reach the ![]() Whimstar.
Whimstar.
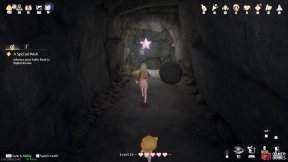
347. Miraland Map
Inside ![]() Deep Aurosa Valley Cavern. After the section with tall platforms above a pool of water, at the end of a tunnel on the left. There are some boulders that you can push nearby to create a shortcut back to the entrance.
Deep Aurosa Valley Cavern. After the section with tall platforms above a pool of water, at the end of a tunnel on the left. There are some boulders that you can push nearby to create a shortcut back to the entrance.
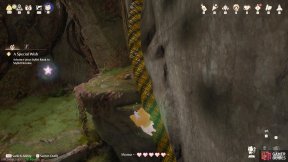
348. Miraland Map
Inside ![]() Farm Cavern. Deep inside, in a section with wishnets and ropes above some water. Waiting for you at the end of this section.
Farm Cavern. Deep inside, in a section with wishnets and ropes above some water. Waiting for you at the end of this section.
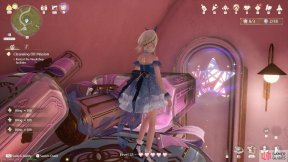
350. Miraland Map
Inside ![]() Timis’s Beauty Lab. At the end of the first area, use a jumping attack to break the wooden floor board. Down below, jump up to the other side to find this star.
Timis’s Beauty Lab. At the end of the first area, use a jumping attack to break the wooden floor board. Down below, jump up to the other side to find this star.
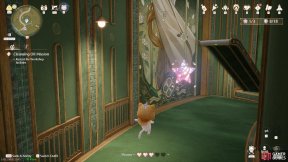
351. Miraland Map
Inside ![]() Timis’s Beauty Lab. At the 2nd area, Aroma Extraction Room. Near the end, there’s a square shaped hole on the floor. Drop down and use the speed-boosting conveyor belt to reach the star. You’ll need to double jump.
Timis’s Beauty Lab. At the 2nd area, Aroma Extraction Room. Near the end, there’s a square shaped hole on the floor. Drop down and use the speed-boosting conveyor belt to reach the star. You’ll need to double jump.
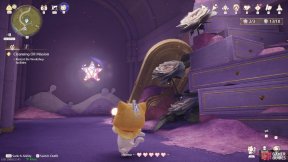
352. Miraland Map
Inside ![]() Timis’s Beauty Lab. At the 3rd area, Cosmetic Assembly Line. Around the halfway point, you can drop down on the left. Keep going and you’ll find this star at the end, on the left.
Timis’s Beauty Lab. At the 3rd area, Cosmetic Assembly Line. Around the halfway point, you can drop down on the left. Keep going and you’ll find this star at the end, on the left.
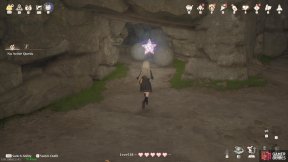
353. Miraland Map
Inside ![]() Field Base Cavern. Go along the sloped path on the right-hand side. Head through the entrance with the
Field Base Cavern. Go along the sloped path on the right-hand side. Head through the entrance with the ![]() Bling. After pushing through some Esselings, there are some boulders. Push them over the ledge, them follow them to the
Bling. After pushing through some Esselings, there are some boulders. Push them over the ledge, them follow them to the ![]() Whimstar.
Whimstar.
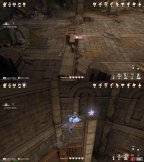
354. Miraland Map
Inside ![]() Forest Cavern. In the 2nd area, accessible by jumping to the small ledge with
Forest Cavern. In the 2nd area, accessible by jumping to the small ledge with ![]() Bling near the treasure chest/first dew. Floating atop the tallest pillar. Move the crate towards the end of the fallen pillar on the right. Then jump from the top of the crate to the lowest pillar. Then keep jumping from there.
Bling near the treasure chest/first dew. Floating atop the tallest pillar. Move the crate towards the end of the fallen pillar on the right. Then jump from the top of the crate to the lowest pillar. Then keep jumping from there.

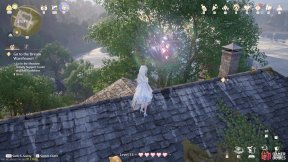
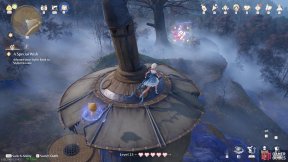
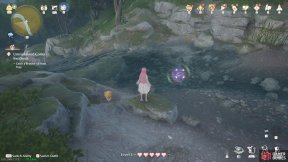
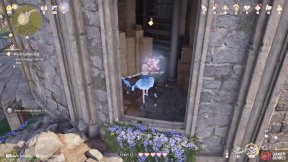
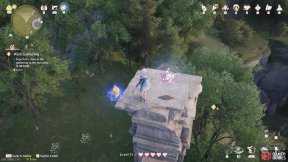
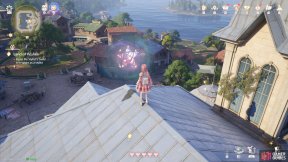
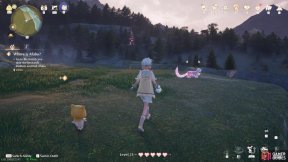
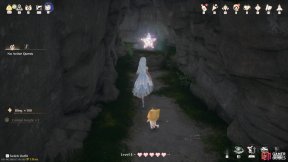
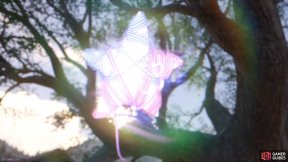
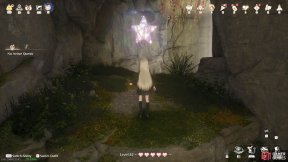
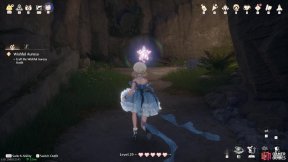
 Sign up
No Comments