Waves 1 - 10
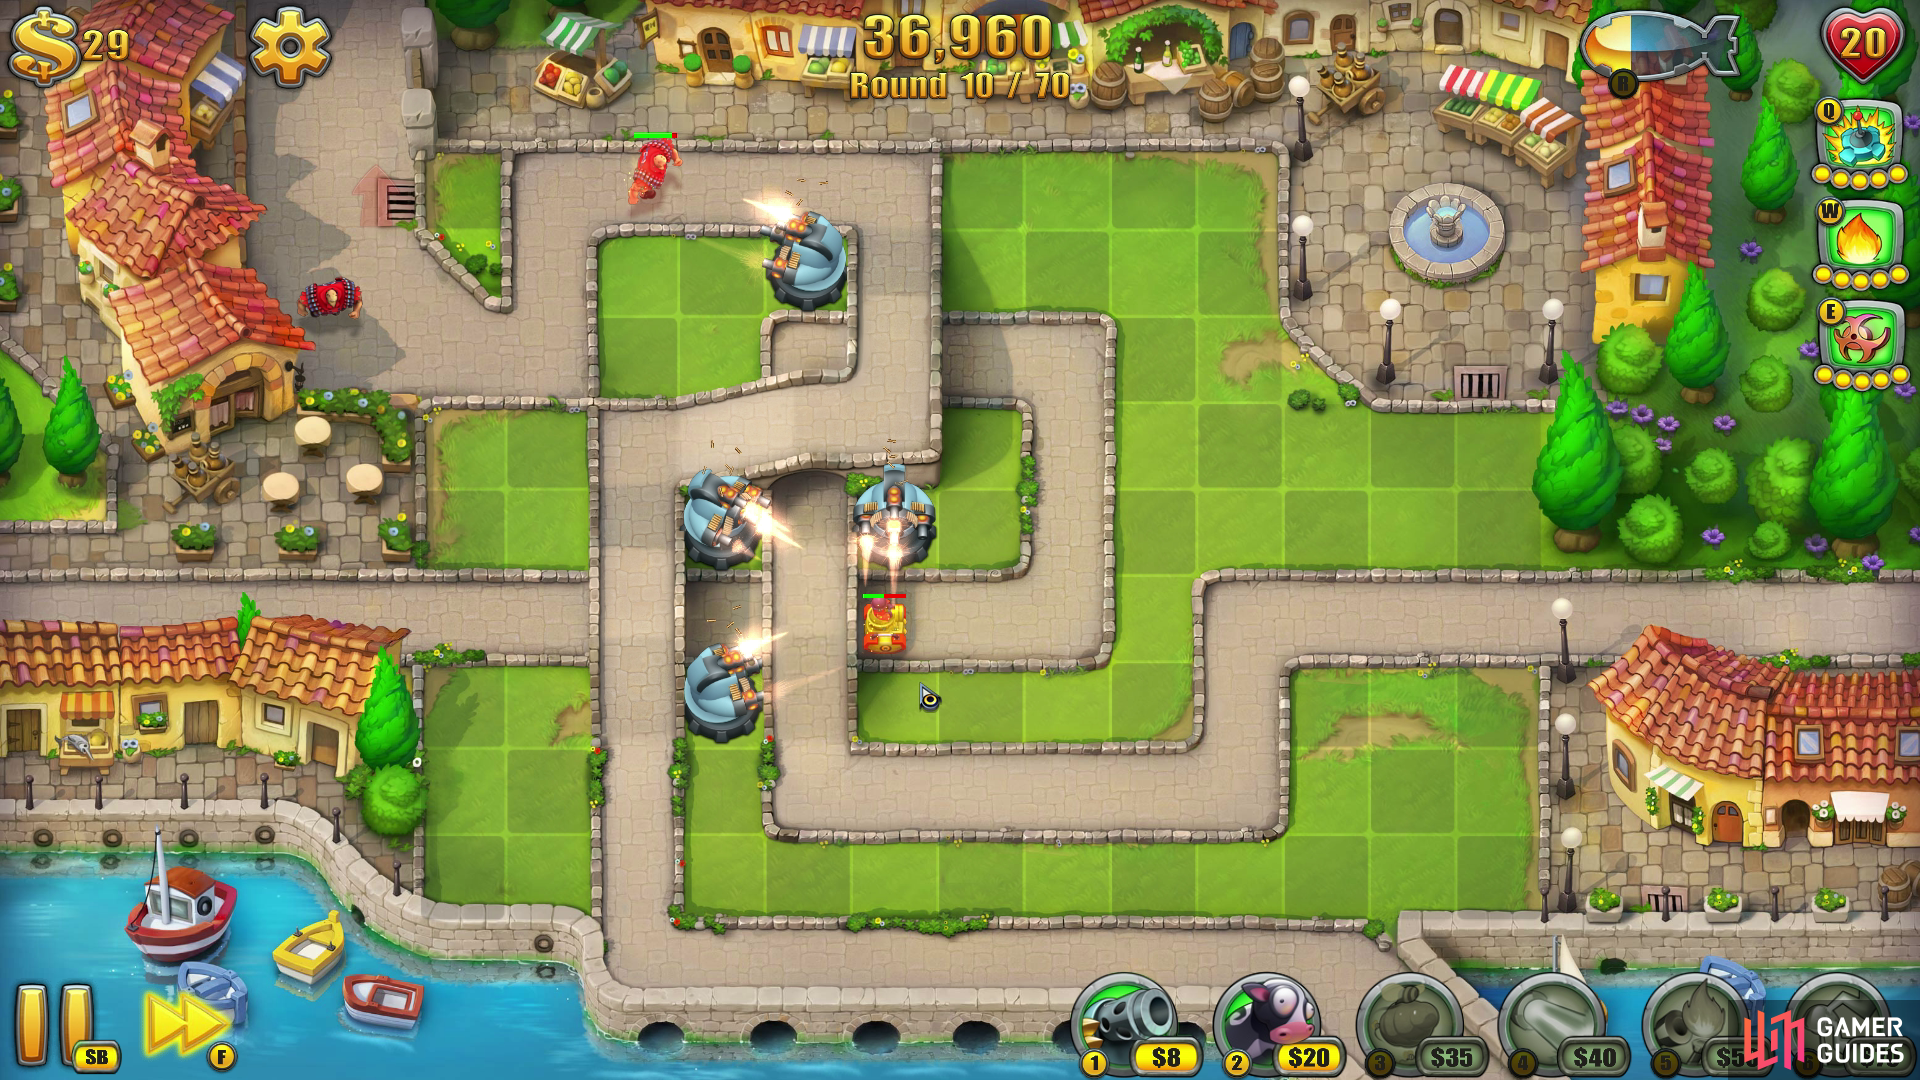
Covering the overlapping pathways is critical to success on this map.
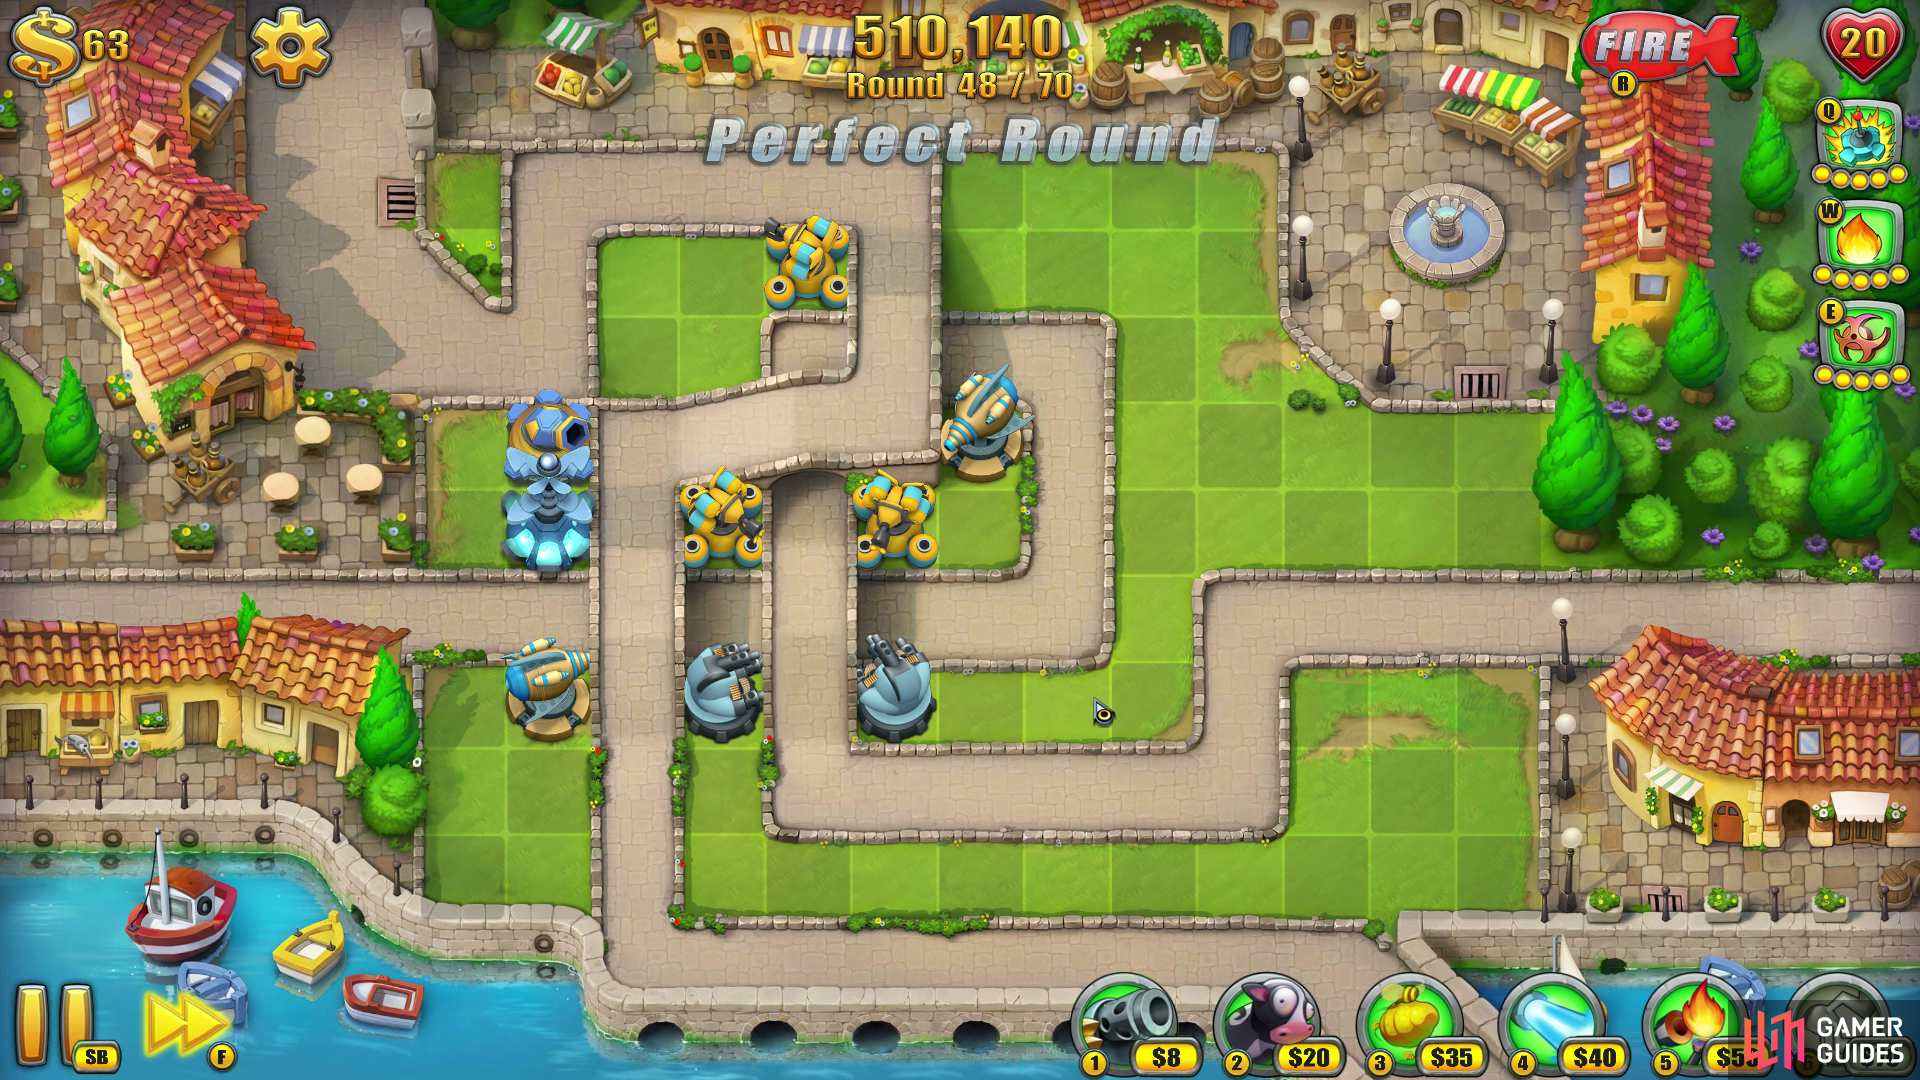
– Lay your first Gun Tower in the single grid square that’s in the middle of the looping pathways. This spot is your key tower location for the map. Upgrade this gun as a priority.
– You’ll now want to lay your next three Gun Towers so they’re covering all parts of the central looping system (see screenshot above).
Waves 11 - 20
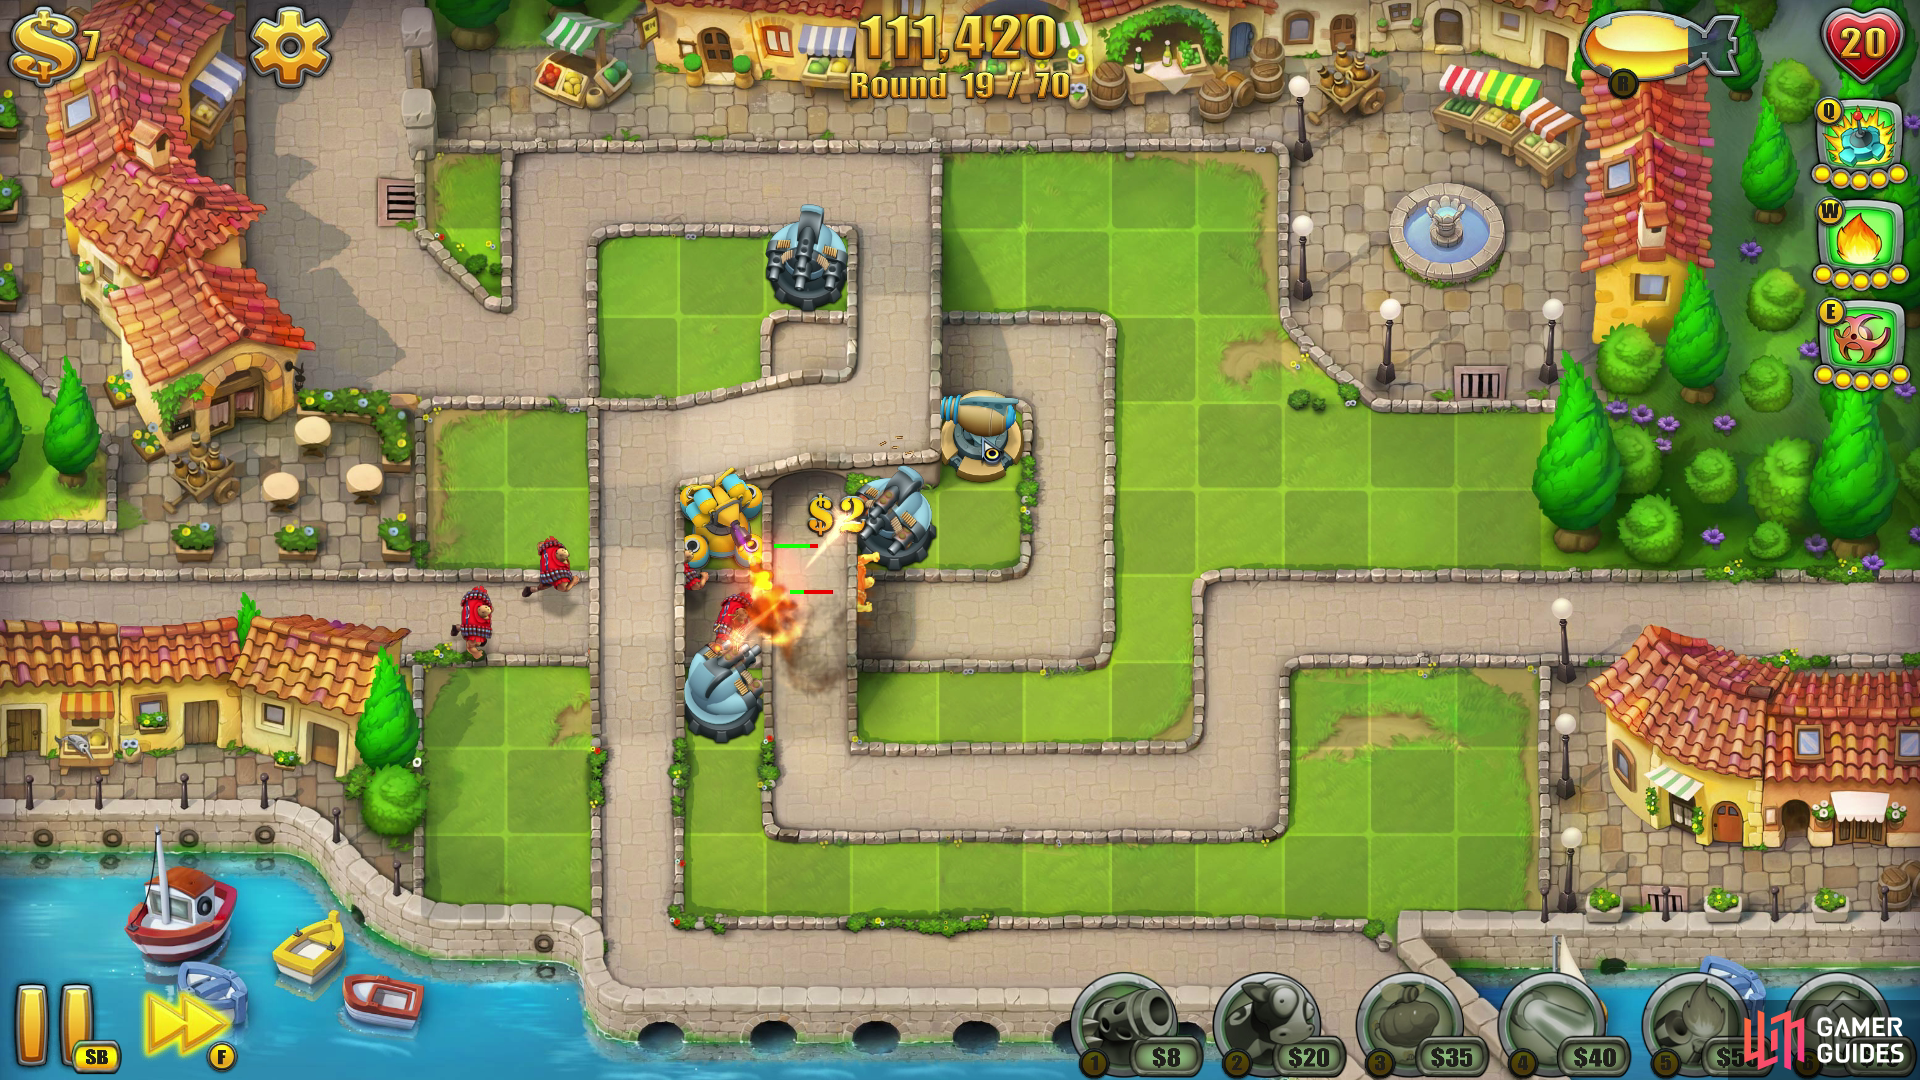
Make sure you cover the key pathway twists and turns.
– Once you’ve got $38, sell the Gun Tower from the middle and put a Flamethrower Tower in its place.
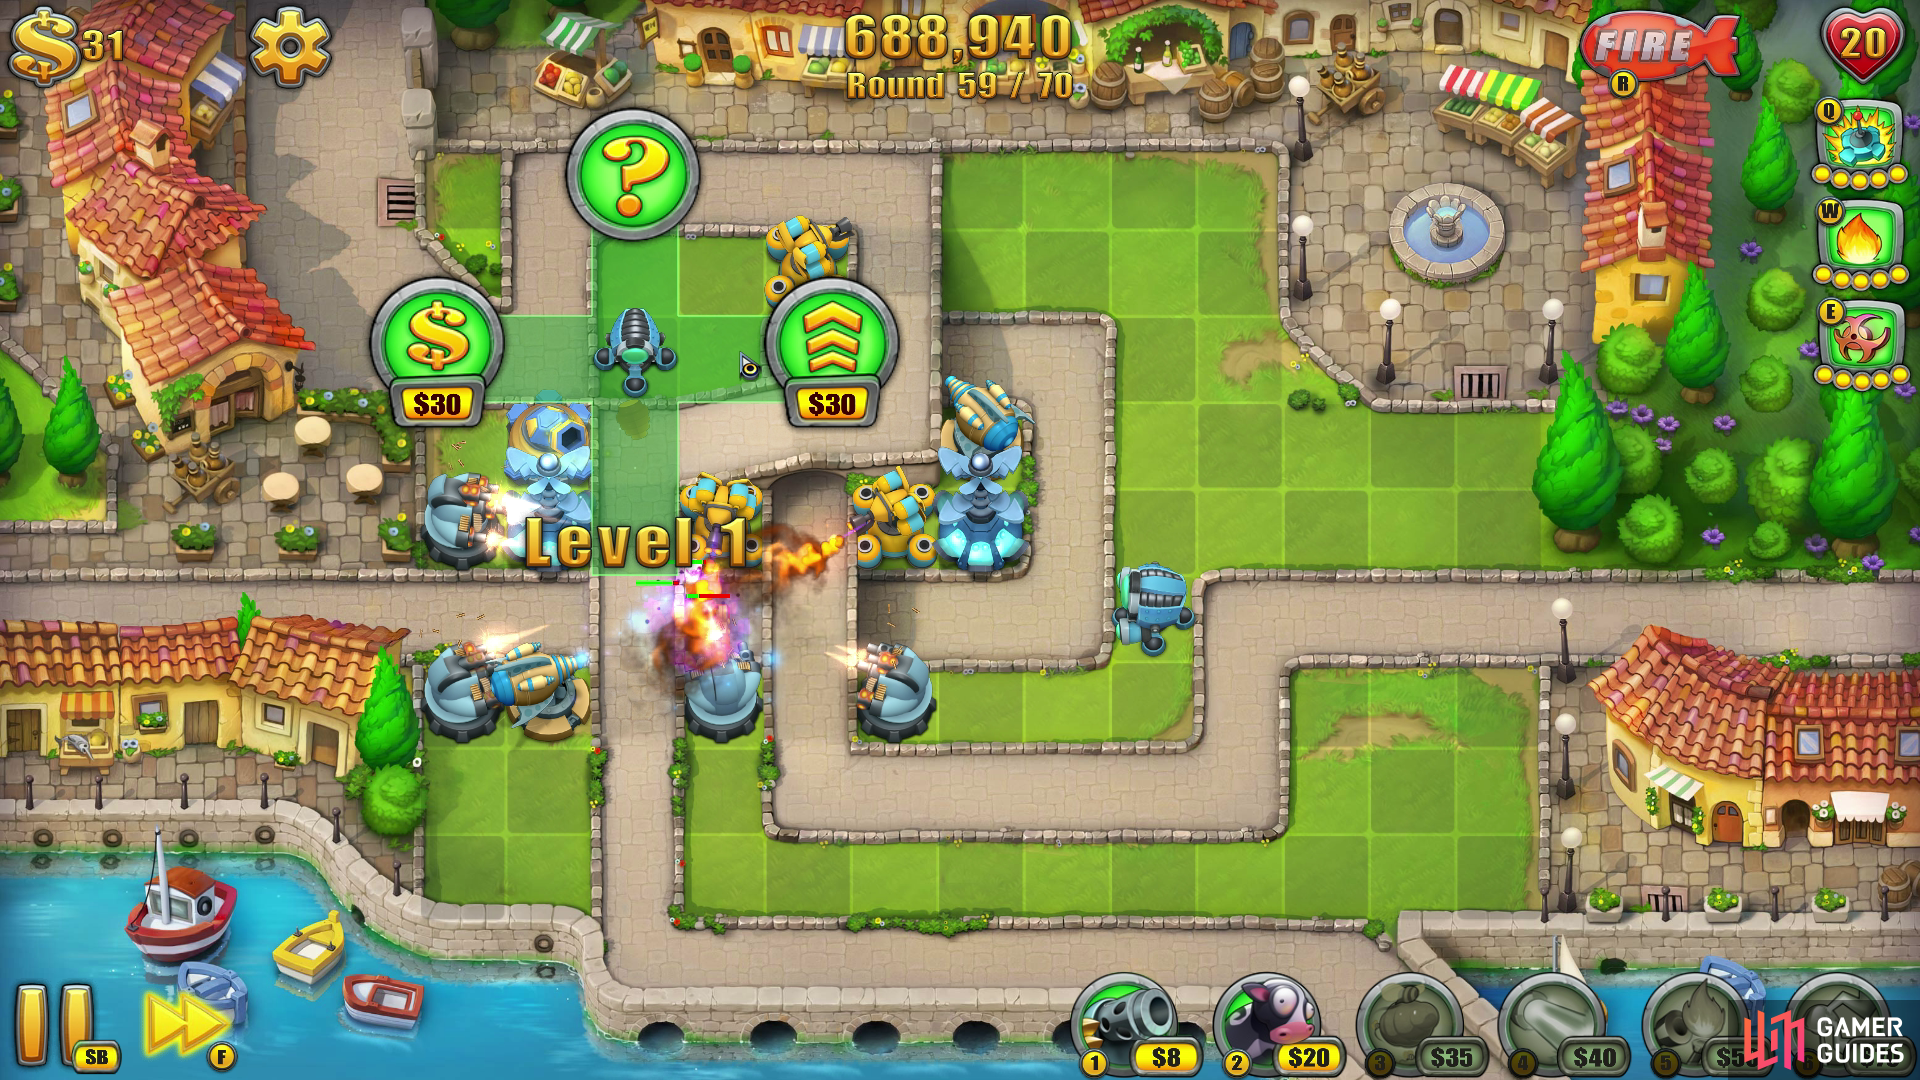
– Next, focus on upgrading this Flamethrower Tower and once you reach level 3, drop a Slow Tower on the corner of the bridge and pathway (see screenshot above).
Waves 21 - 30
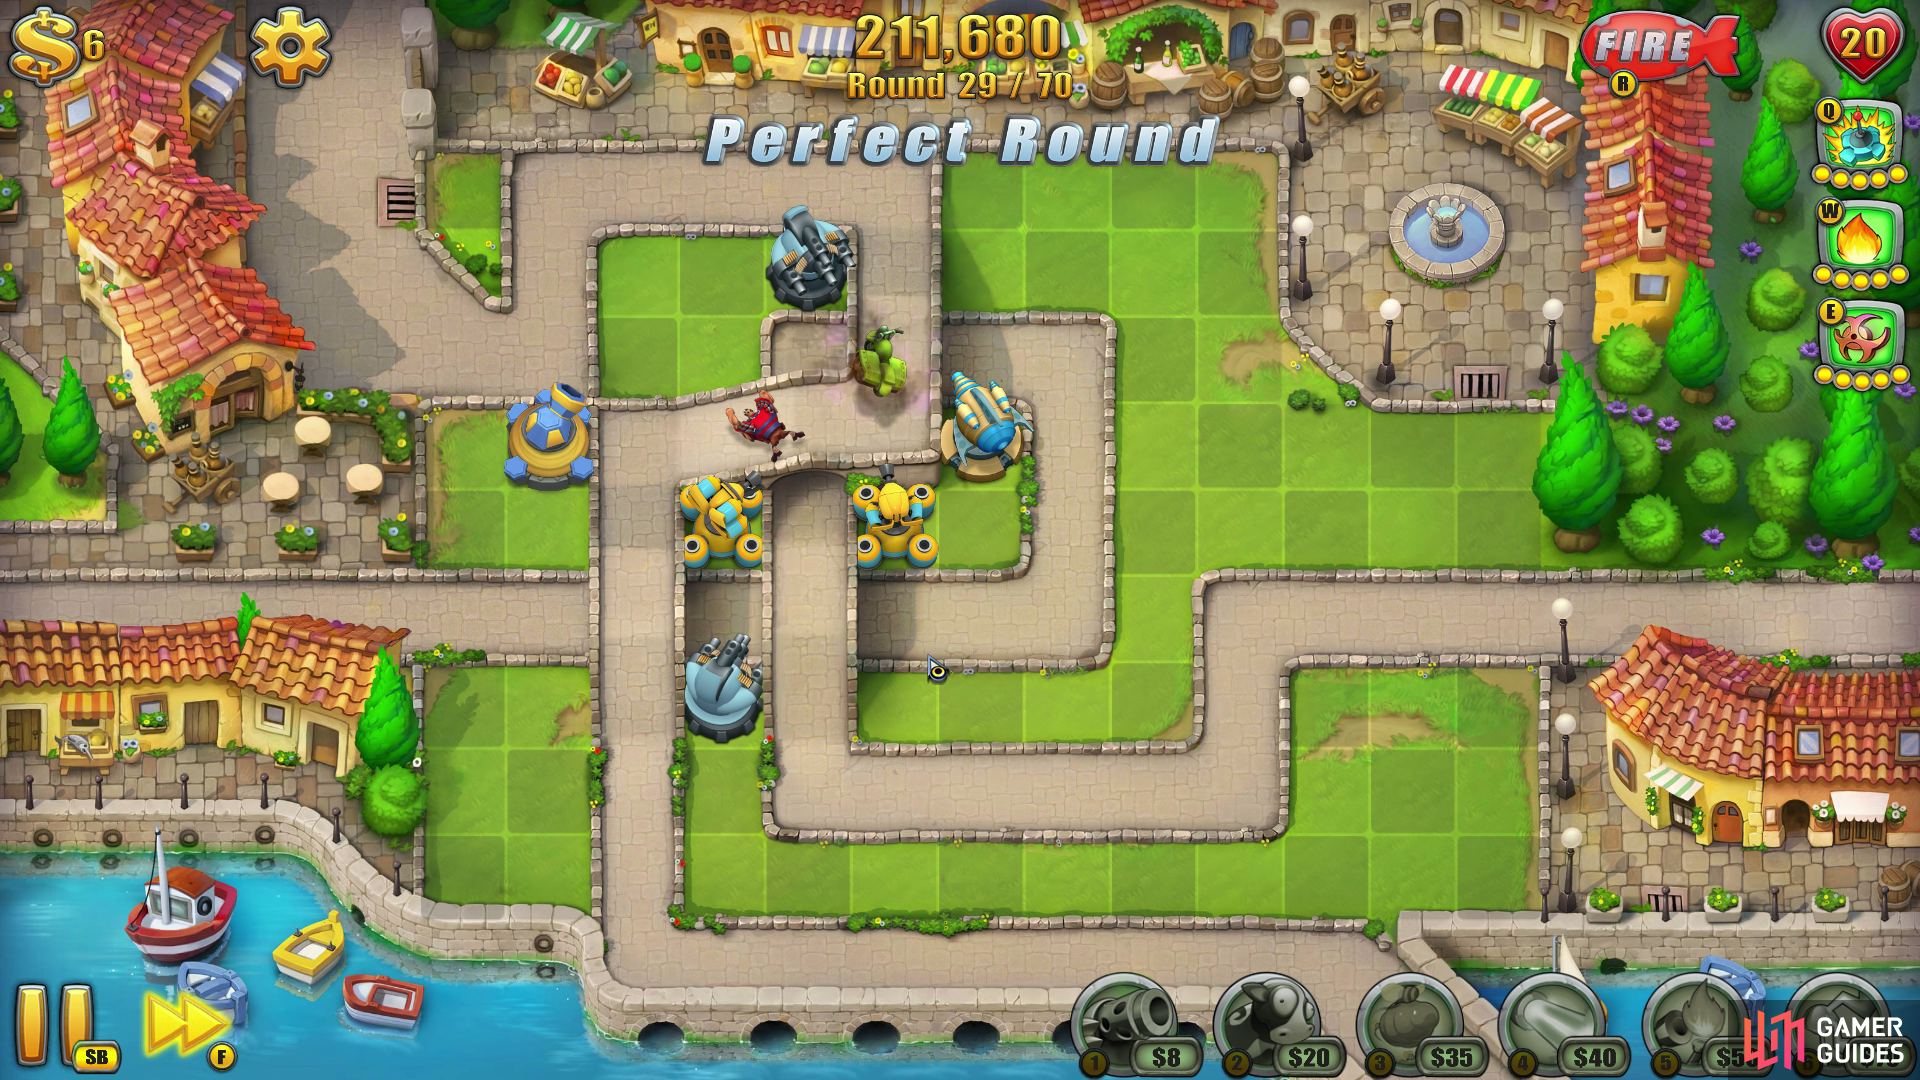
The Hive Tower will soften up any Fieldrunners that show up from either entrance.
– Once all of these existing towers have been fully upgraded, save up for a Hive Tower and plonk it down on the top right-hand corner of the 4-squares that’s near both entrances.
Waves 31 - 40
Placing a Slow Tower of your choice at the location above will provide maximum effect.
– These 10 waves are about sitting tight and letting your cash build up so can buy a Tesla Tower and place it directly below the Hive Tower. This will take care of all plane-related attacks that only come from the left entrance.
Waves 41 - 50
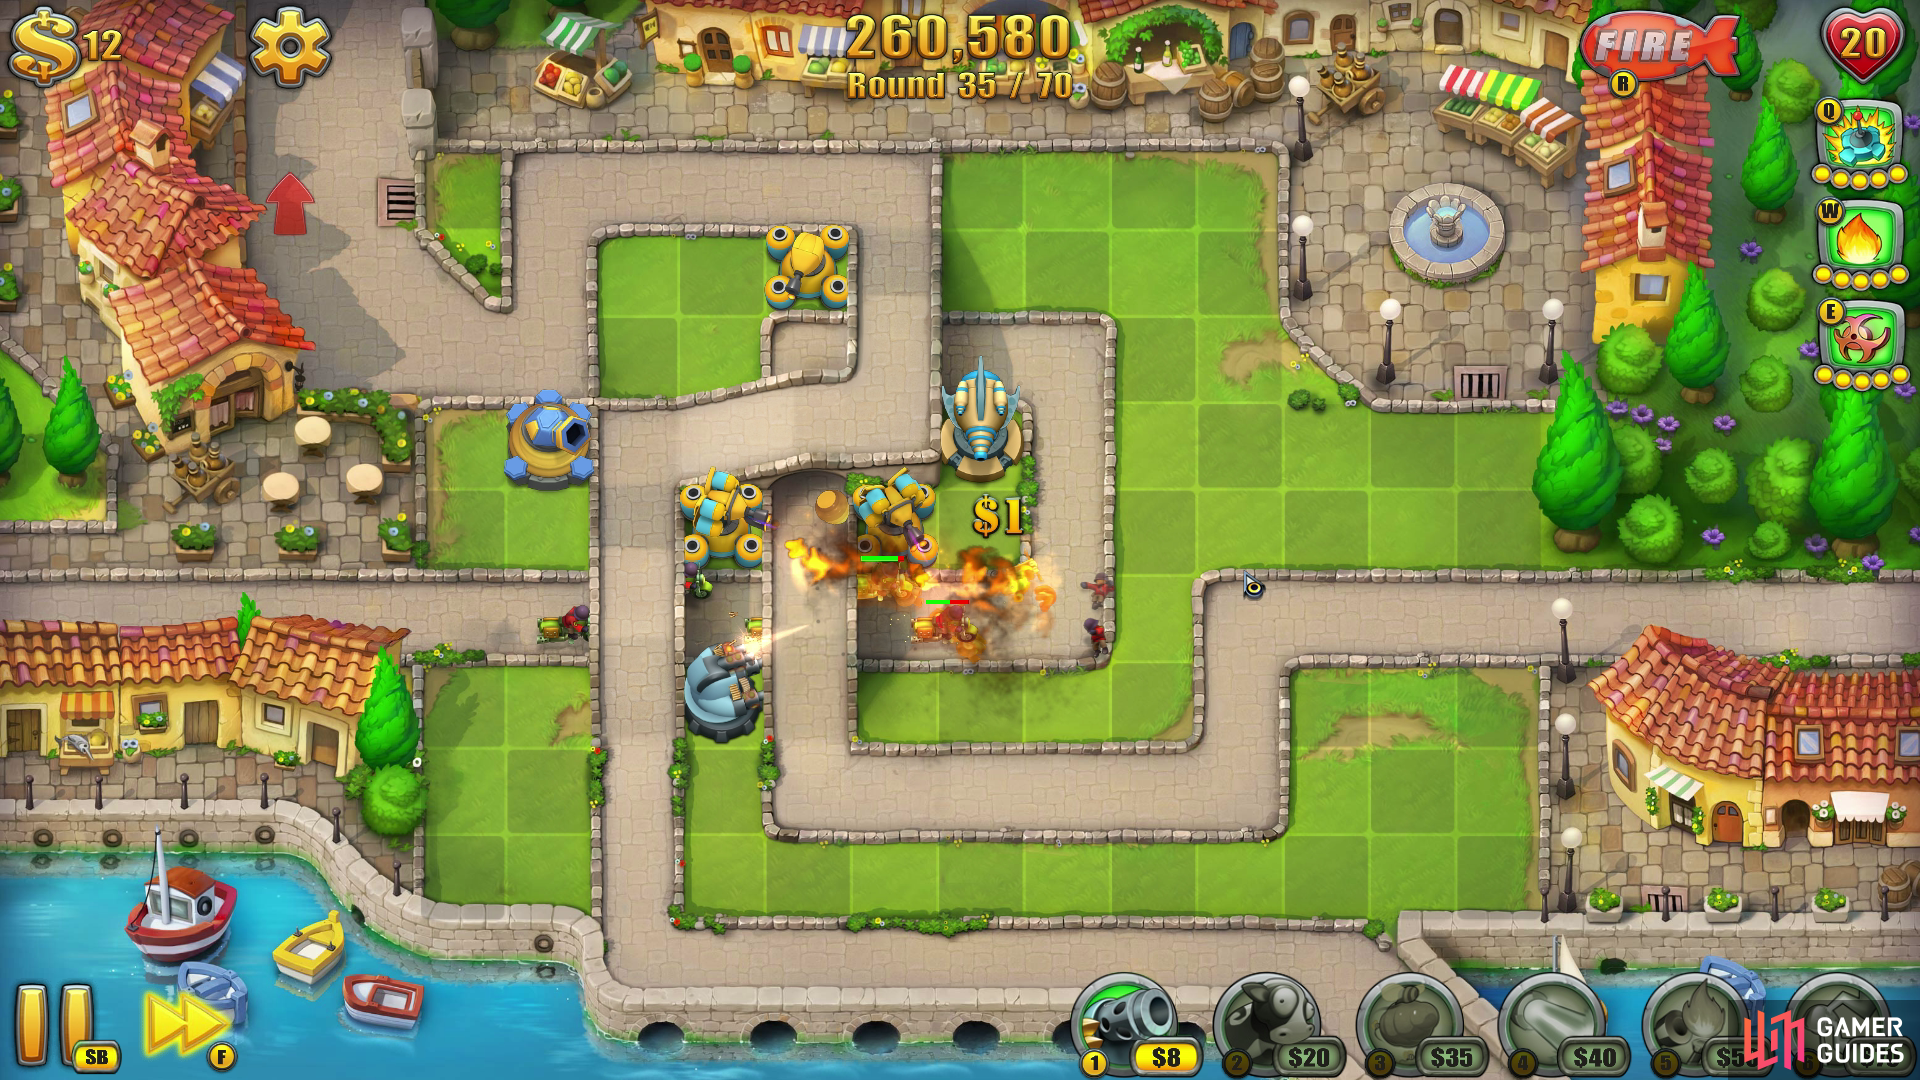
Tesla Towers will make short work of all aircraft that turn up (of which there’ll be plenty).
– Stick another Slow Tower on the 6-square grid of grass that’s beside the left entrance. This’ll help make the Tesla Tower’s job a lot easier.
– Upgrade the Gun Tower that’s to the right of the Flamethrower Tower into another Flamethrower Tower, so both of them are covering the central area well.
– Place a Tesla Tower beside this new Flamethrower Tower.
Waves 51 - 60
At this point, your map is pretty secure, so further towers will only strengthen this position.
– Upgrade the northernmost Gun Tower into a Flamethrower Tower and upgrade it to level 3.
– Place a Laser Tower at the end of the left-hand entrance and upgrade this ASAP.
Waves 61 - 70
If you’re not going for endless mode, then feel free to use your Airstrike as you see fit.
– Your defences are now impenetrable for the remaining waves, so feel free to add more towers how you wish.
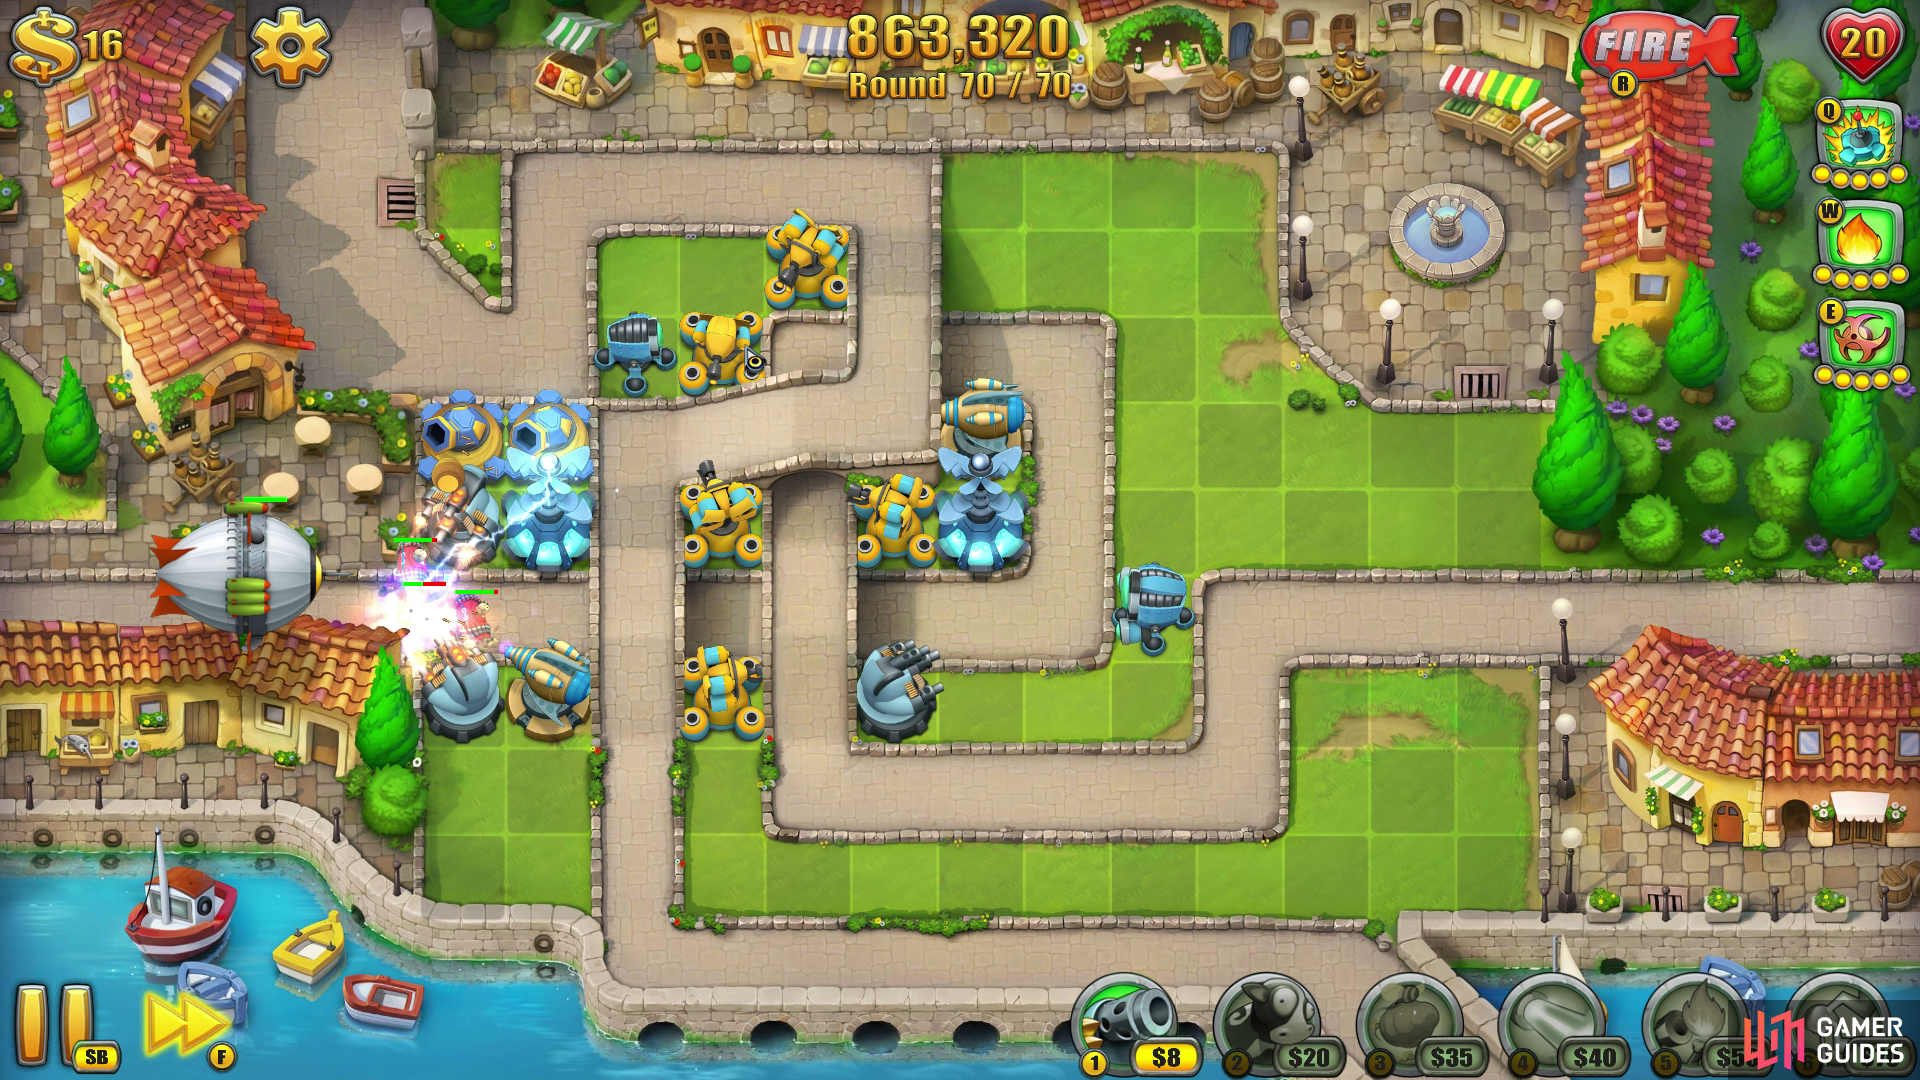
– If you’re going to play Endless Mode, then placing a Laser Tower as seen in the screenshot above will minimise the chances of enemies sneaking out that exit.

 Sign up
No Comments