Collector
The Morbid Urn is a Bazaar item that is unlocked when you sell three specific pieces of loot to any merchant. These three pieces of loot are the Phobos Glaze, Horakhty’s Flame and Deimos Clay, with all three being rewarded to you upon finishing certain Hunts. The Phobos Glaze is gotten from the Gil Snapper hunt, the Horakhty’s Flame from the Orthros hunt and the Deimos Clay from the Trickster hunt. Once you have all three, sell them to a merchant to unlock the Bazaar item and purchase it for 250,000 gil to unlock the trophy.
Cartographer
Yet another trophy that has a misleading description, as you simply need to set foot in every zone in any given area. However, there are a few exceptions that are exempt from this, such as one-off areas like the Dreadnought Leviathan or Rabanastre Palace. Some areas like The Great Crystal also don’t count, as there is no actual map of the place in-game. Basically, if you can’t return to the place in the game after finishing it or see a map available, then it shouldn’t count. One of the easiest ways to keep track of the individual zones is by procuring the maps for each area, which can either be bought from certain Moogles in towns/safe areas or found in green urns. These maps will show all zones on your maps now, but they will be darkened, with them becoming highlight as you explore. You do not need to explore every single inch of every zone, as long as you have set foot in them.
There are a few trouble spots that might be forgotten about or skipped over when going over the maps. One such example is Kaff Terrace in Bhujerba, which is the southeastern zone and one you never really visit at all. Another area is in Archades where you require the Sandalwood Chop, which needs all 28 Pinewood Chops (there are two zones in that area). The Subterra in Pharos also counts, as well as the Hall of the Wroth God in Sochen Cave Palace, which is where you fight the Hell Wyrm. There is also Site 6 North in Lhusu Mines, an area that is accessible from a hidden path from Site 6 South.
Mist Walker
Concurrences are the special animations that play out sometimes after you do a Quickening Chain. In order to trigger a Concurrence, you need to perform a certain number of Quickenings during a single chain. There’s a total of eight Concurrences and each one requires a specific number of level 1/2/3 Quickenings. First and foremost, you’re going to need to purchase the Quickening licenses on your characters’ boards. Once you have three for each one, try to find an area that has enemies close to a Save Crystal, as touching them will replenish your Mist Charges (what’s needed to use Quickenings in the first place).
Find an enemy and trigger a Quickening, noting that you should always aim for the hardest Concurrence and work from there. That means you will want to start with a Level 3 Quickening (unless you’re going for a specific one). When you do this, you will see your character names, button prompts next to them and the names of other Quickenings; there is also a timer below this that will begin at four seconds. If the name of the Quickening is there and lit up, then press the corresponding button to trigger another Quickening to occur after the first is finished. If all of the names are darkened, then you will need to press R2 to shuffle them and should a Mist Charge appear next to someone, press their button twice (quickly) to use another Quickening.
| Concurrence | Mist Charges Needed |
|---|---|
| Inferno | Level 1 (x3) |
| Cataclysm | Level 1 (x6) |
| Torrent | Level 1 (x2); Level 2 (x2) |
| Windburst | Level 2 (x4) |
| Ark Blast | Level 1 (x2); Level 2 (x2); Level 3 (x2) |
| Whiteout | Level 3 (x4) |
| Luminescence | Level 1 (x3); Level 2 (x3); Level 3 (x3) |
| Black Hole | Level 1 (x4); Level 2 (x4); Level 3 (x4) |
Eagle Eye
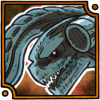
Deathgaze is a Hunt that unlocks after completing the story events in Giruvegan and requires you to at least be of the Riskbreaker rank for Clan Centurio. The name of the hunt is Visitor on Deck, but it’s also possible to fight Deathgaze in Trial 65 of Trial Mode, which can also net the trophy. If doing the hunt, then you’ll need to do a little extra leg work to get this monster to appear. After getting the hunt from a Notice Board, go to any aerodome and locate the family that petitioned the hunt. Talk to them to officially begin, then board a skyferry (leisure option).
There is a small chance that Deathgaze will appear on the deck on your first trip, so don’t be surprised if you don’t see it. Once you arrive at your destination, locate the traveler again and speak to him again, then ride another skyferry. Keep doing this over and over (the chances for Deathgaze to appear will increase with each subsequent trip) until you finally get the option to go onto the deck and fight Deathgaze.
As far as the fight goes, Deathgaze likes to use a number of status ailments, like Disease (normal attack or Curse), Sap (Scourge), and Poison (Bio). In addition to this, he can use Crushing Fangs to instantly KO a party member, use Reverse to make your physical attacks heal him, and put up a physical paling to make your physical attacks do no damage for two minutes. He can also heal himself with Restore. Deathgaze is weak to earth and absorbs wind, with all other elements doing normal damage. One easy way to finish this battle quickly is to cast Reverse on Deathgaze, then use Renew to reduce his HP to 1.
Wyrmslayer
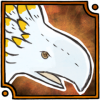
Fafnir can be encounter by either finding him in Trial 89 of Trial Mode or by doing the hunt name Wyrm Wrath’s Renewal. If you do the former, he can be killed instantly by equipping a Nihopalaoa on someone and having that character toss a Phoenix Down at him. The hunt for Fafnir is available after you finish up in Giruvegan and you will be speaking with Relj in Mt. Bur-Omisace to officially begin it. The only problem with Fafnir is that he only spawns during a snowstorm and entering Frozen Brook will change the weather, so you’ll need to go around that zone.
From Bur-Omisace, go to Freezing Gorge, then Head of the Silverflow, Icebound Flow, Karydine Glacier and Silverflow’s End. The battle against Fafnir goes through a couple of phases, all tied to the beast’s life. He’ll begin with normal attacks and Rake, then start using White Breath a little bit later, which is ice-elemental and can inflict Stop. He also has access to both Silencega and Sleepga, which he’ll use intermittently, as well as Shock at half health. At critical health, you will be seeing White Breath a lot more, as well as his regular attacks being chained. Fafnir is susceptible to Slow and Sap, weak to Thunder and naturally absorbs ice.
Sharpshooter
Trickster is an Elite Mark that can be fought in Trial 58 of Trial Mode or by accepting the hunt named Paramina Run from Montblanc in Clan Centurio. Once you speak with Gurdy, head to Frozen Brook in Paramina Rift to find Monid waiting for you, who will help with the fight. You may have to go in and out until you see Monid tell you that Trickster is there, as the Chocobo is not always present. When you do get the signal from Monid, it’s time to battle. The biggest problem with the Trickster is that it likes to run around a lot, plus it can become almost completely invisible.
That issue is why this can be one of the more annoying hunts, but don’t let its cutesy Chocobo features fool you, either, as it can prove to be very strong. Its normal attack can inflict Doom, plus it will start with Lunge and Wild Charge. Later on in the battle, it will switch out Wild Charge for Choco-Comet, as well as use White Wind, which will make it immune to ailments for two minutes. Even worse, it can erect a physical paling, meaning only magicks will work for a short time, but it absorbs all elements except for one. Once you hit it with its weak element, it will use Shift to change its weakness.
One of the easier ways to defeat Trickster is by putting to sleep (magick or Niho/Prince’s Kiss combo) before it gets the chance to use White Wind. Depending on where you’re at in the game, you may need to kill Monid and/or Larsa, as they will use physical attacks (Larsa can have his Gambits changed, though) and wake Trickster up. Using non-elemental magicks is the best way to go about this fight, especially when Trickster activates the physical paling. You really only have two choices of non-elemental magicks, though, at this point, which are Bio and Drain.
Freshmaker
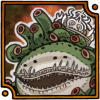
Carrot is a giant malboro that can be fought in either Trial 70 of Trial Mode or by accepting the hunt named Carrot Stalk after finishing the story events in Mt. Bur-Omisace. Once you accept the hunt from Montblanc and talk to Zammadria in the Nalbina aerodrome, you will need to head off to Salikawood. As mentioned in the game, Carrot is shy, meaning if you kill any enemies in the Salikawood before encountering Carrot, then you will not find her at all. That means you will either have to turn off all Gambits until you reach Sun-dappled Path or hold down the flee button until you get there.
You will find that this malboro can put up quite a challenge, as it has access to skills like Time Requiem (inflicts Stop), Putrid Breath (inflicts most ailments), Hero’s March (casts Protect/Shell/Haste/Bravery/Faith) and Purify (cures any ailments cast on her). In fact, it may be better to wait until a little later in the game to do this hunt, as Carrot is also very strong. She will use Growing Threat when her health gets to half or so, doubling her level and increasing her attack power/defense. Having a healthy supply of Remedies (or even a Ribbon if you wait until much later) and Dispel on a Gambit to get rid of its statuses will make this fight a little easier. Carrot is only susceptible to Silence and Slow, weak to holy, absorbs dark and halves all other elements.
Master Swordsman
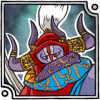
Gilgamesh is an Elite Mark that is unlocked upon finishing up the events at Draklor Laboratory and while he can be encountered in Trial Mode, you cannot unlock this trophy from that encounter, so it must be done in the actual main game. Gilgamesh is a two-part fight, both taking place in Lhusu Mines, but in areas inaccessible at the beginning. To go deeper, you will first need to do the Antlion hunt, after which, the Site 11 Key appears on a body in the Hunters’ Camp in Phon Coast. Gilgamesh is level 45 in the first fight and accompanied by Enkidu, who you should take out first to make things a little easier.
The fight is separated into four different phases, with a cutscene occuring at certain HP thresholds (60%, 40% and 20%). It should be mentioned that Gilgamesh holds two important pieces of equipment during the first bout, the Genji Shield and Genji Gloves. While the first one is a good shield, the Gloves are one of the better accessories in the game; these items become available after the cutscenes that occur at 40% and 20%. So, make sure you steal those items from him before you trigger the next cutscene/defeat him, as they don’t carry over to the next phase.
For the majority of the first battle, Gilgamesh will use Kick, Slice Thrice and his normal attack, while he can command Enkidu to do two physical attacks. It isn’t until the final phase that Gilgamesh will start tossing out other tricks, starting with Perfect Defense, making him invulnerable to all damage. There’s nothing you can do here, other than stay alive, so ignore Gilgamesh until he does two Ultimate Illusion attacks, after which the palings will fall. Don’t forget to steal the Genji pieces of armor at the correct thresholds. He halves all elements throughout the entire fight and is only vulnerable to Slow.
The second fight occurs in the far reaches of Lhusu Mines, which requires the Site 11 Key mentioned above. Luckily, there is a Save Crystal right before this second encounter, as Gilgamesh is definitely a lot more powerful and challenging, coming in at level 70 this time. As with the first battle, take out Enkidu first to avoid his skills, such as Crushing Fangs and the same Growl (Protect, Shell and Haste), as well as the moves Gilgamesh can make him perform. Gilgamesh himself also has some new skills in this battle, all centered around your party’s levels. Level 2 Sleep will hit anyone with the ailment that has a level divisible by 2, with Level 3 Disable and Level 4 Break also doing the same thing.
This makes an even-numbered level for your party members a bad thing, so you might want to have one or two members with a level like 61, 65, 67 - basically, an odd number that isn’t divisible by three will work. Every cutscene (yes, he will do these at the same intervals as the first battle) will have Gilgamesh with buffs, so make sure you dispel them. Not that far into the fight, he will begin using Bitter End, which has a chance to inflict Sap, so counter this with Regen. Once he gets low enough, he will erect Perfect Defense and use Monarch Sword twice before it will drop. It also doesn’t help that his normal attacks have a small chance of inflicting Stop, which might happen as he unleashes combos on your group.
It goes without saying that Gilgamesh is definitely a challenging boss here, as his strength is pretty high and the addition of status ailments can make things troublesome. You will want someone with a Remedy Lore 3 present to toss out Remedies, as well as some back ups for Chronos Tears, Prince’s Kisses and Gold Needles as Gambits on everyone, just in case. Don’t forget that Gilgamesh has the other two pieces of Genji equipment as steals, with the Genji Helm at 40% (Tournesol/Sunflower sword) and Genji Armor at 20% (when he uses Perfect Defense).



 Sign up
No Comments