Floor 33 - Ereshkigal
Here we are, the last floor, the big bad boss. The following schema setup is very specific and will take a little practice but once mastered, can allow you to beat Ereshkigal in just a minute or so.
Schemata Setup
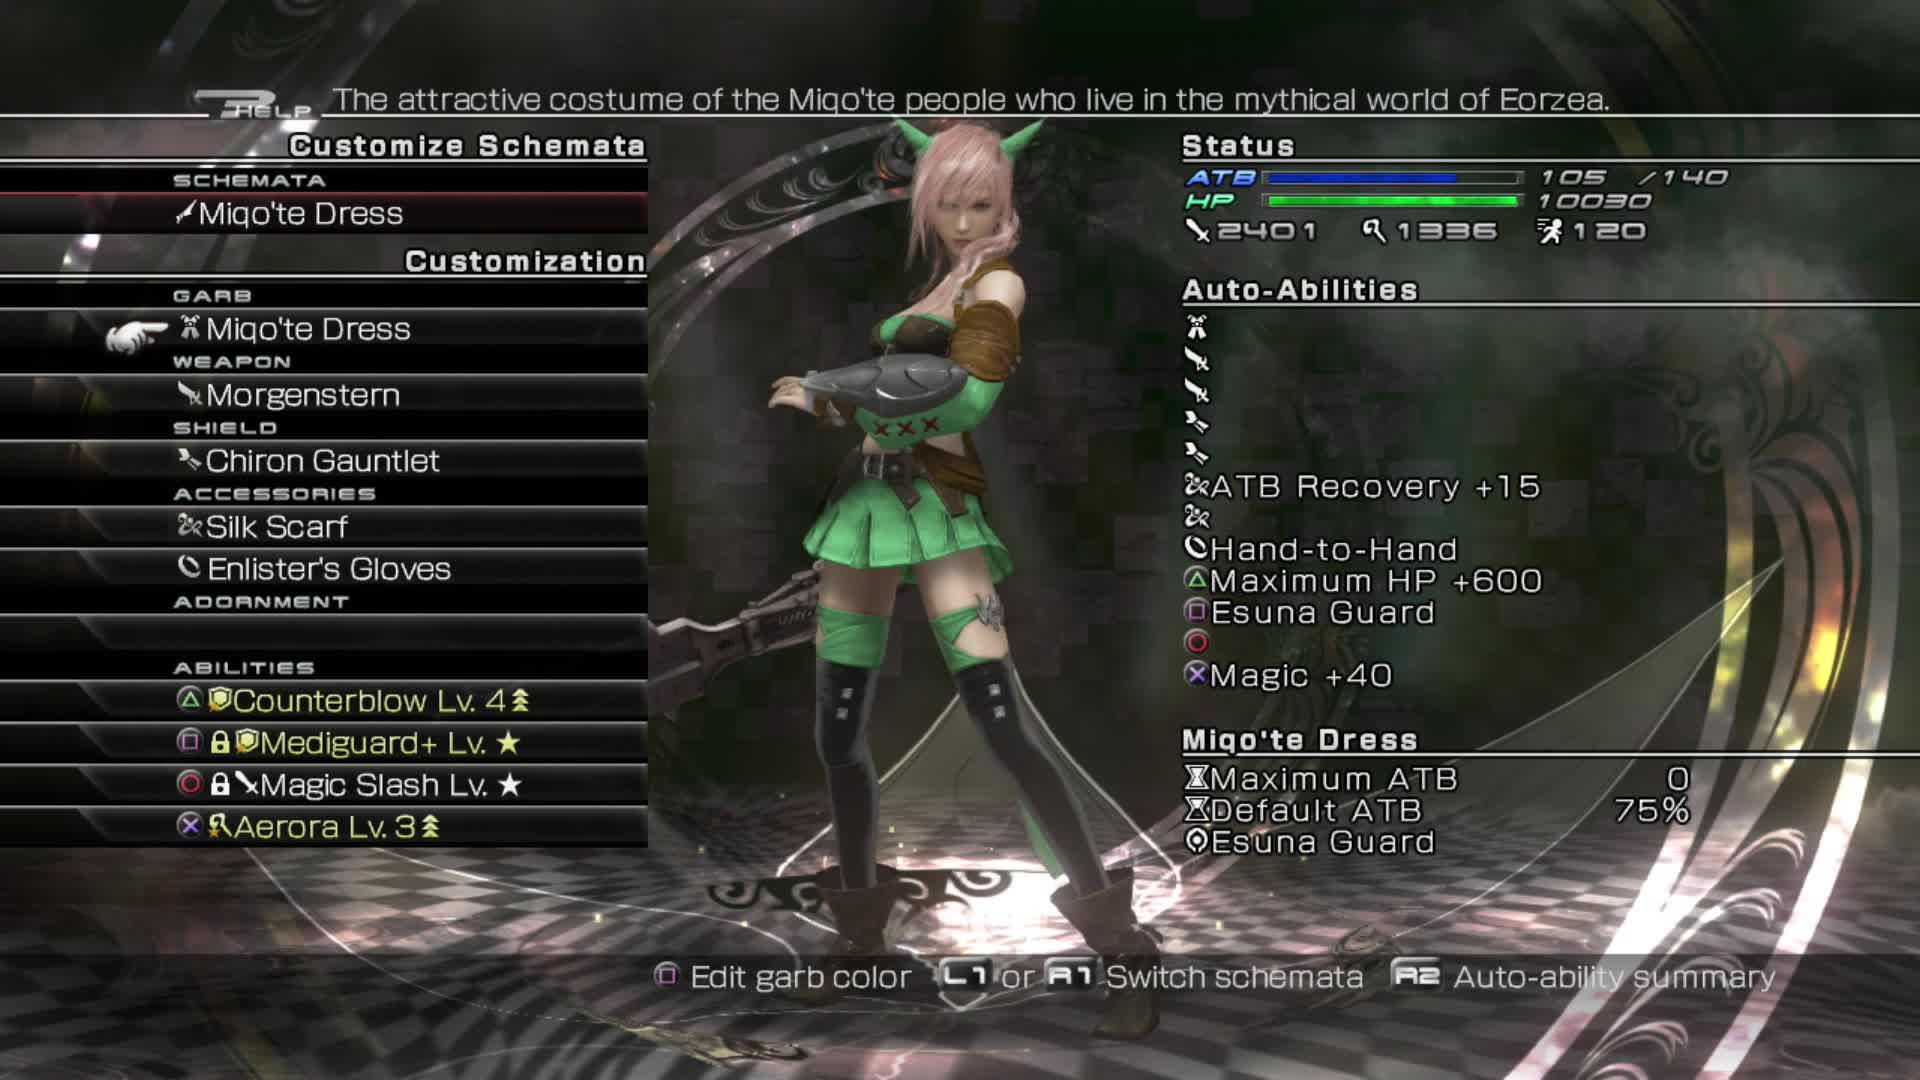
Miqo’te Dress
| Weapon | Morgenstern |
|---|---|
| Shield | Chiron/Yale Gauntlet |
| Accessories | Silk Scarf/Falcon Charm, Enlister’s Gloves |
| Abilities | Counterblow (not necessary so feel free to equip whatever you want), Mediguard Lv * (locked), Magic Slash Lv * (locked), Aerora Lv 3 (or other ’ara spell at least Level 3) |
You will be using Magic Slash to inflict the most damage. Powerful equipment is essential while Aerora is necessary to keep a chain of spells going long enough to Stagger. ATB recovery is also necessary to enable you to keep using abilities and the Enlister’s Gloves maximise damage output at close range.
Magic Slash is the key to this whole strategy so this garb is essential.
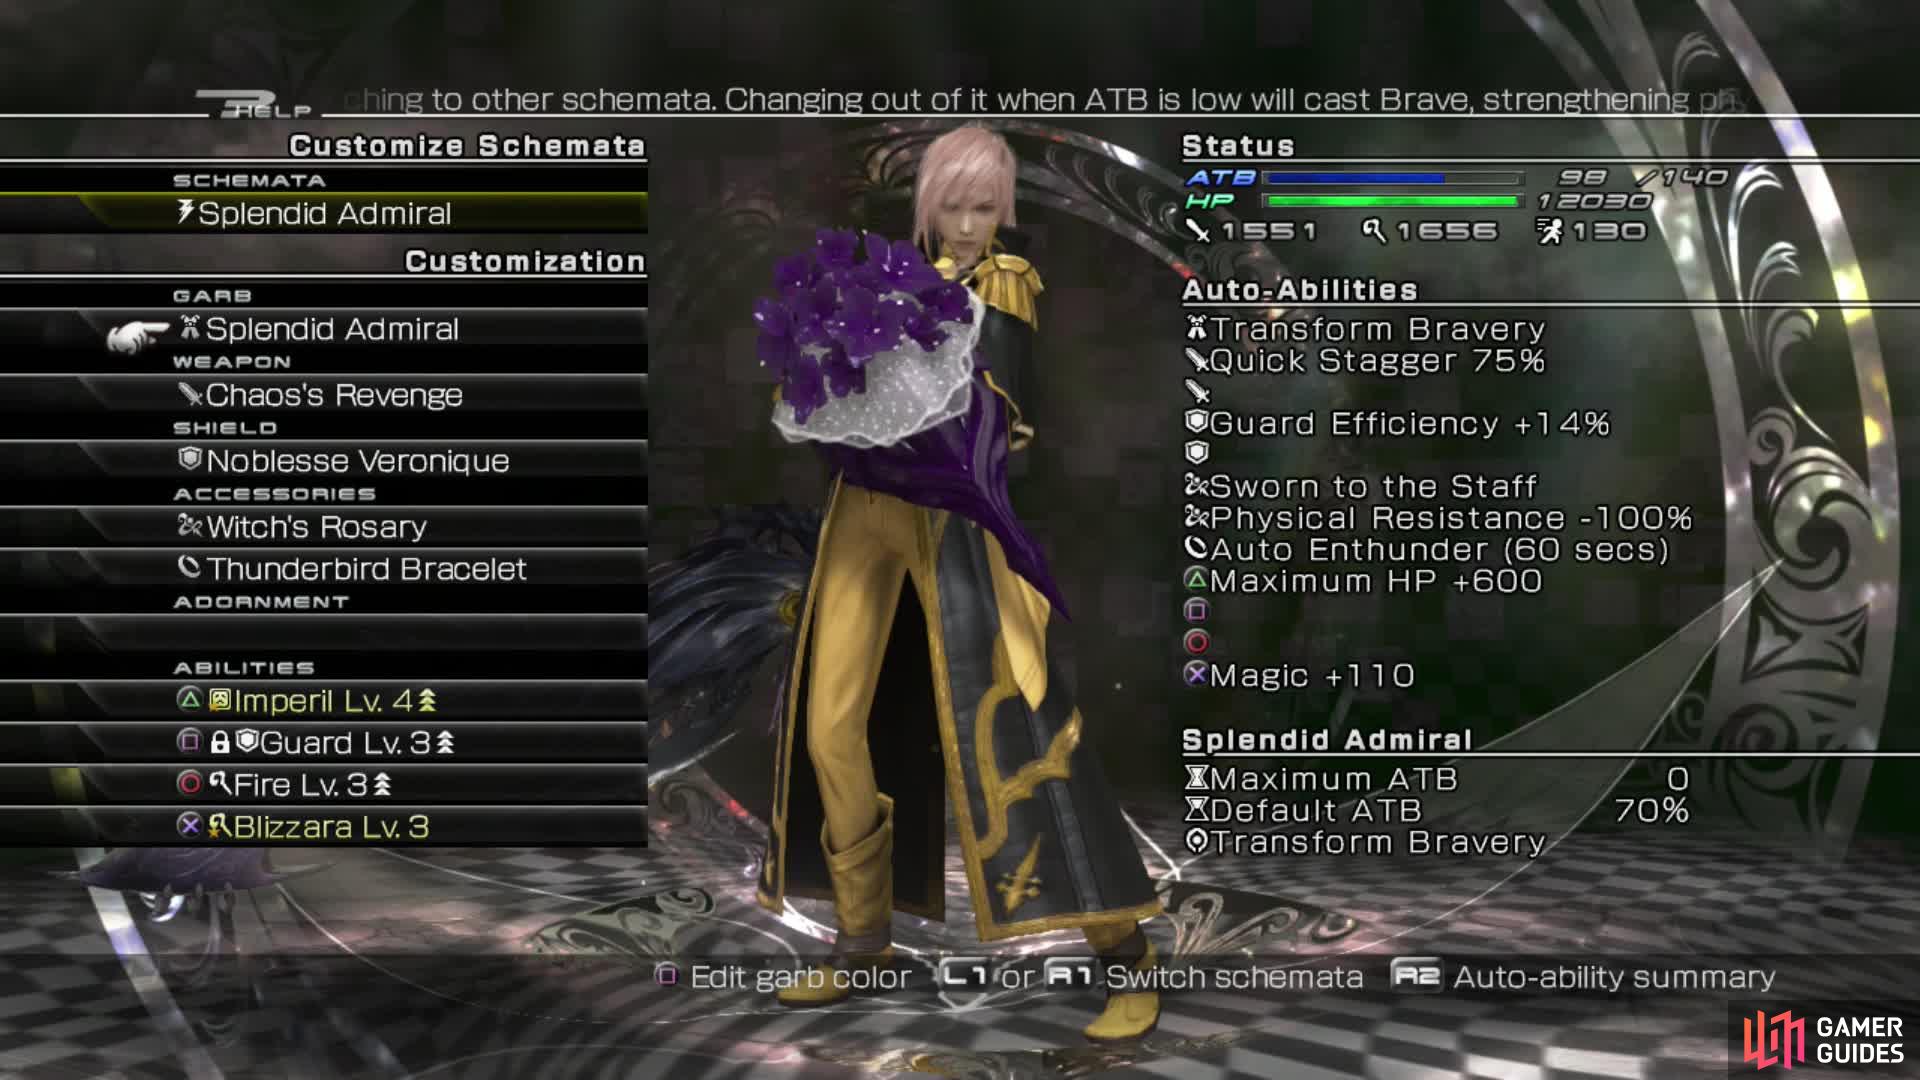
Splendid Admiral
| Weapon | Chaos’s Revenge |
|---|---|
| Shield | Noblesse Veronique |
| Accessories | Witch’s Rosary, Thunderbird Bracelet (or other auto element) |
| Abilities | Imperil, Guard (locked), Fire, Blizzara (and any other element different from bracelet. A good mix is useful) |
Chaos’s Revenge Quick Stagger is an absolute must for this strategy because you can rapidly build Stagger levels and having good ATB recovery is also very useful. The Witch’s Rosary is necessary to maximise magic damage and you won’t have to worry about physical damage. Finally an Auto-element bracelet is highly recommended to increase damage at the start of battle and exploit Ereshkigal’s elemental weaknesses.
You will need this schema for Transform Bravery and its Stagger power.
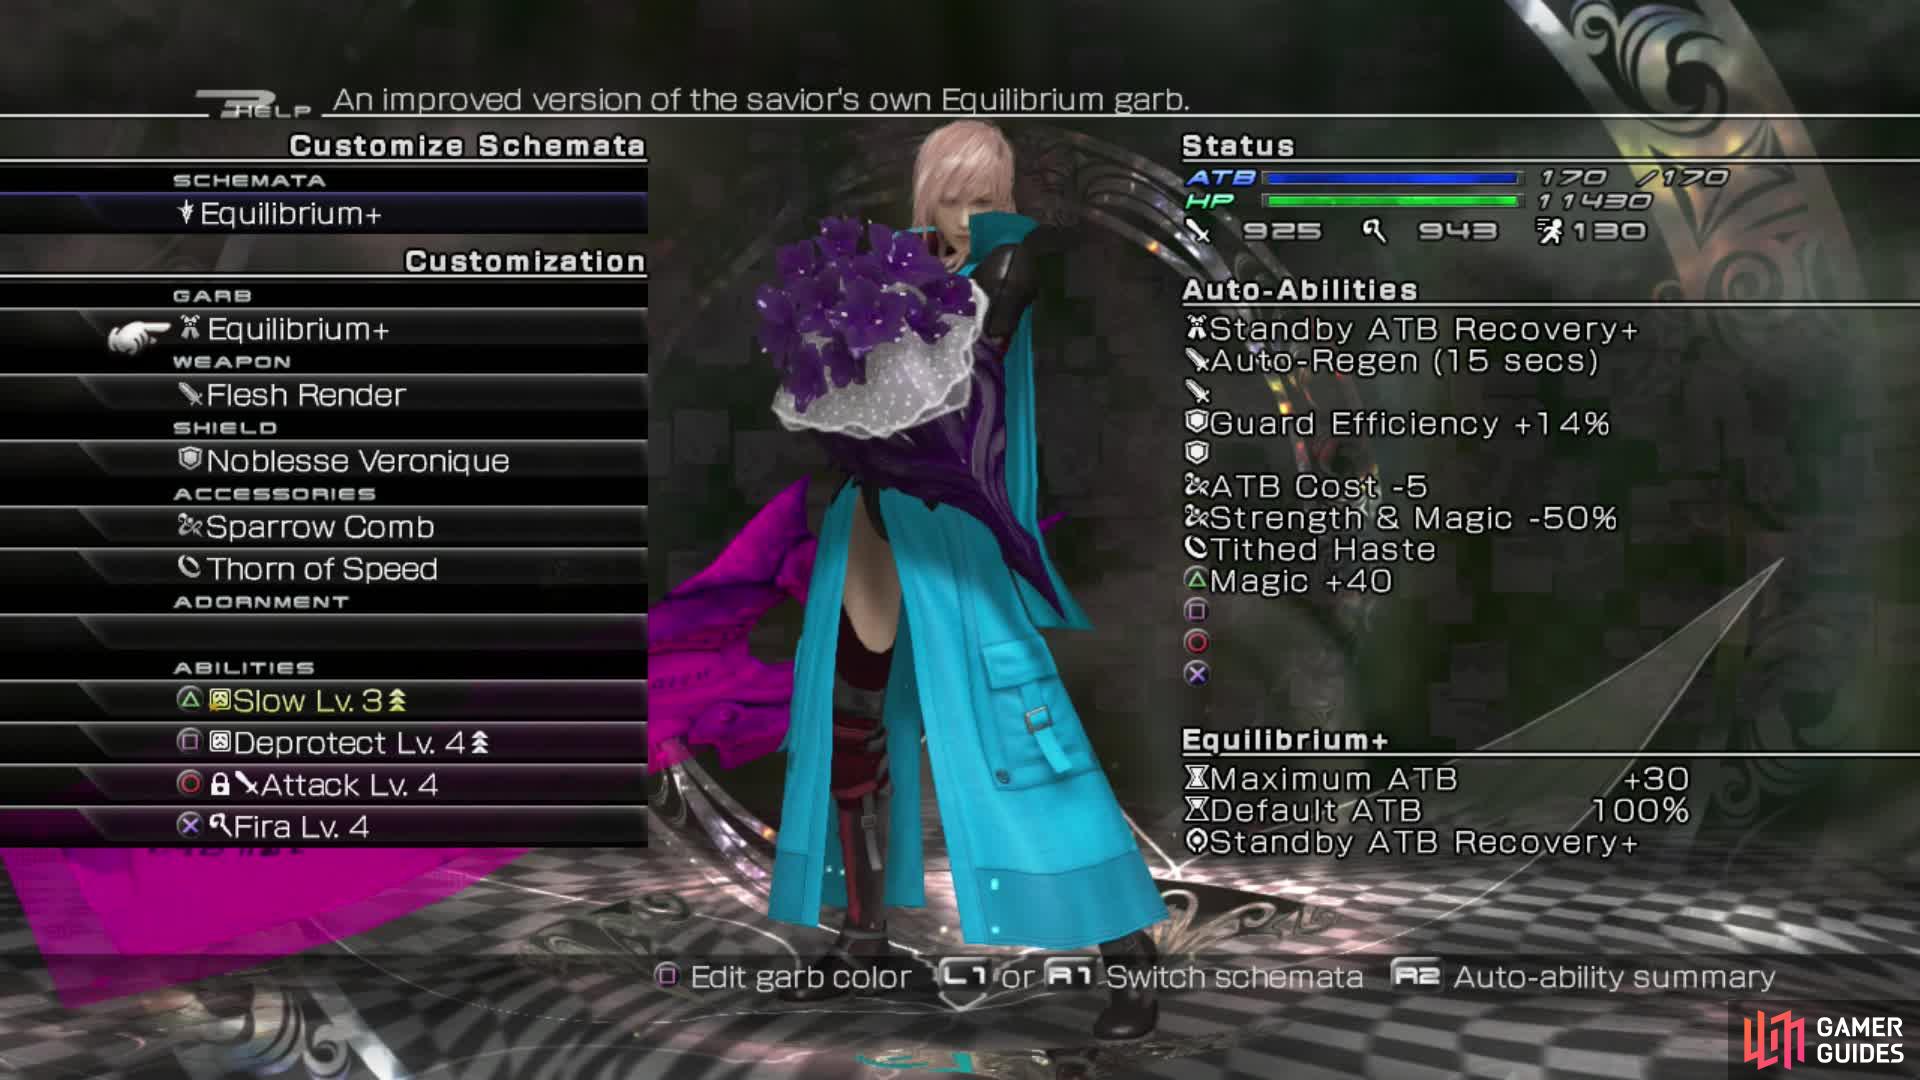
Equilibrium+
| Weapon | Flesh Render |
|---|---|
| Shield | Noblesse Veronique |
| Accessories | Sparrow Comb, Thorn of Speed |
| Abilities | Slow, Deprotect, Attack (locked), Fira |
Flesh Render is a lifeline to slowly regenerate any health that may be lost while you’re kicking its ass. The Sparrow Comb reduces ATB cost substantially allowing you to keep attacking and the usual ATB speed increase from the shield allows this even more. Damage output is not that important here. What is important is driving up the Wave and keeping airborne.
Having a good ATB recovery schema greatly helps to Stagger Ereshkigal.
Strategy
Before you do anything, run around the edge of the room and attack Ereshkigal from behind so you can reduce its substantial HP by 25%. Immediately inflict Slow (you may have to cast it a couple of times) and then use Attack to jump into the air and start spamming your elemental spells.
Quickly switch between your schema to allow for quick regeneration of your ATB and to keep yourself aloft. You do NOT want to use any finales or you will end up on the floor and be vulnerable to damage. Use each spell no more than twice to avoid this.
You will reach a Stagger very quickly if you keep up the continuous spells. Do not stop your attacks at this point but instead push for another Stagger by doing the same thing. You will reach the second Stagger very quickly but this is still not the stage we need so instead continue on.
You must keep airborne throughout the Stagger process or you will be subject to powerful attacks.
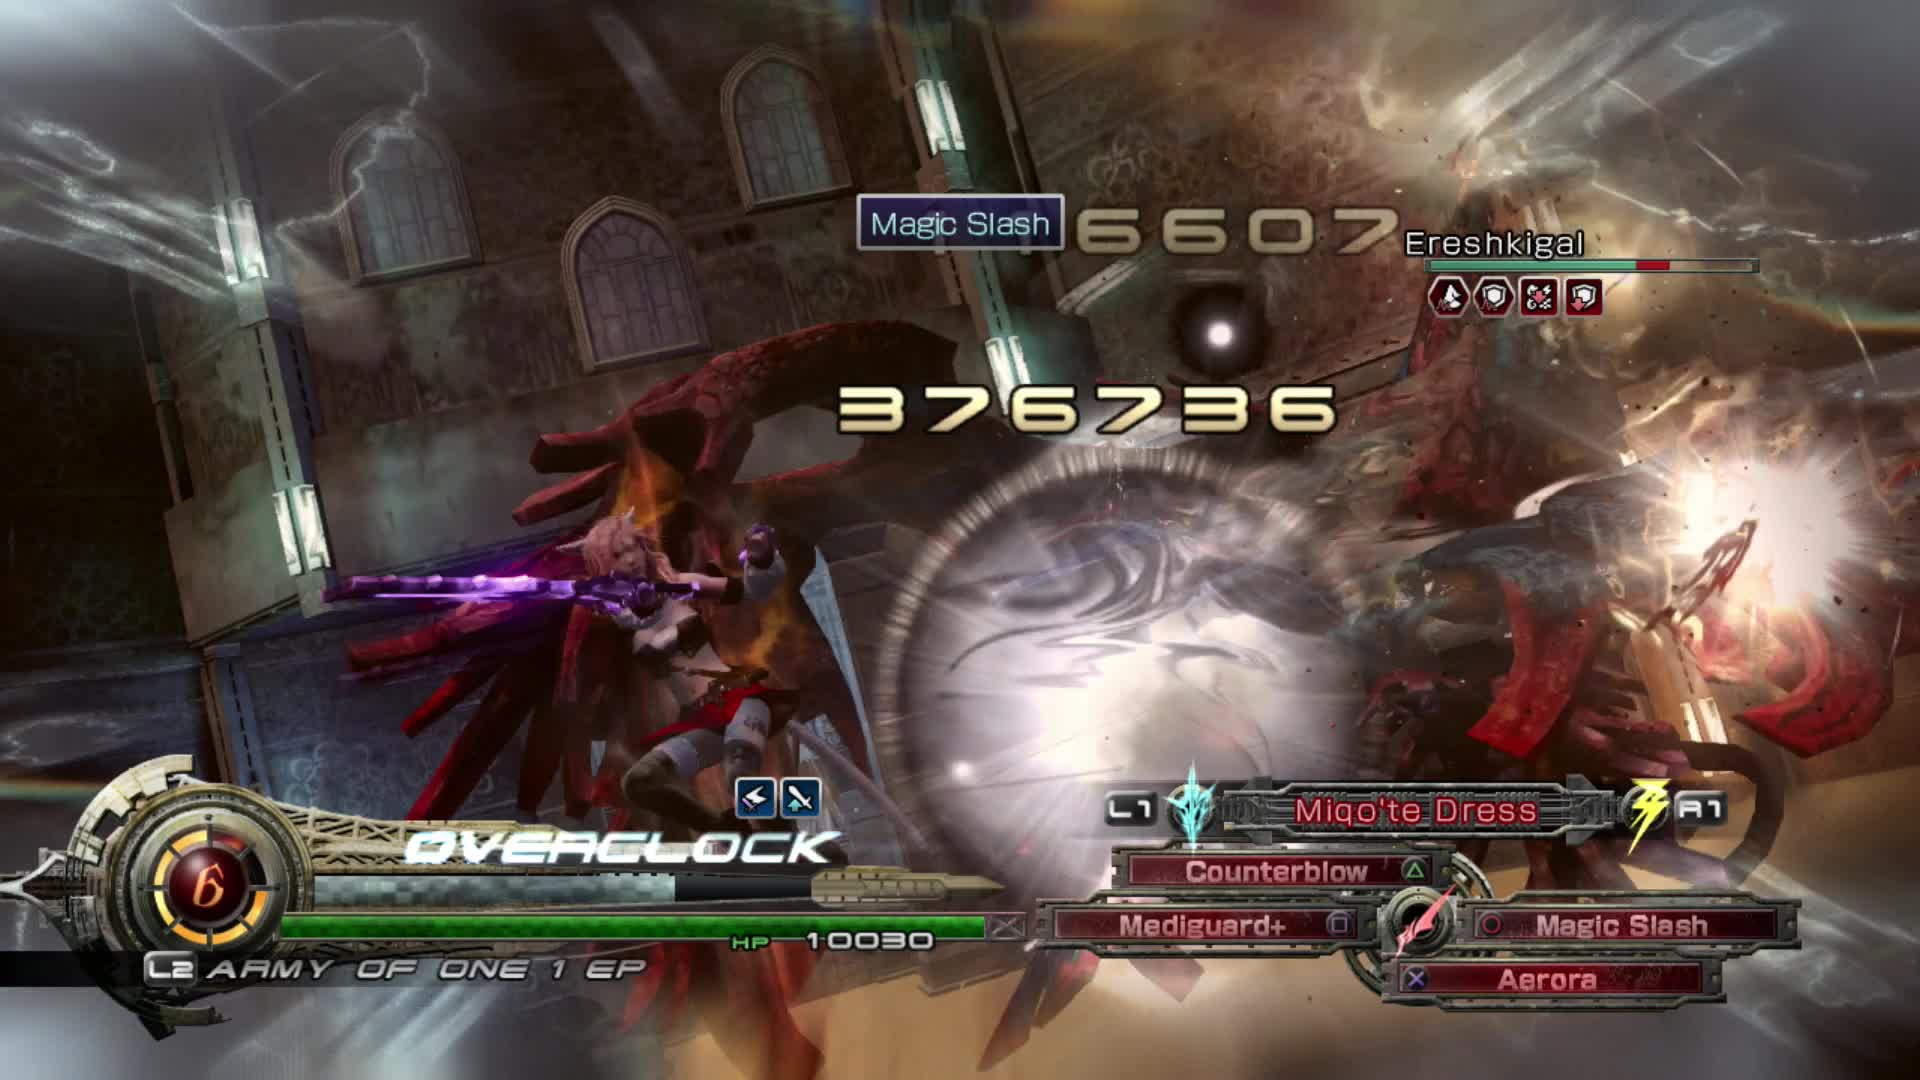
After staggering for a third time, there is a very brief window that allows for absolute maximum damage. As soon as you Stagger for a third time, stop your attacks and quickly cast Imperil and Deprotect. Finally switch to Miqo’te Dress and use Magic Slash. Overclock once you’re up in the air.
You need to take advantage of this window so keep Overclocking and spamming Magic Slash. You may only need 6 EP or you can go for it and use the full 8 if you wish. Ereshkigal will not last long at all once you reach the third Stagger. Say hello to your new trophy and 5* rating!
Magic Slash absolutely decimates Ereshkigal in this tiny window. You must keep Overclocking to take advantage.
Reward : Ultimatus, +10 Max ATB




 Sign up
No Comments