Schemata Setup
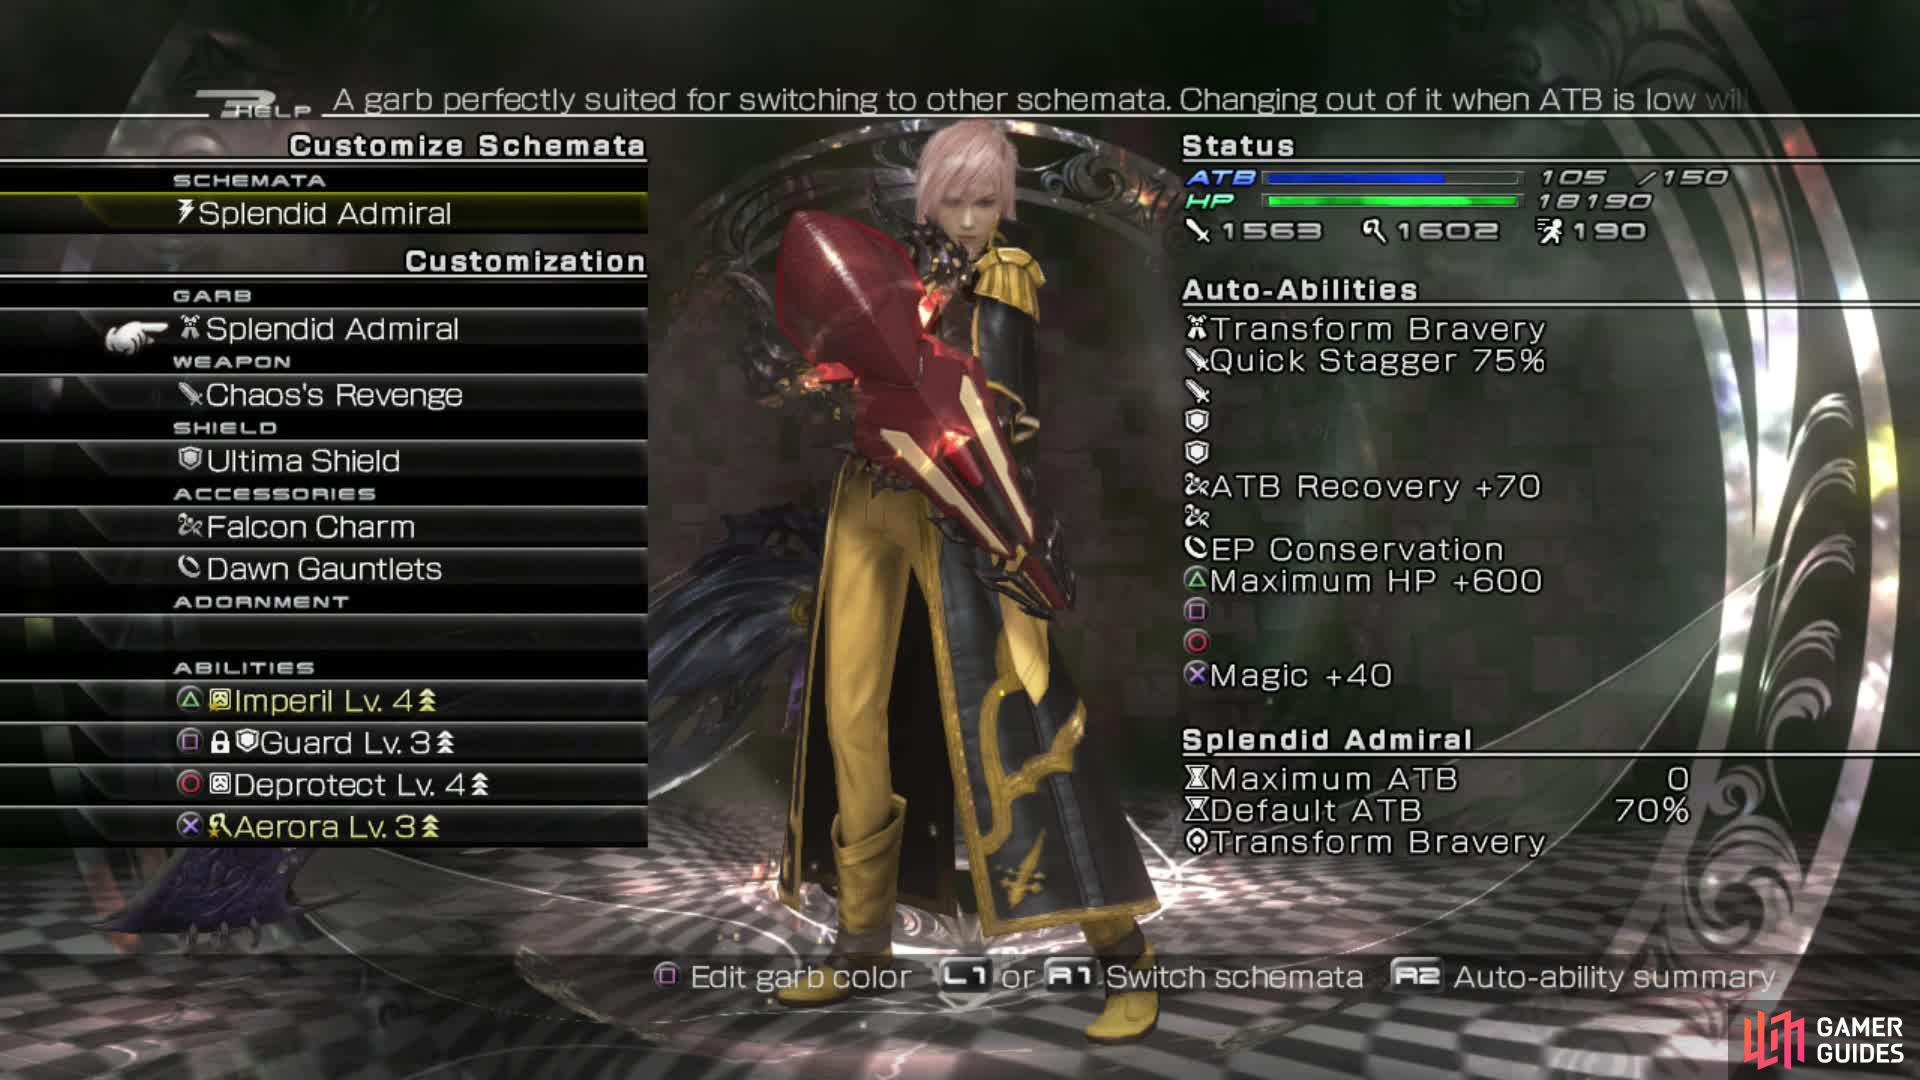
Splendid Admiral (default)
| Weapon | Chaos’s Revenge |
|---|---|
| Shield | Ultima Shield |
| Accessories | Silk Scarf or Falcon Charm, Dawn Gauntlets |
| Abilities | Imperil, Guard, Deprotect, Aerora |
ATB speed is a priority especially while using the Ultima Shield. With this shield, your stats will be pretty crazy and your ability to block damage will be increased massively. EP conservation is useful, especially if you aren’t very confident and want to Overclock a lot. The other abilities are pretty standard.
Splendid Admiral will guard against the strongest attacks and can Stagger quickly.
Soldier of Peace
| Weapon | Morgenstern |
|---|---|
| Shield | Noblesse Veronique |
| Accessories | Warrior Hunter’s Mask, Beggar’s Beads/Enlister’s Gloves |
| Abilities | Heavy Slash, Heavy Guard, Shadowbind (locked), Fire |
Your second damage dealer, having a good weapon makes this fight go a lot faster. If you want the Double Deity, the Beggar’s Beads are a good choice to improve the chance. The item drop rate is stupidly low though so you may have to replay a few times. You will find that you won’t use Soldier of Peace as much as Equilibrium but having two powerful physical schema really helps to reduce the time and get that 5* rating.
Having two damage dealers makes the fight speed by.
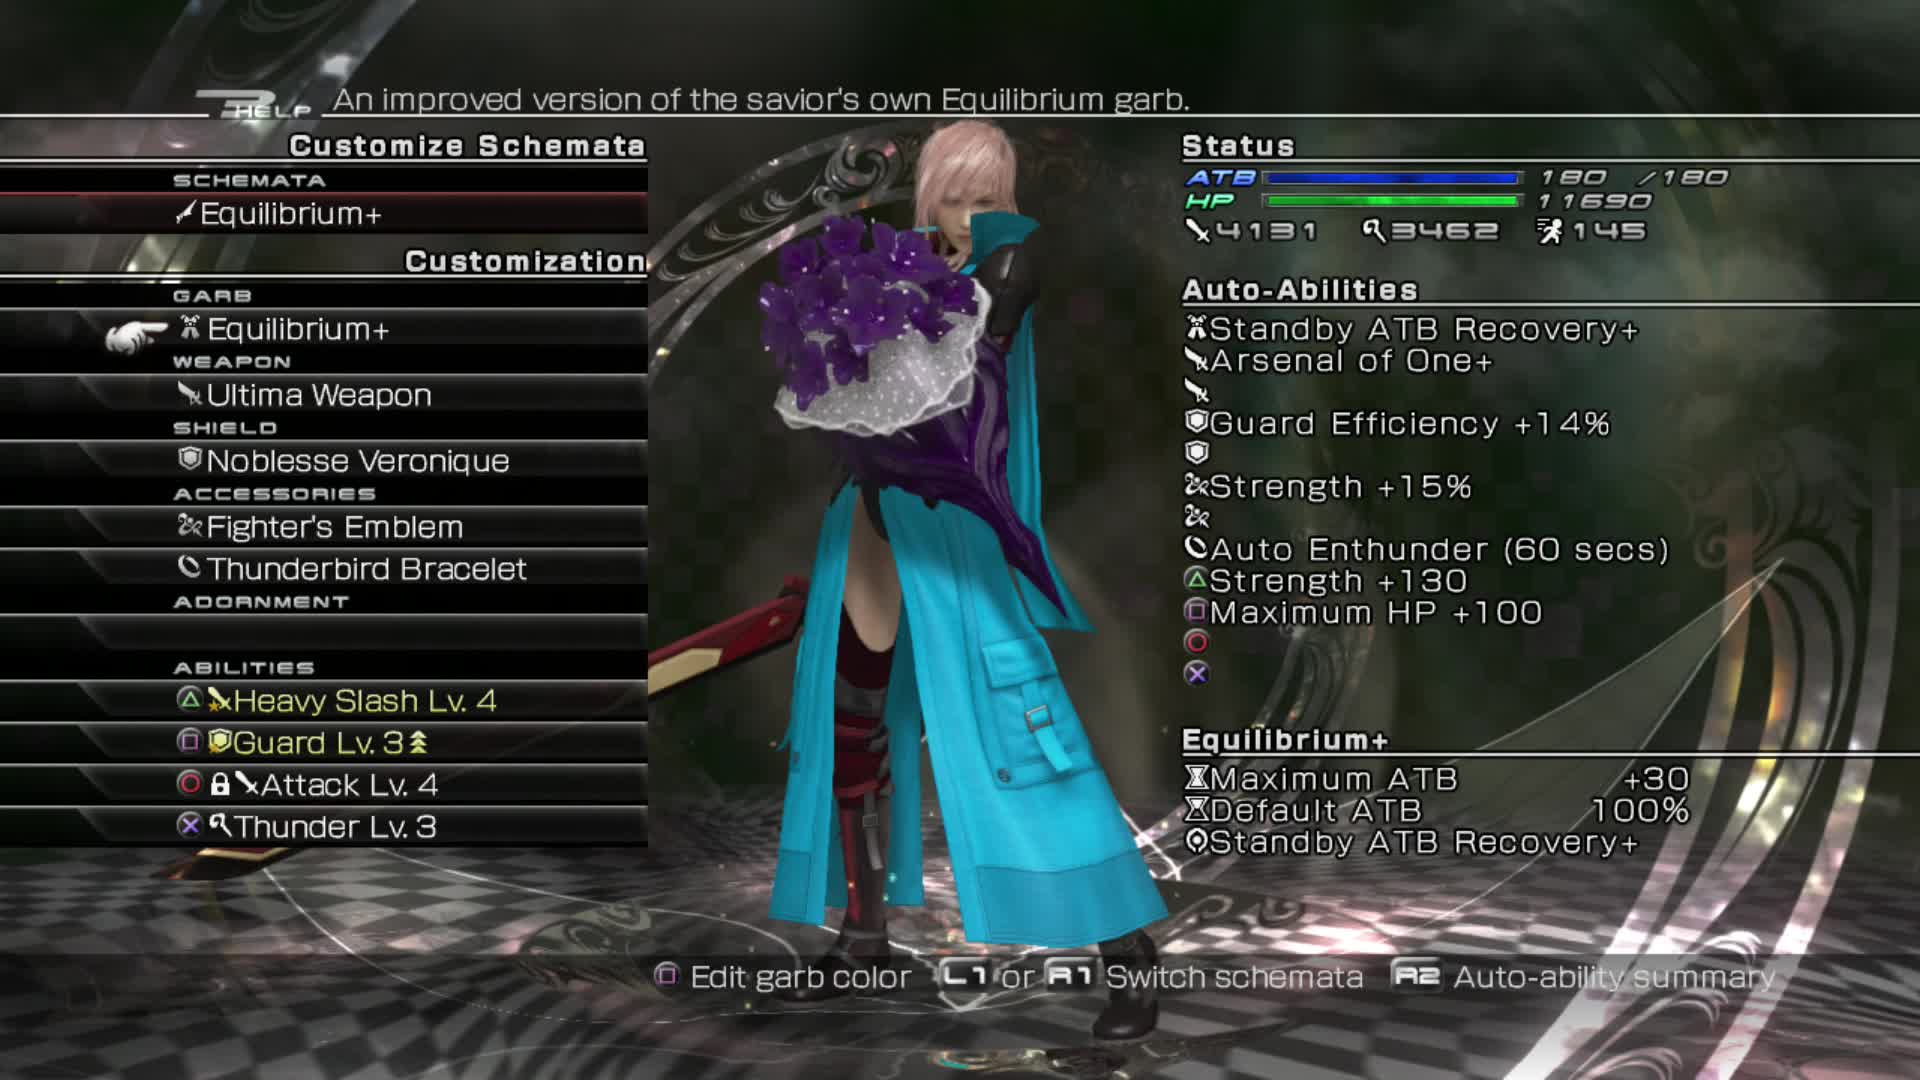
Equilibrium+
| Weapon | Ultima Weapon |
|---|---|
| Shield | Noblesse Veronique |
| Accessories | Fighter’s Emblem, Wolf’s Emblem or Warrior Hunter’s Mask, Firewyrm, Watergod, Thunderbird or Windwalker Bracelet |
| Abilities | Heavy Slash, Guard, Attack (locked), Thunder |
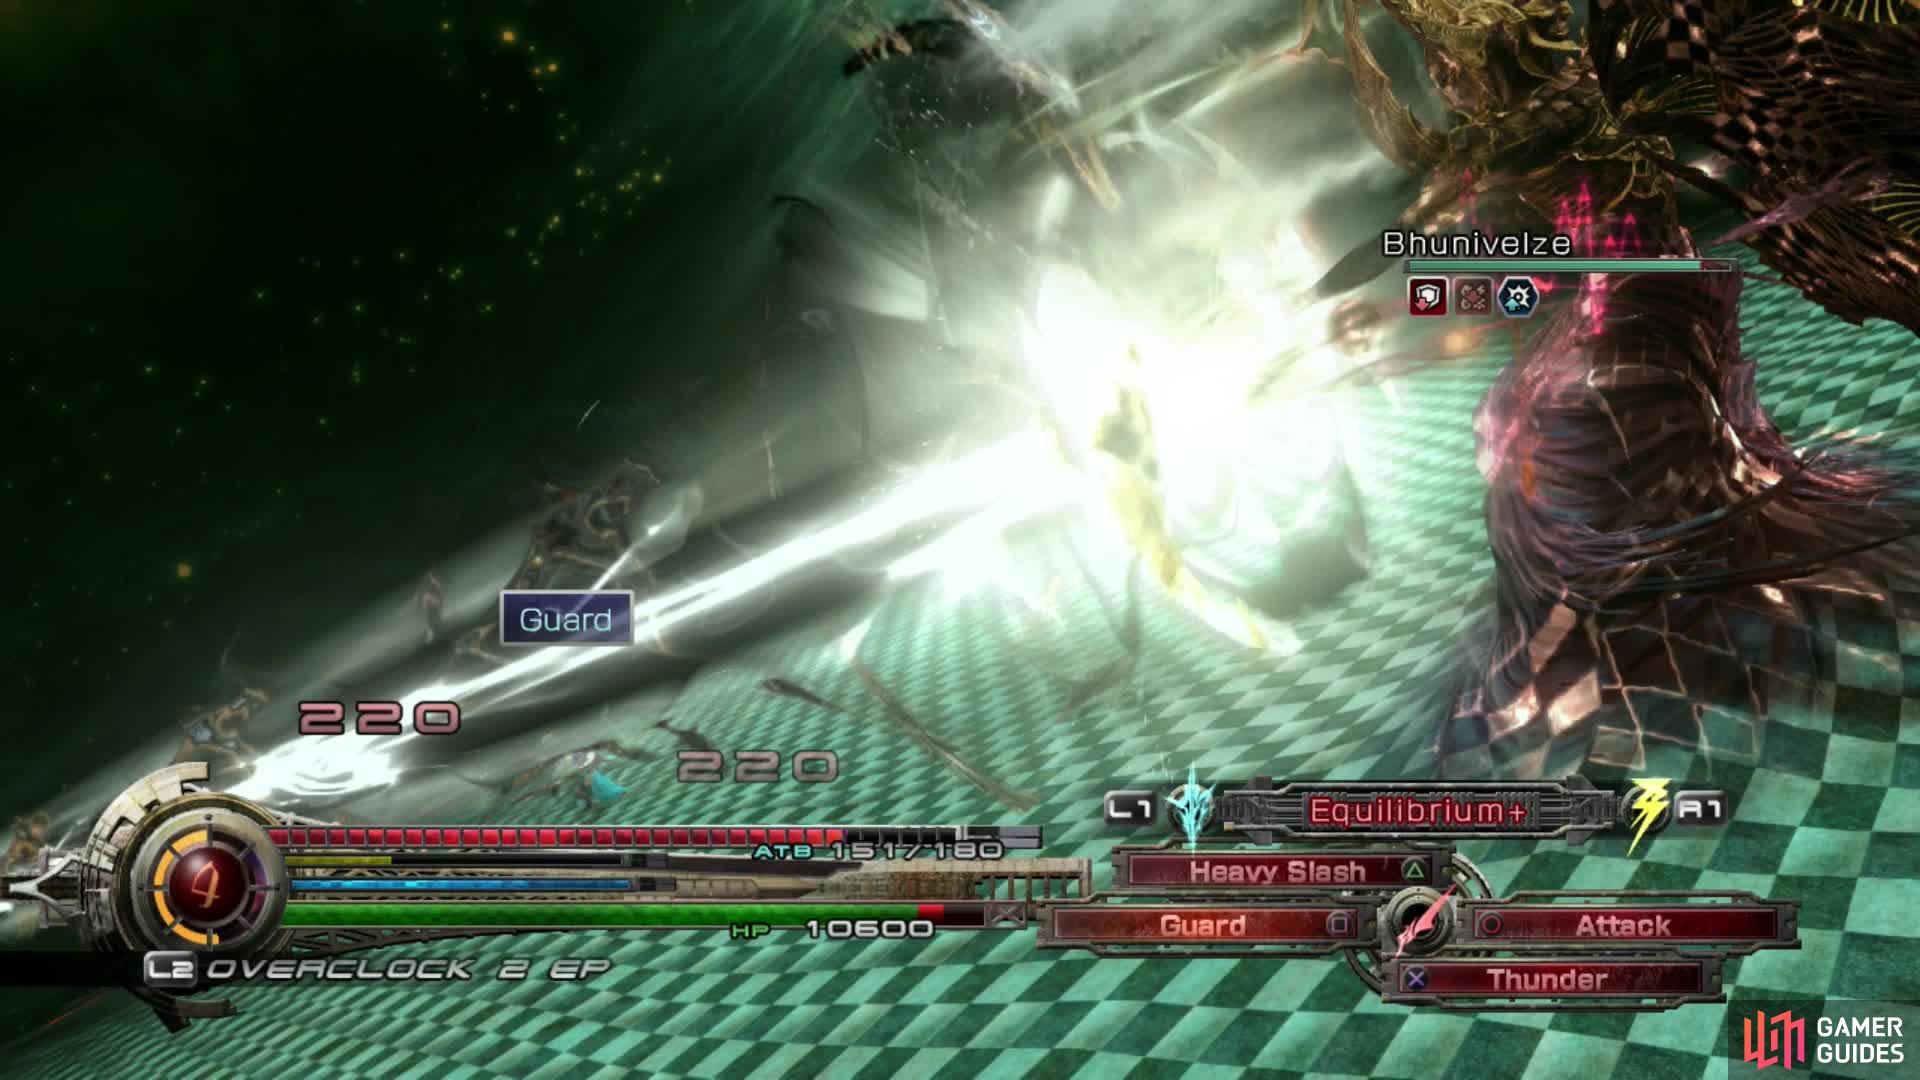
One of your damage dealers, the Ultima Weapon does ridiculous damage. You can use Thunder for building the Wave and a Guard is handy during Bhunivelze’s quick attack phases.
Equilibrium becomes insanely powerful when upgraded and carrying Ultima Weapon.
Strategy
Bhunivelze is probably one of the most challenging final bosses there has been in a Final Fantasy for some time, particularly when you are facing him for the first time. He has four forms and quite a complex pattern of attacks to learn. It may take you a few tries just to learn his attack patterns and when to do what, even with prior knowledge it must still be put into practice.
You will have no break between the phases so your Schemata must cover for all these phases. Your aim will be to inflict Stagger on him as quickly as possible, to eliminate the threat of his most powerful attacks and the chance he will kill you outright. If you wish to acquire the Double Deity weapon, you must achieve a 5* ranking and even then, it still has a very low drop rate. If you are in pursuit of this weapon, replace the Dawn Gauntlets with the Beggar’s Beads. This improves your chances slightly but it still has a low drop rate.
Fill your EP to maximum by farming the Set enemies in the Altar areas. Having an Ether or two (or a Turbo Ether) will help enormously, and enable you to achieve a 5* rating and a very good time. Warrior’s Potions, Nektar of the Gods and any other buffing potions as well as the usual Hi-Potions will also be of benefit.
1st Form
Bhunivelze will immediately cast Doom in this phase, automatically imposing a time limit for this phase of the battle. How nice of him. He will use non-elemental attacks and will inflict status ailments regularly. Many of them are not that dangerous so ignore all but the very damaging ones and focus on Staggering him as soon as possible using elemental spells. He can also be debuffed with Deprotect, Deshell and Imperil.
Trigger Transform Bravery to power up your attacks and keep pushing to end him quickly. Watch out for Almagest that can do considerable damage so Guard when you see the notification. Also, guard against his dual-sword swipes as they can be very disruptive.
Almagest hurts a lot if not guarded against.
2nd Form
Bhuni will automatically use Monad Beget at the beginning of this phase. These little mines roam around, inflicting damage on you at random. Ignore them and focus on wiping that smirk off God’s face. Refresh any debuffs and then return to standard staggering protocol. Activate Transform Bravery as soon as he is staggered and then go all out with Artemis’s Arrows.
Even though he gets the Unshelled effect after Stagger, Overclocking and using Artemis’s Arrows will let you avoid the nasty Genethliac Hymn phase of the battle. You don’t want to be subject to Dancing Mad . He may use Wings of Destruction a particularly nasty attack so switch to Splendid Admiral and block as much as you can. Heal if you need to and carry on.
This hurts…a lot. Make sure to Guard at once.
2nd Form (Genethliac Hymn)
Bhunivelze will begin to charge this attack about half way through the second phase. If you cannot kill him before this, no matter. You must concentrate all your efforts on Staggering him and, at this point, Lightning will have to leap into the air to attack, rendering Jump useless and Beat Down less efficient. Your best bet is to focus on damaging him with spells and remaining airborne throughout. You can always Overclock if you are struggling to Stagger him. Staggering him results in Falling Star, a very strong magic attack but no way near as strong as the non-staggered version Dancing Mad. If your stats are high enough, you may not even have to contend with this part of the battle.
This is your cue to push for the Stagger.
3rd Form
This phase sees him use strong physical attacks but your Guards should be enough to deflect the majority of it. Use Splendid Admiral for the bigger attacks that have an on-screen notification like Almagest. In the beginning he will use Holy Blade to buff himself but just ignore it and continue pushing for the Stagger.
Each cast of Holy Blade will confer another buff so be aware of which ones he has. If he gets Bravery, steal it off him .Keep your HP up as he will use Ultima at some point and even guarding that can still take off a few thousand HP. Around half way through the Stagger build up, Overclock and spam elemental attacks in Splendid Admiral to bring him to Stagger.
You can now Overclock again if you wish or just keep smashing away with physical attacks. Eventually he’ll go down.
If you don’t kill him quickly, Bhunivelze will launch this phase’s ultimate attack Hypernova . Make sure your HP is topped up because the window to Guard against it is very small.
You really don’t want to be on the receiving end of this attack.
4th Form
The final phase is made to test your Stagger-building skills. He is highly resistant to all status ailments until Stagger and will use strong attacks throughout. This phase can take a while if you choose not to Overclock to increase Stagger build up. You must be patient and take your time, trying not to take many risks. Use a buffing potion to mitigate some of the damage so you can focus on attacking.
He will now use Heartless Angel (and those familiar with its use in previous Final Fantasys will know what it means) which, if not Guarded against, will reduce your HP to 1. It has an incredibly long animation and so you must keep attacking right till the last moment. You should Guard when the camera zooms in on Lightning. This is a great chance to add points to the Wave as he will not use any other attacks during this period.
When the camera changes like this, Guard immediately to prevent Heartless Angel.
Elementaga can hurt a lot unless you block it in Splendid Admiral as does Damnatio Memoriae . If you make a mistake, it does not matter as most attacks shouldn’t kill you outright so just heal and carry on. Eventually you will reach Stagger at which point, he’s as good as dead.
Debuff and then go all out with Equilibrium and Soldier of Peace and watch him fall. You should easily defeat him and get the 5*. Your final task is complete, well done!
Congratulations on completing the game! After the credit roll, be sure to save your game to enable New Game+ and unlock Hard Mode. You also unlock the ability to upgrade your weapons and armour.

A Legend From Times Past
Proof of the true savior, who overthrew even the god of light to lead the people to a new world.

90






 Sign up
No Comments