Village of Calamity is the first mission in Wo Long: Fallen Dynasty where you’ll get your first taste of how the missions play out. As you progress through the mission, you’ll briefly learn about the Morale system and how it’s tied to the Flags of which there are two types, Marking Flags, and Battle Flags. Not only are these Flags tied to the Morale system, but they’re needed for 100 mission completion from which you’ll eventually unlock the Fly It High trophy/achievement. This page will show you where you can find all Masking and Battle Flags in the Village of Calamity mission.
Village of Calamity is the first mission in Wo Long, and has six flags to find.
Battle Flag 1 Location
On to the flags. There are three Battle Flags, and three Marking Flags in total. The first flag you’ll find is the Battle Flag which you can use to replenish your health, and healing items. From the start, run forward, and you’ll get a tutorial on attacking. Defeat the enemy and jump over the wall to the left of them. Follow the path, defeating any enemy that comes your way, and you’ll get the Deflecting tutorial.
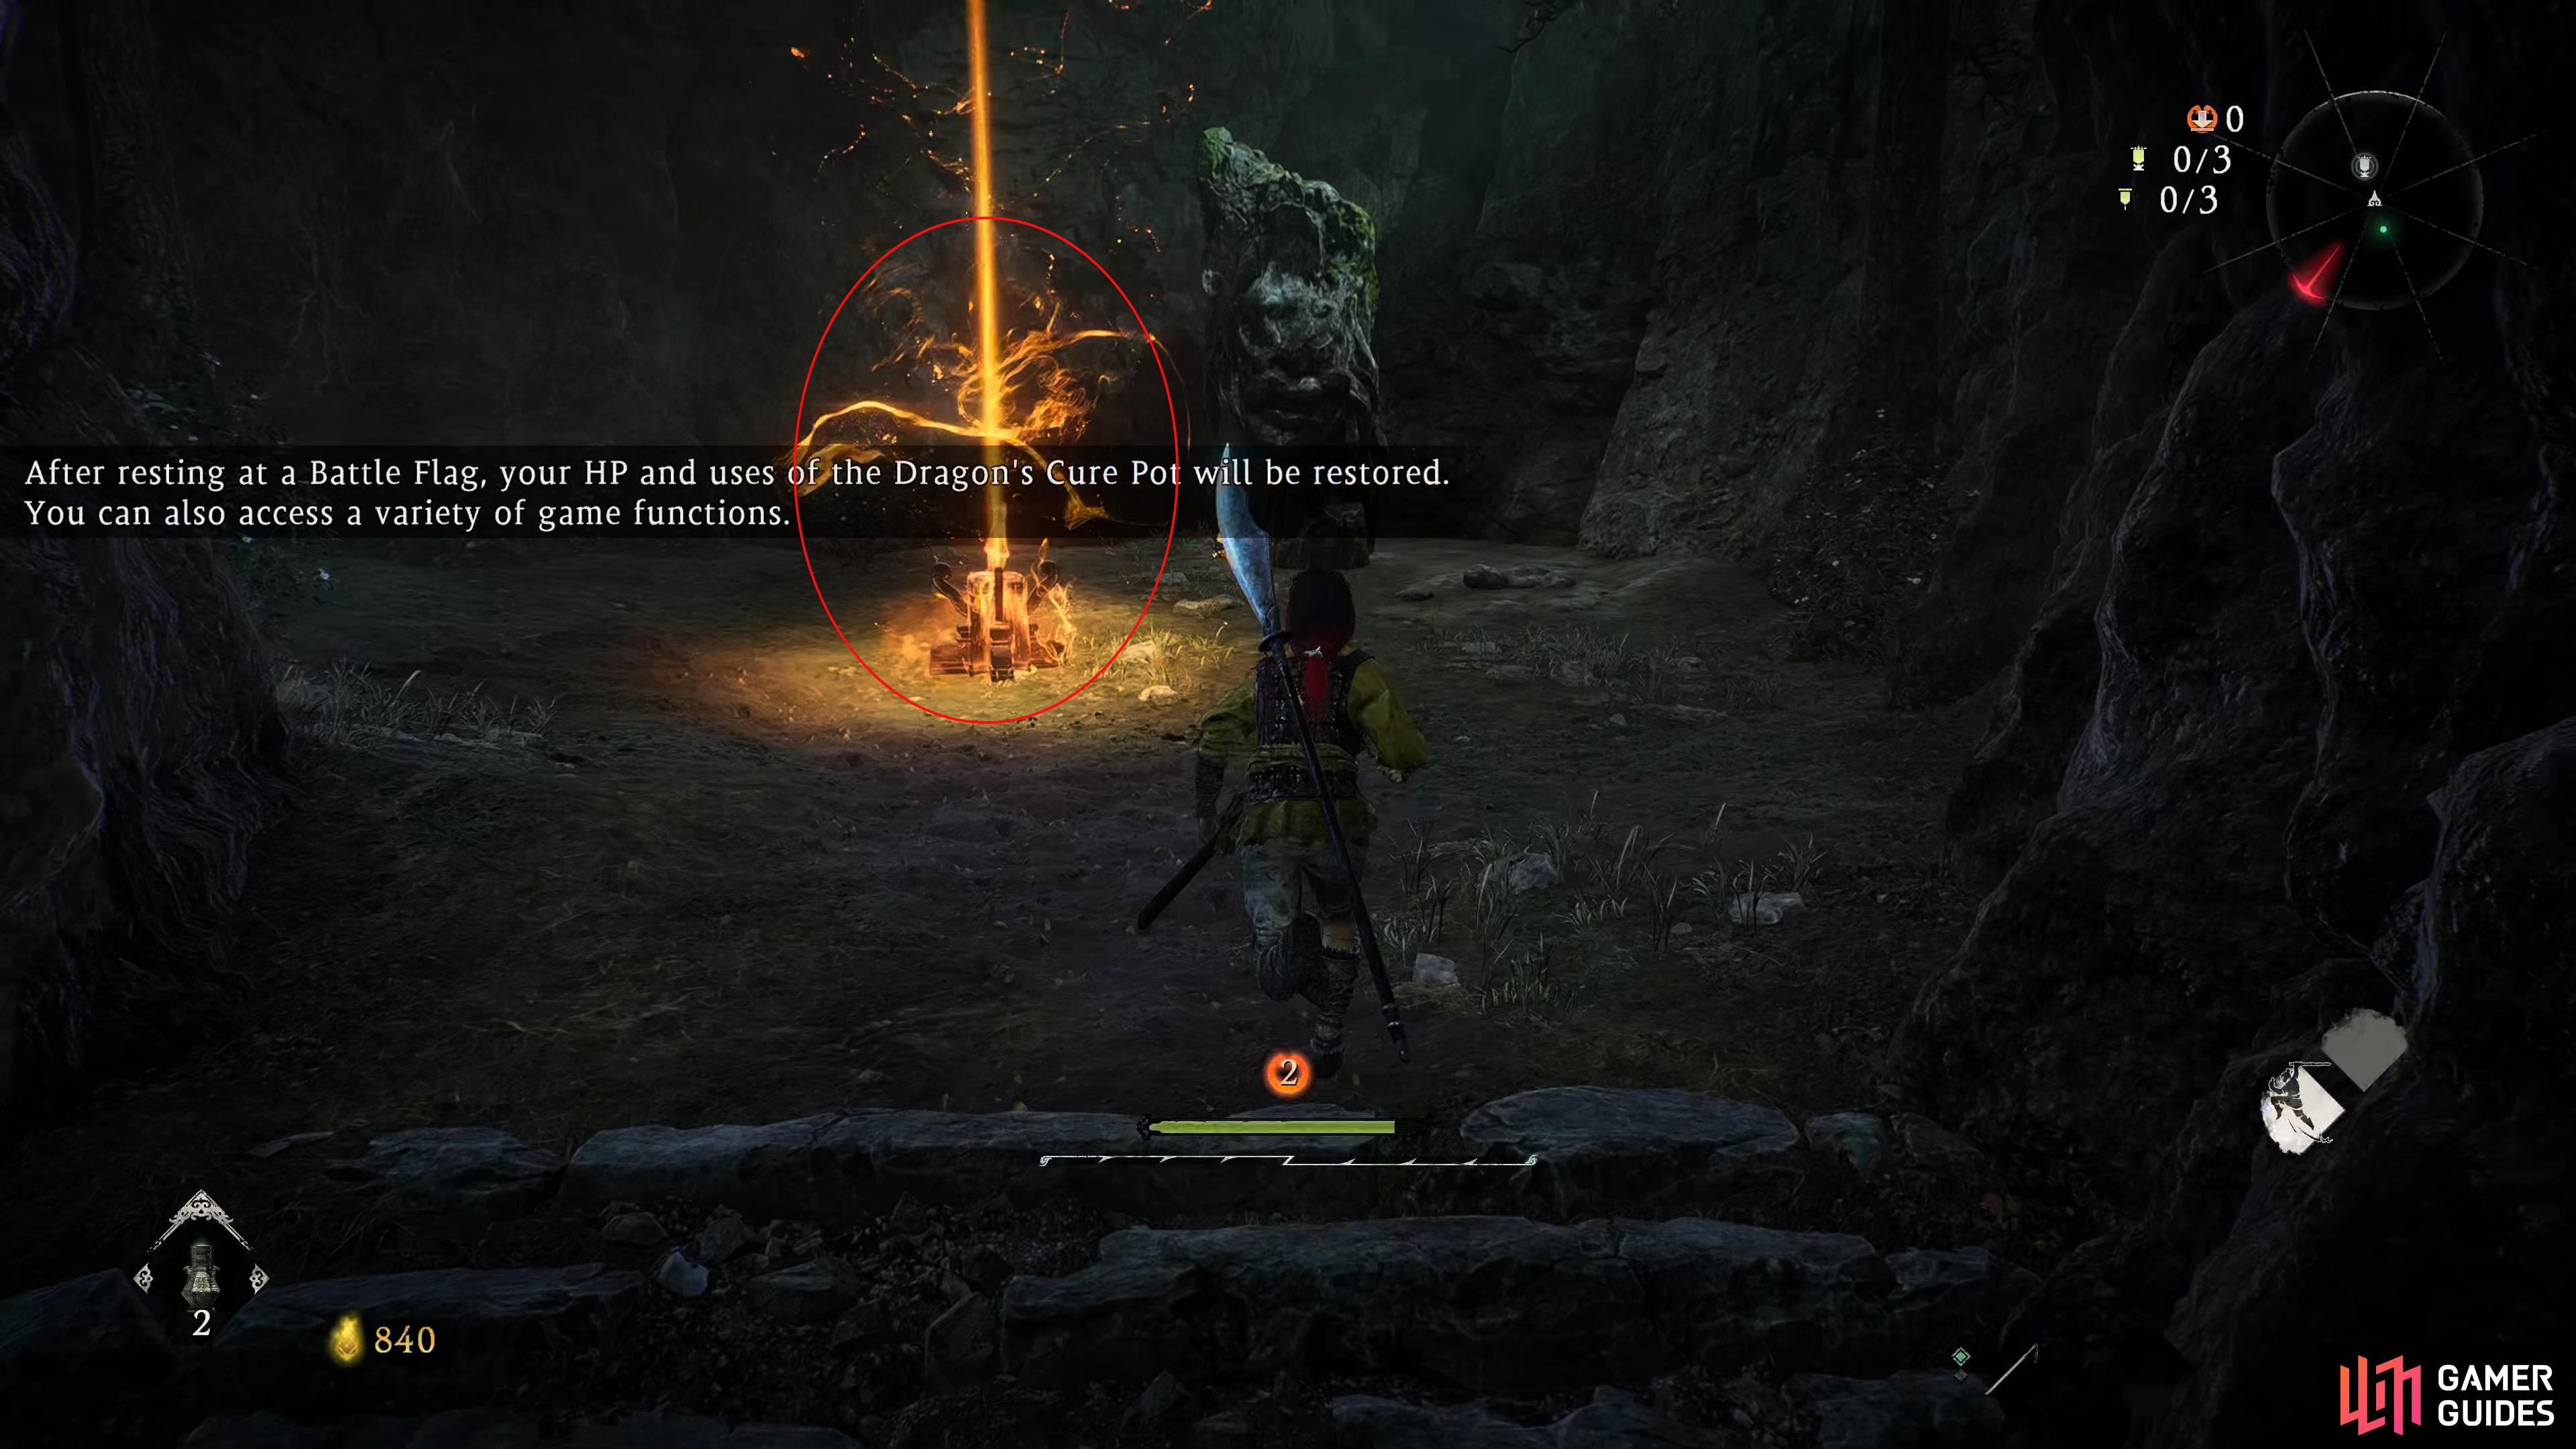
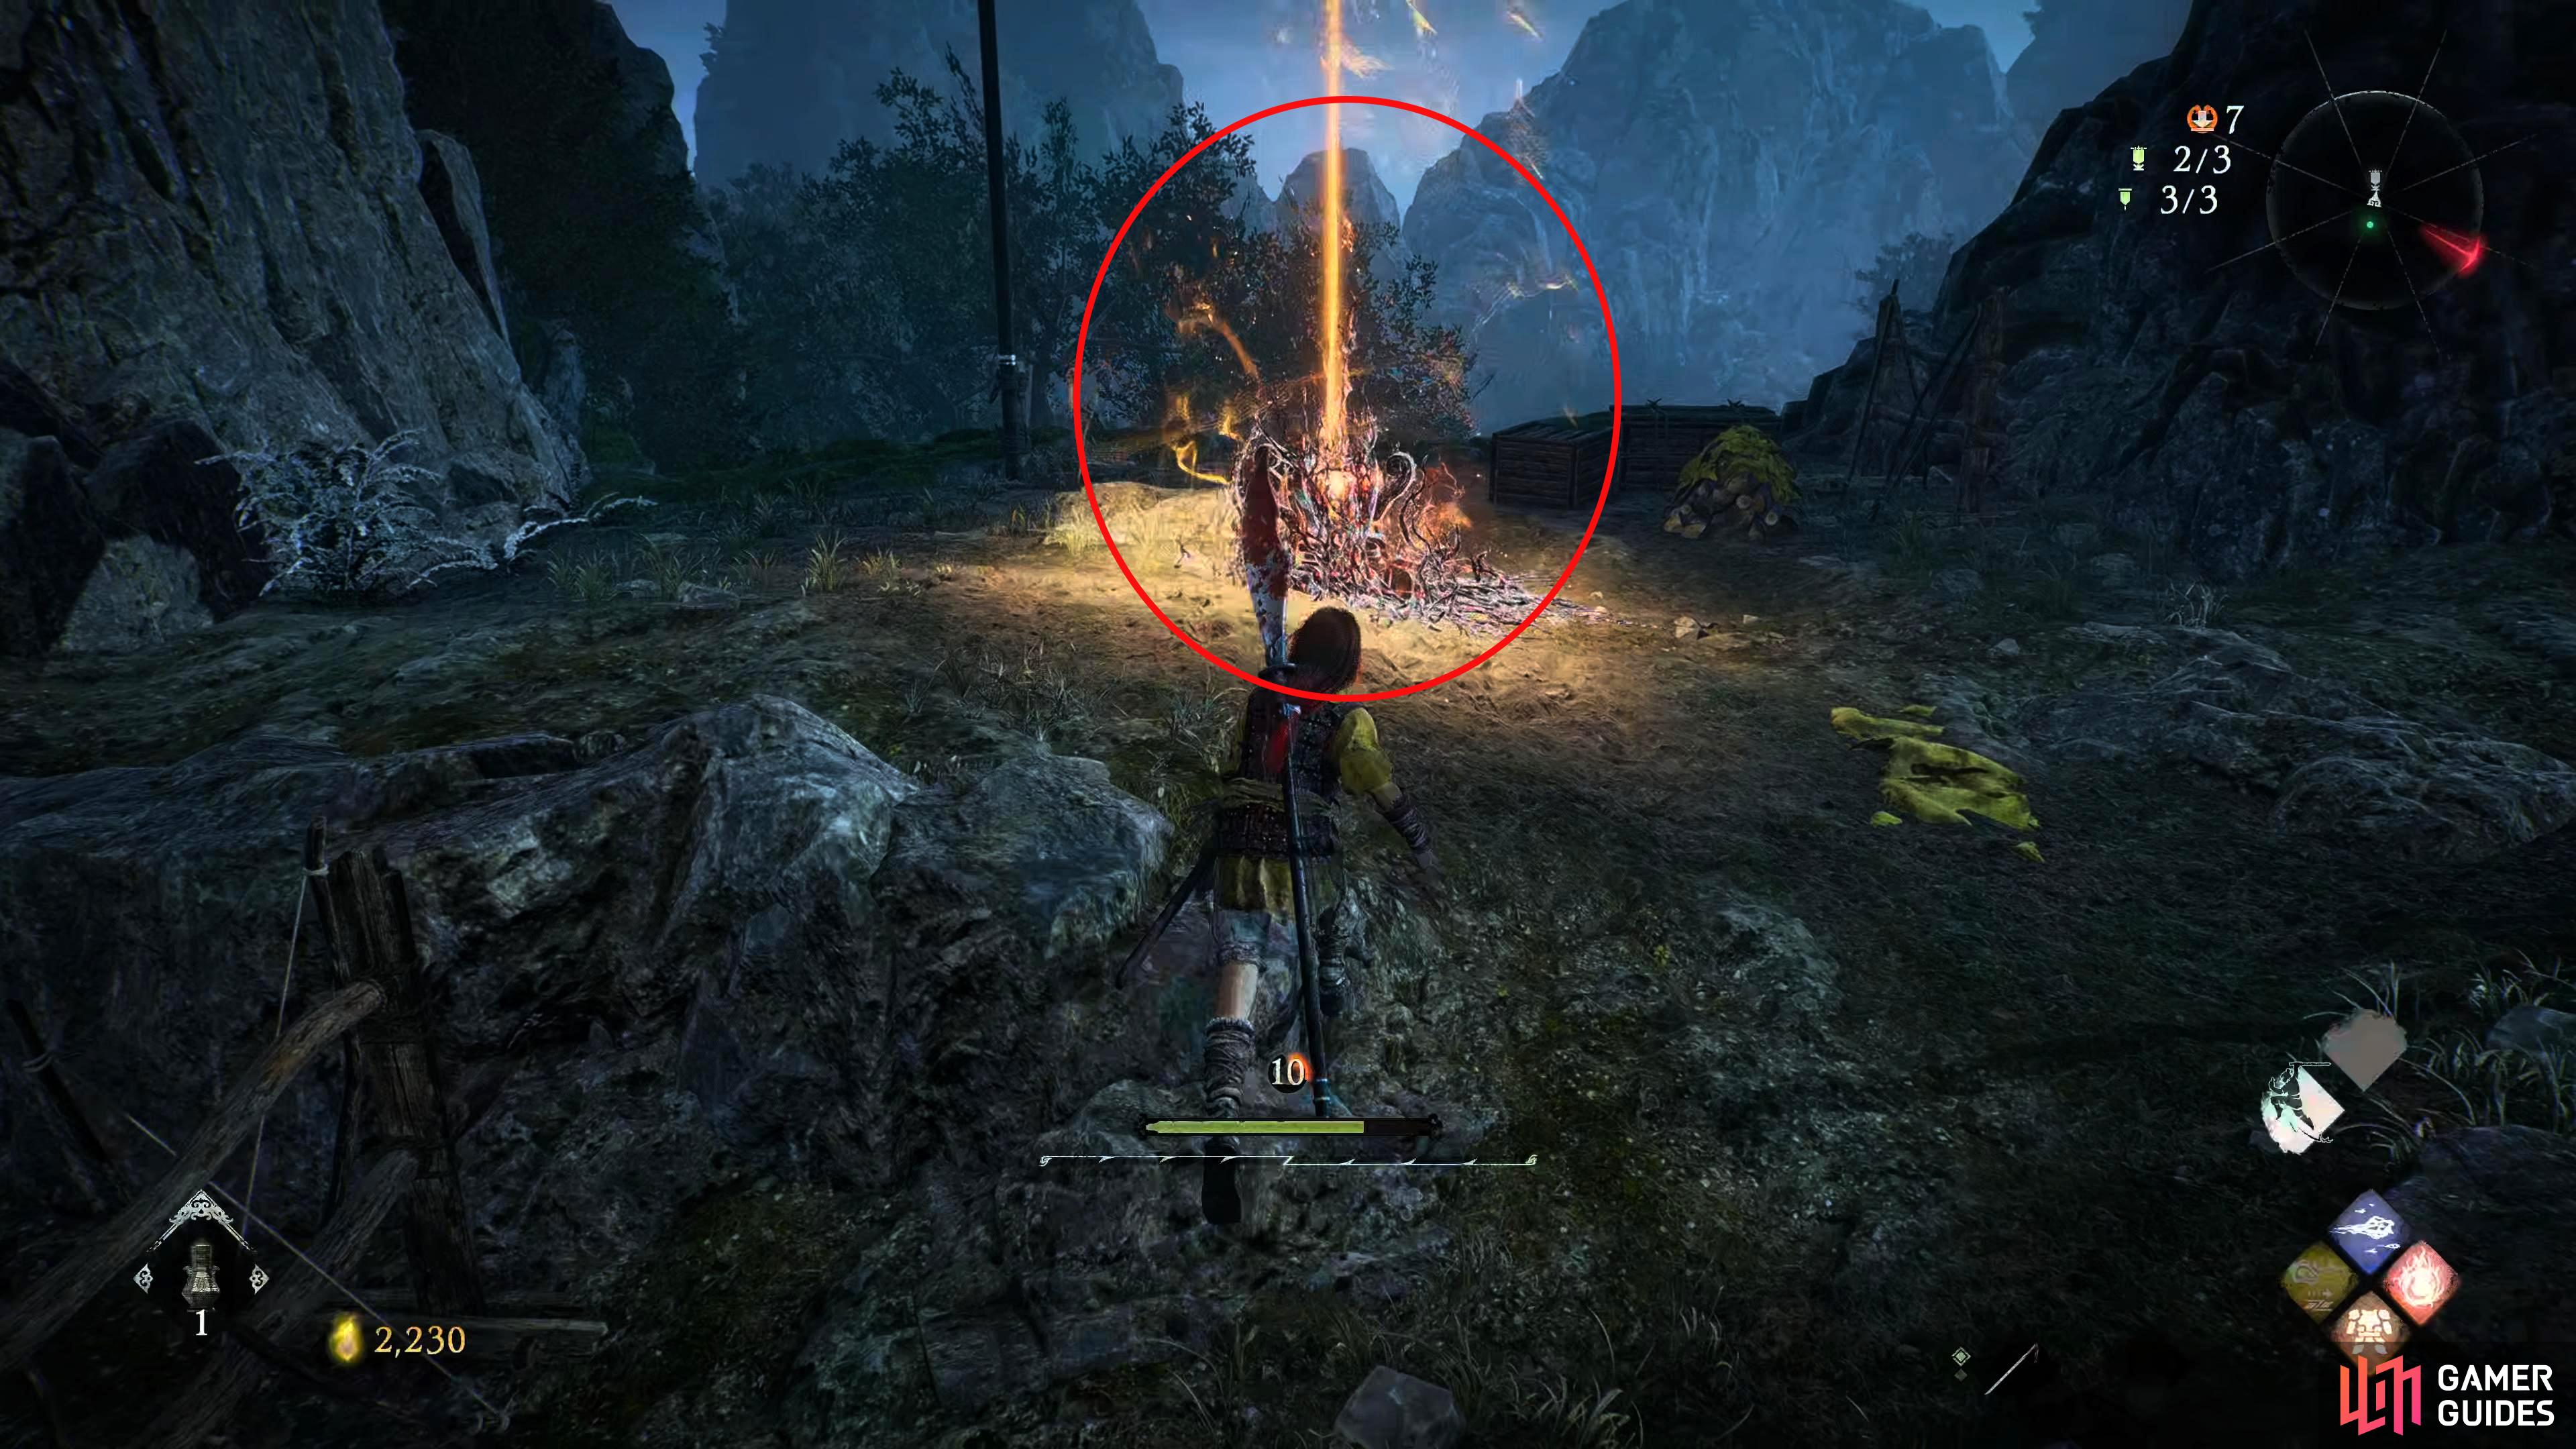
When you’re done with that, continue and defeat the enemy behind the tree to your right. Now jump the house to your left (the house in front of you allows you to create a shortcut), and you’ll get the next tutorial, Morale. Defeat the enemies and head onwards on to the next tutorial, Enemy Critical Blow. Complete the tutorial, and proceed up the nearby steps to find your first Battle Flag.
The first Battle Flag is at the top of the stairs past the Enemy Critical Blow tutorial.
Marking Flag 1 Location
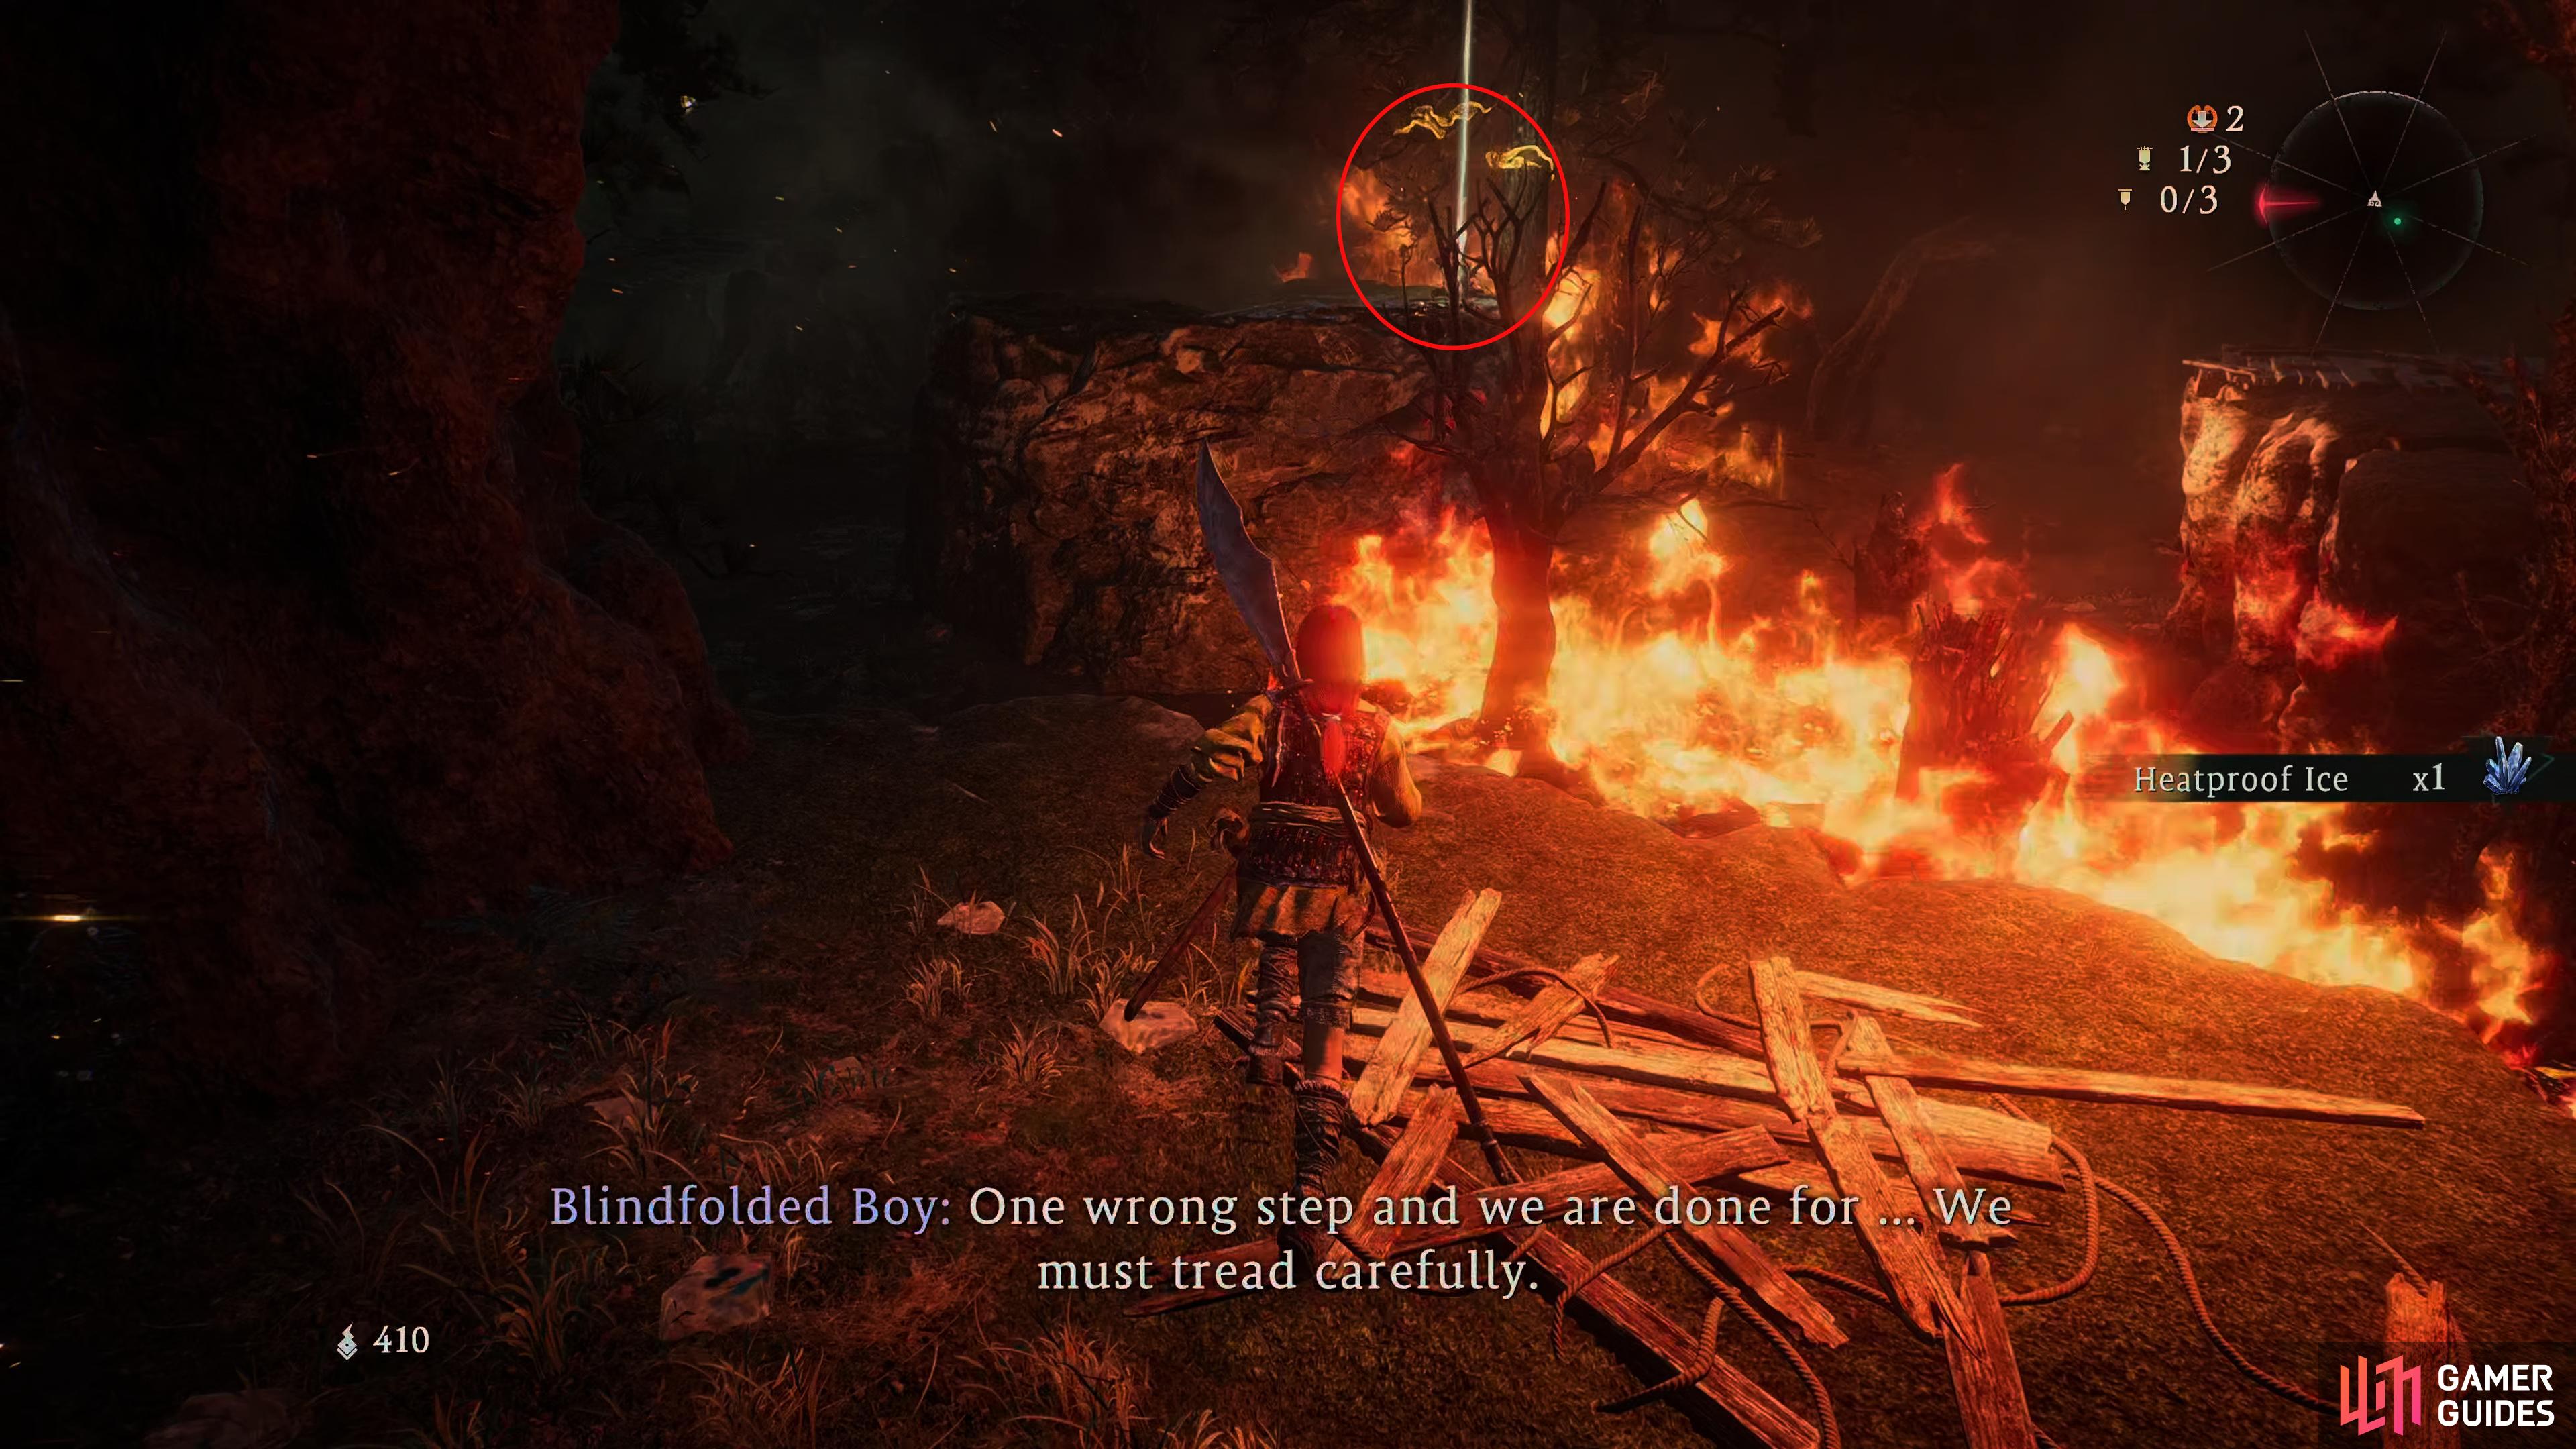
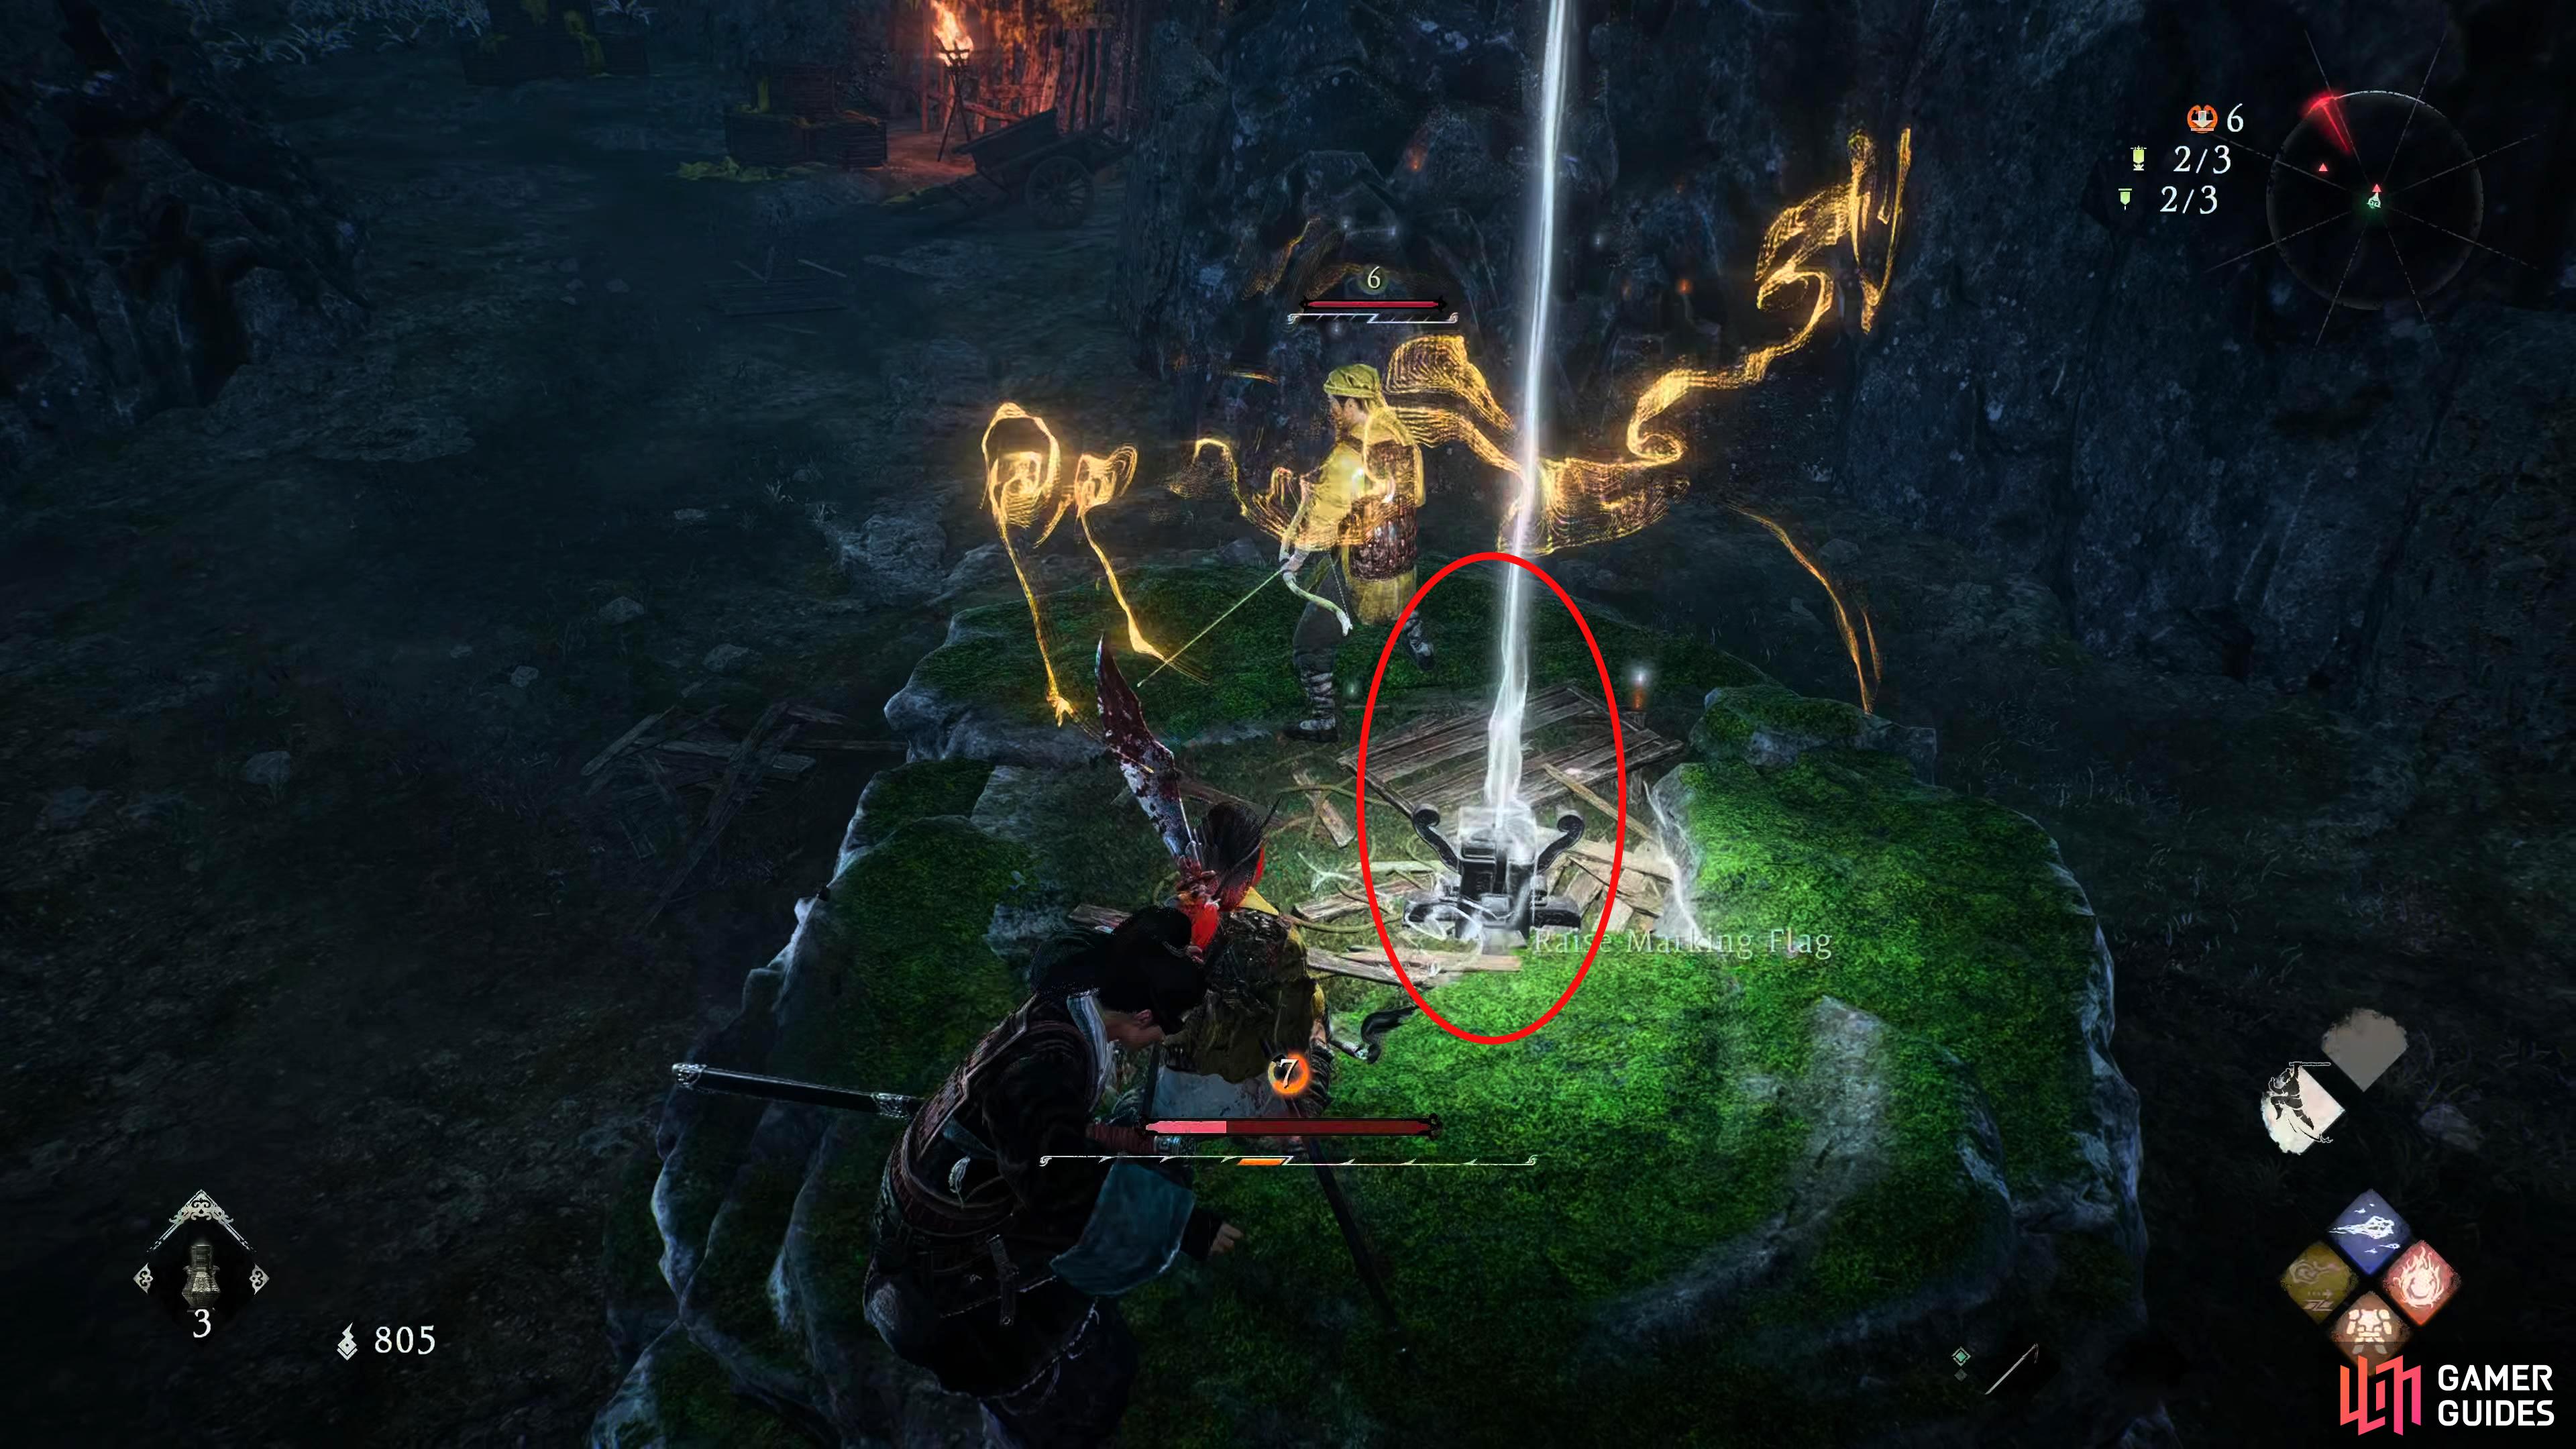
Follow the stairs to your left, and perform a Fatal Strike on the enemy next to the fire then jump on the stone platform with white pain on its edges. Stop here for a second, and look to the northeast where you’ll find the first Marking Flag. These Flags will raise your Morale and replenish any health you’ve lost, but they won’t give you any healing pots back.
The first Marking Flag can be found in the area surrounded by fire. Jump over the platform, and onto the platform to your northeast.
Marking Flag 2 Location
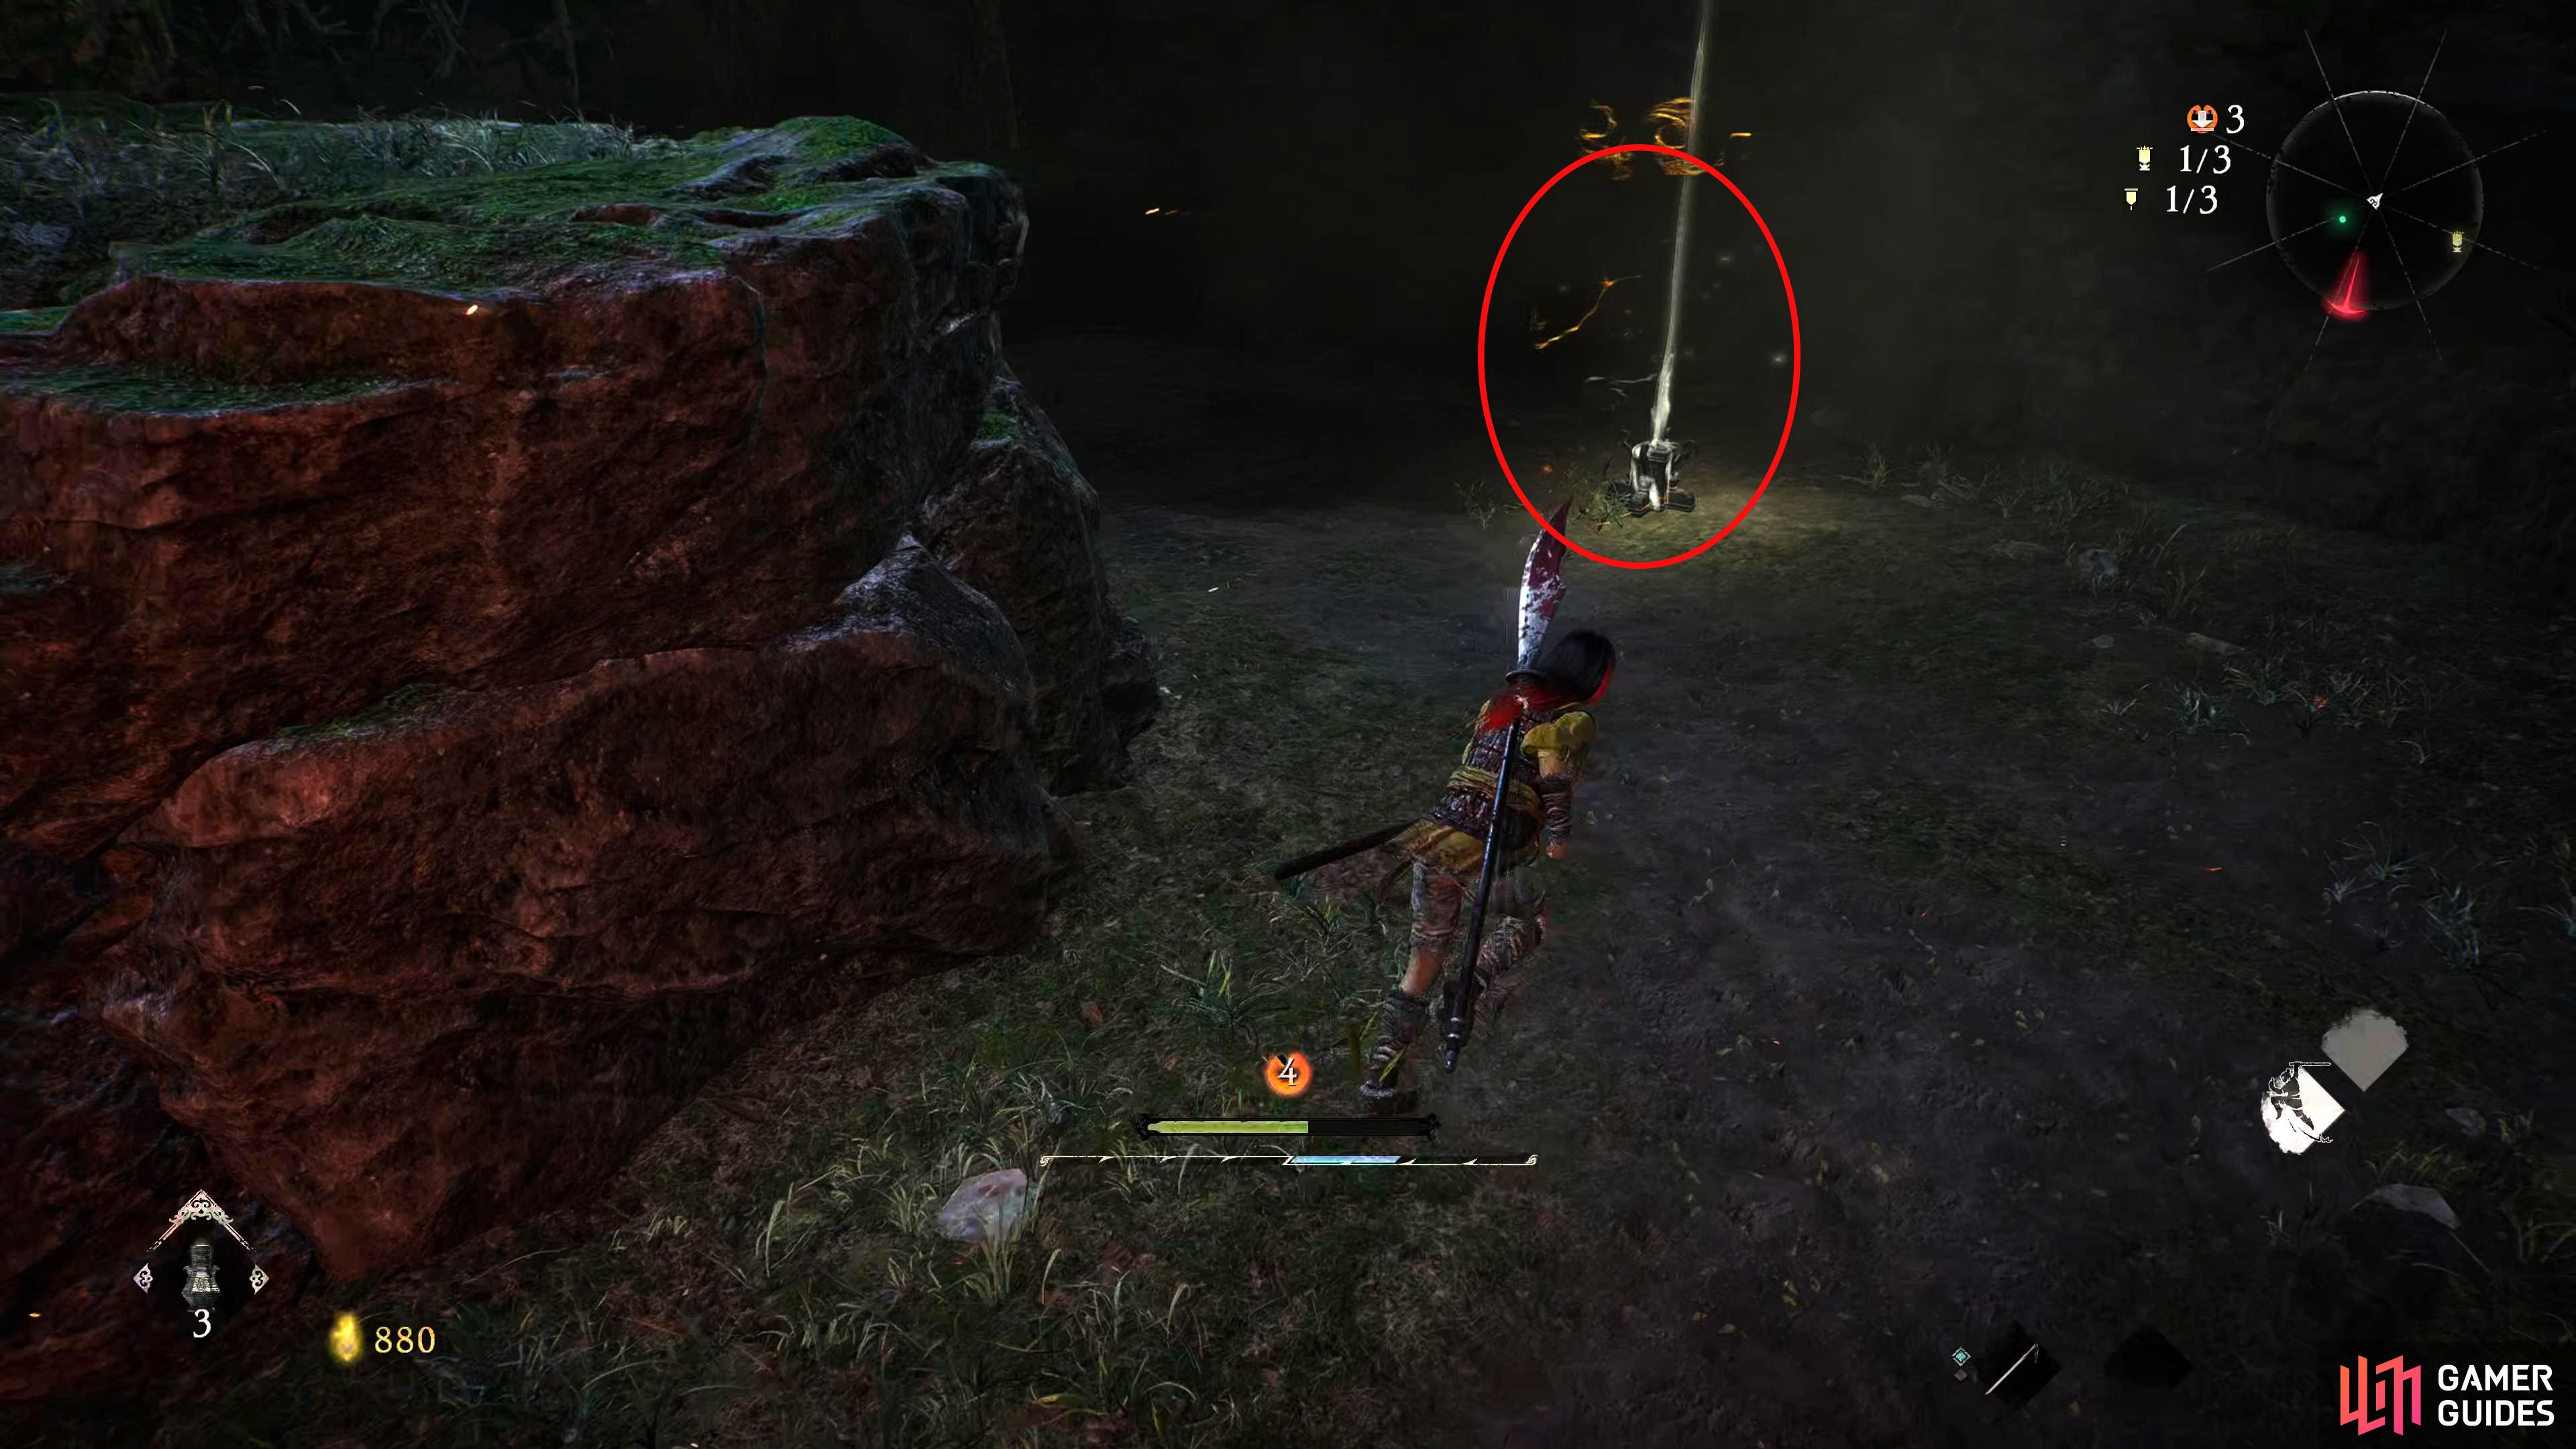
This Marking Flag is near the previous Marking Flag. From the previous Flag, drop to the floor, and follow the path left where you’ll see an enemy waiting at the bottom of some stairs. Head towards and defeat them then look to your right. You’ll see the second Marking Flag behind the rock, but you’ll need to deal with the enemies first of which there are two.
The second Marking Flag can also be found in the area surrounded by fire, but it’s behind a rock at the back, near the stairs leading up.
Battle Flag 2 Location
Go up the previously mentioned stairs to the left of the Marking Flag, and you’ll be welcomed by the golden glow of the next Battle Flag!
The second Battle Flag is at the top of the stairs near Marking Flag 2.
Marking Flag 3 Location
Drop to the floor below where you’ll be met with three zombie-like enemies. Defeat the enemies and proceed onwards where you’ll find another two enemies at the bottom of some stairs to your right, although these can be ignored if you jump on, and over the nearby platforms. As you head onwards, you’ll get the Martial Arts tutorial. Defeat the enemy and proceed up the stairs where you’ll find the next Marking Flag at the back. Be warned though that there are several enemies here including one which shoots at range. The last Marking Flag will be on the same platform where the Ranged attacker is.
The final Marking Flag is at the back of the area at the top of the stairs where the zombie-like enemies were. There will be a ranged attacker on there.
Battle Flag 3 Location
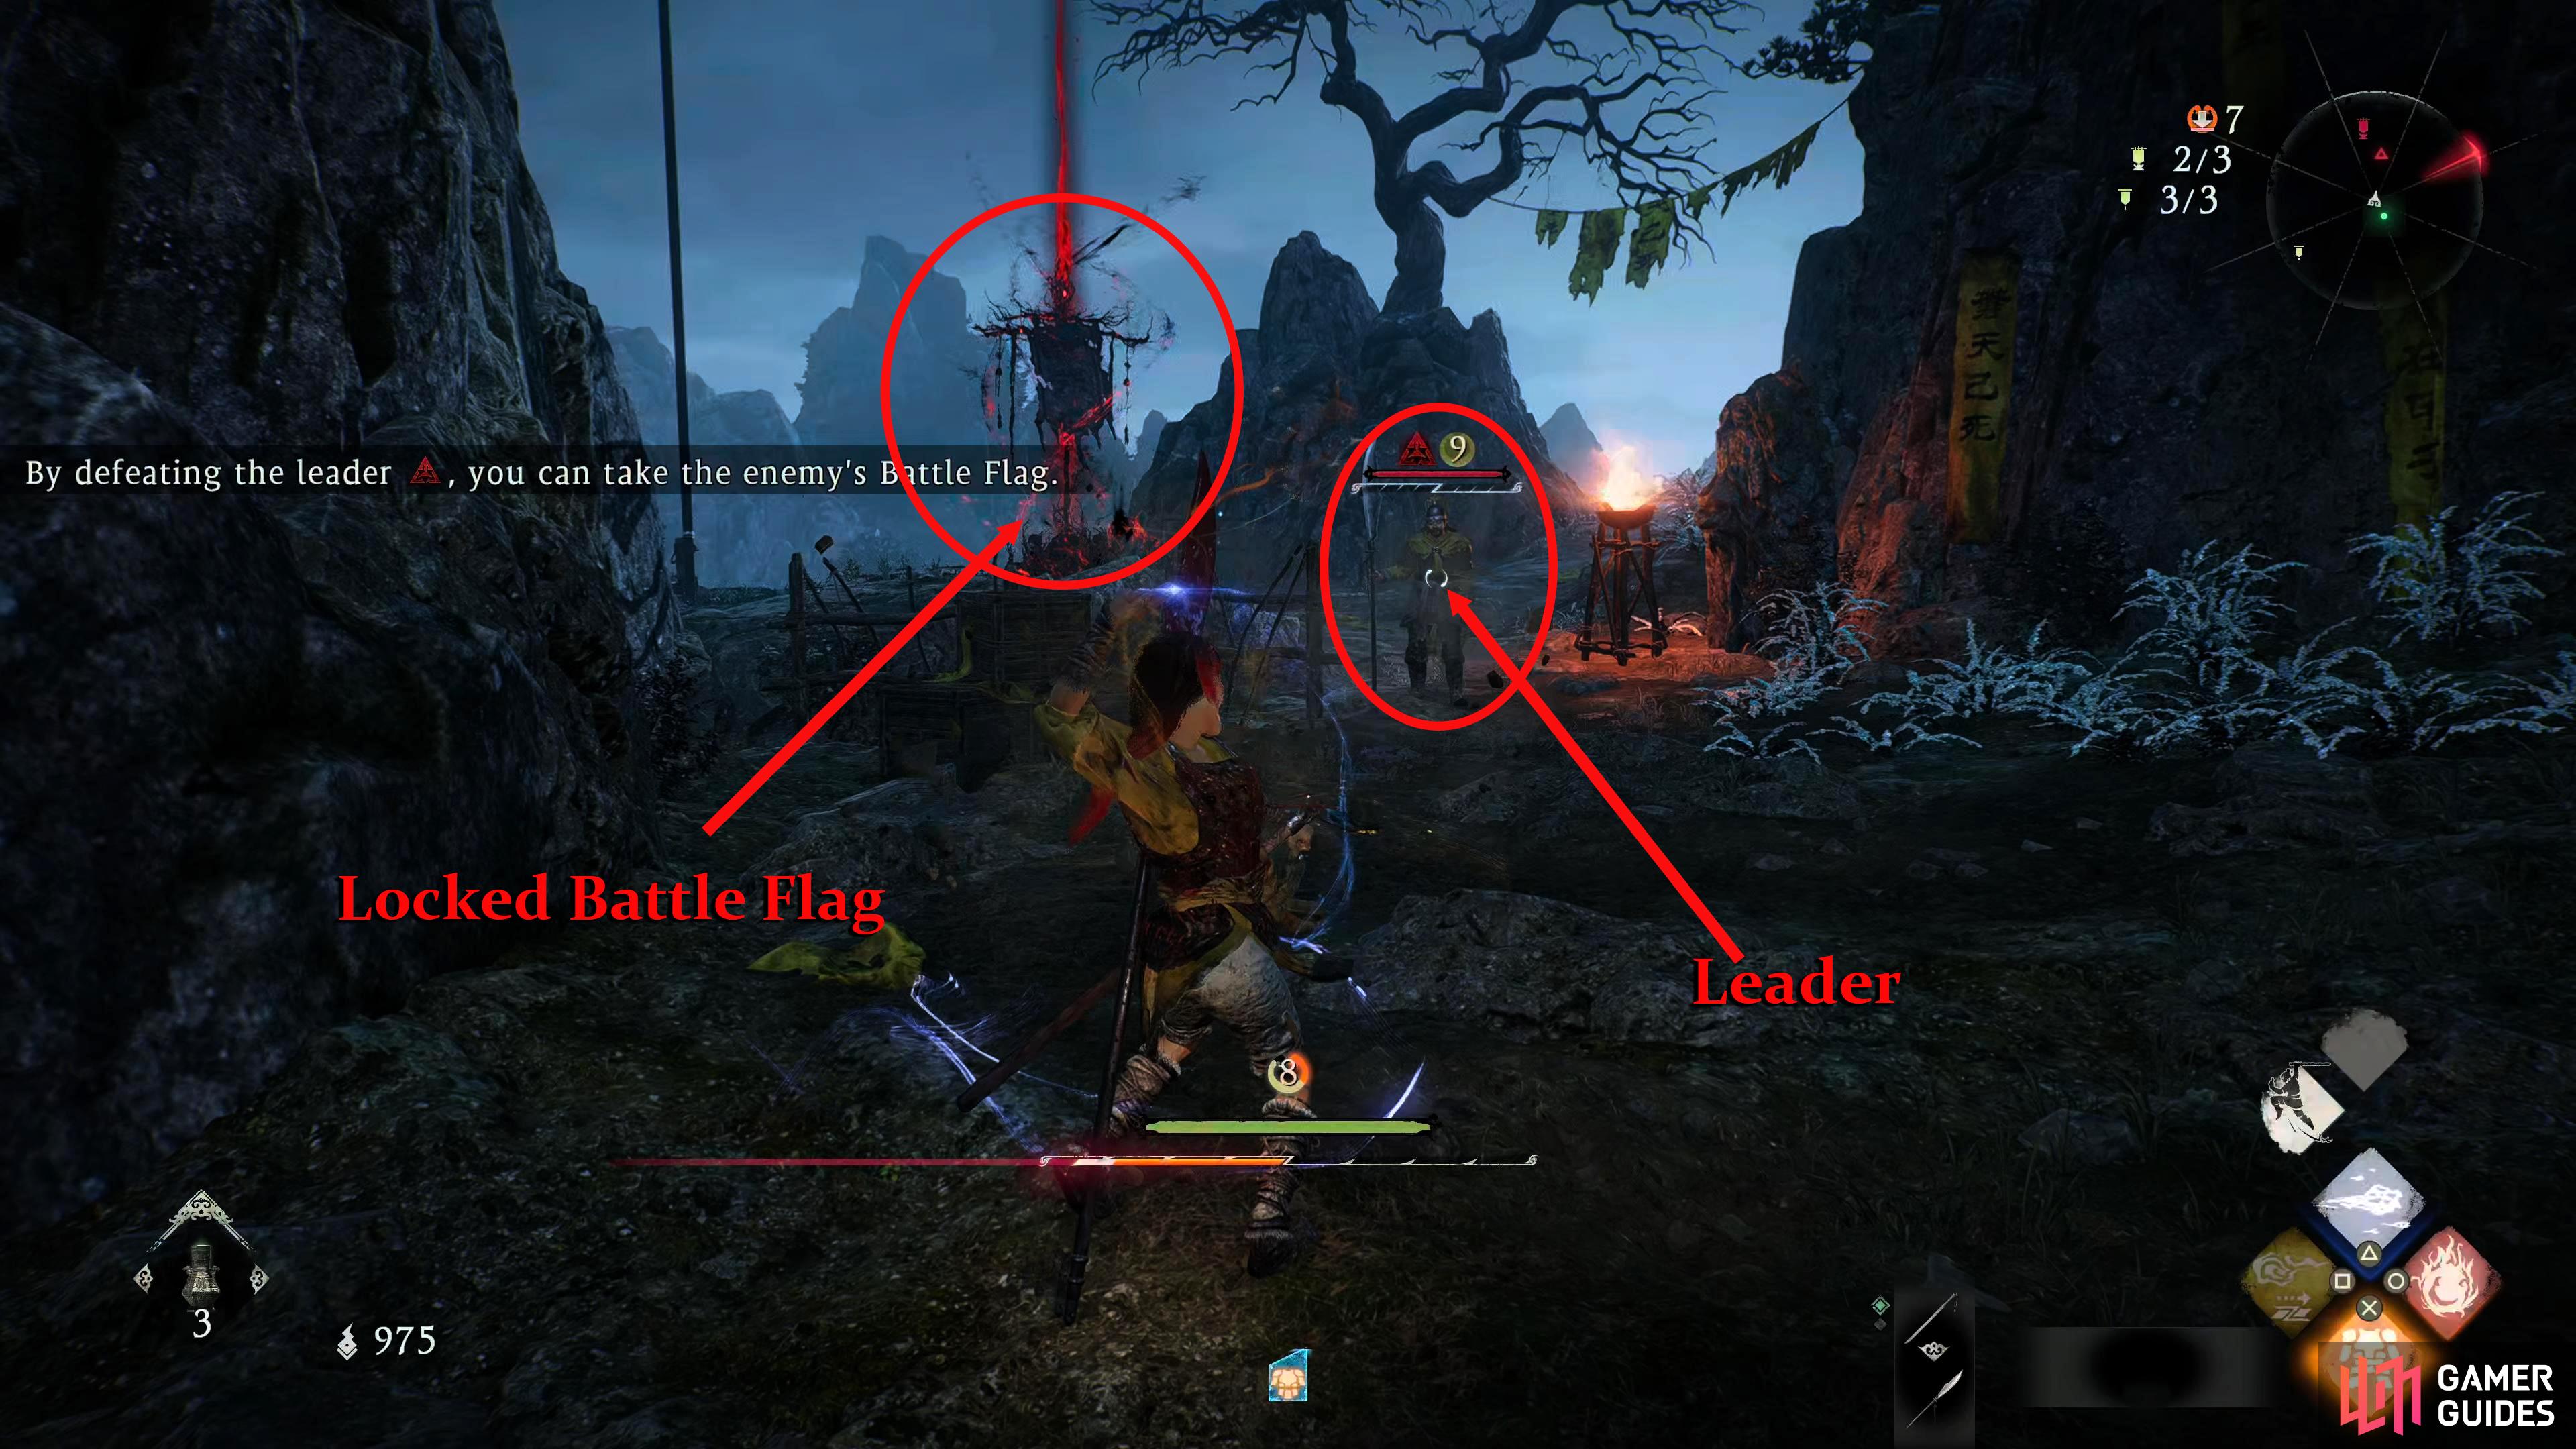
The final flag of the mission is just around the corner. At first this flag will look different with its reddish hue and that’s because it’s locked until you defeat the nearby Leader on which the game will give you a prompt about. Defeat the leader, which will unlock the final Battle Flag thus giving you 100% completion when you finish the mission.
The final Battle Flag is just around the corner from the last Marking Flag, but you’ll need to defeat the nearby Leader to unlock it.
How to Find the Flags
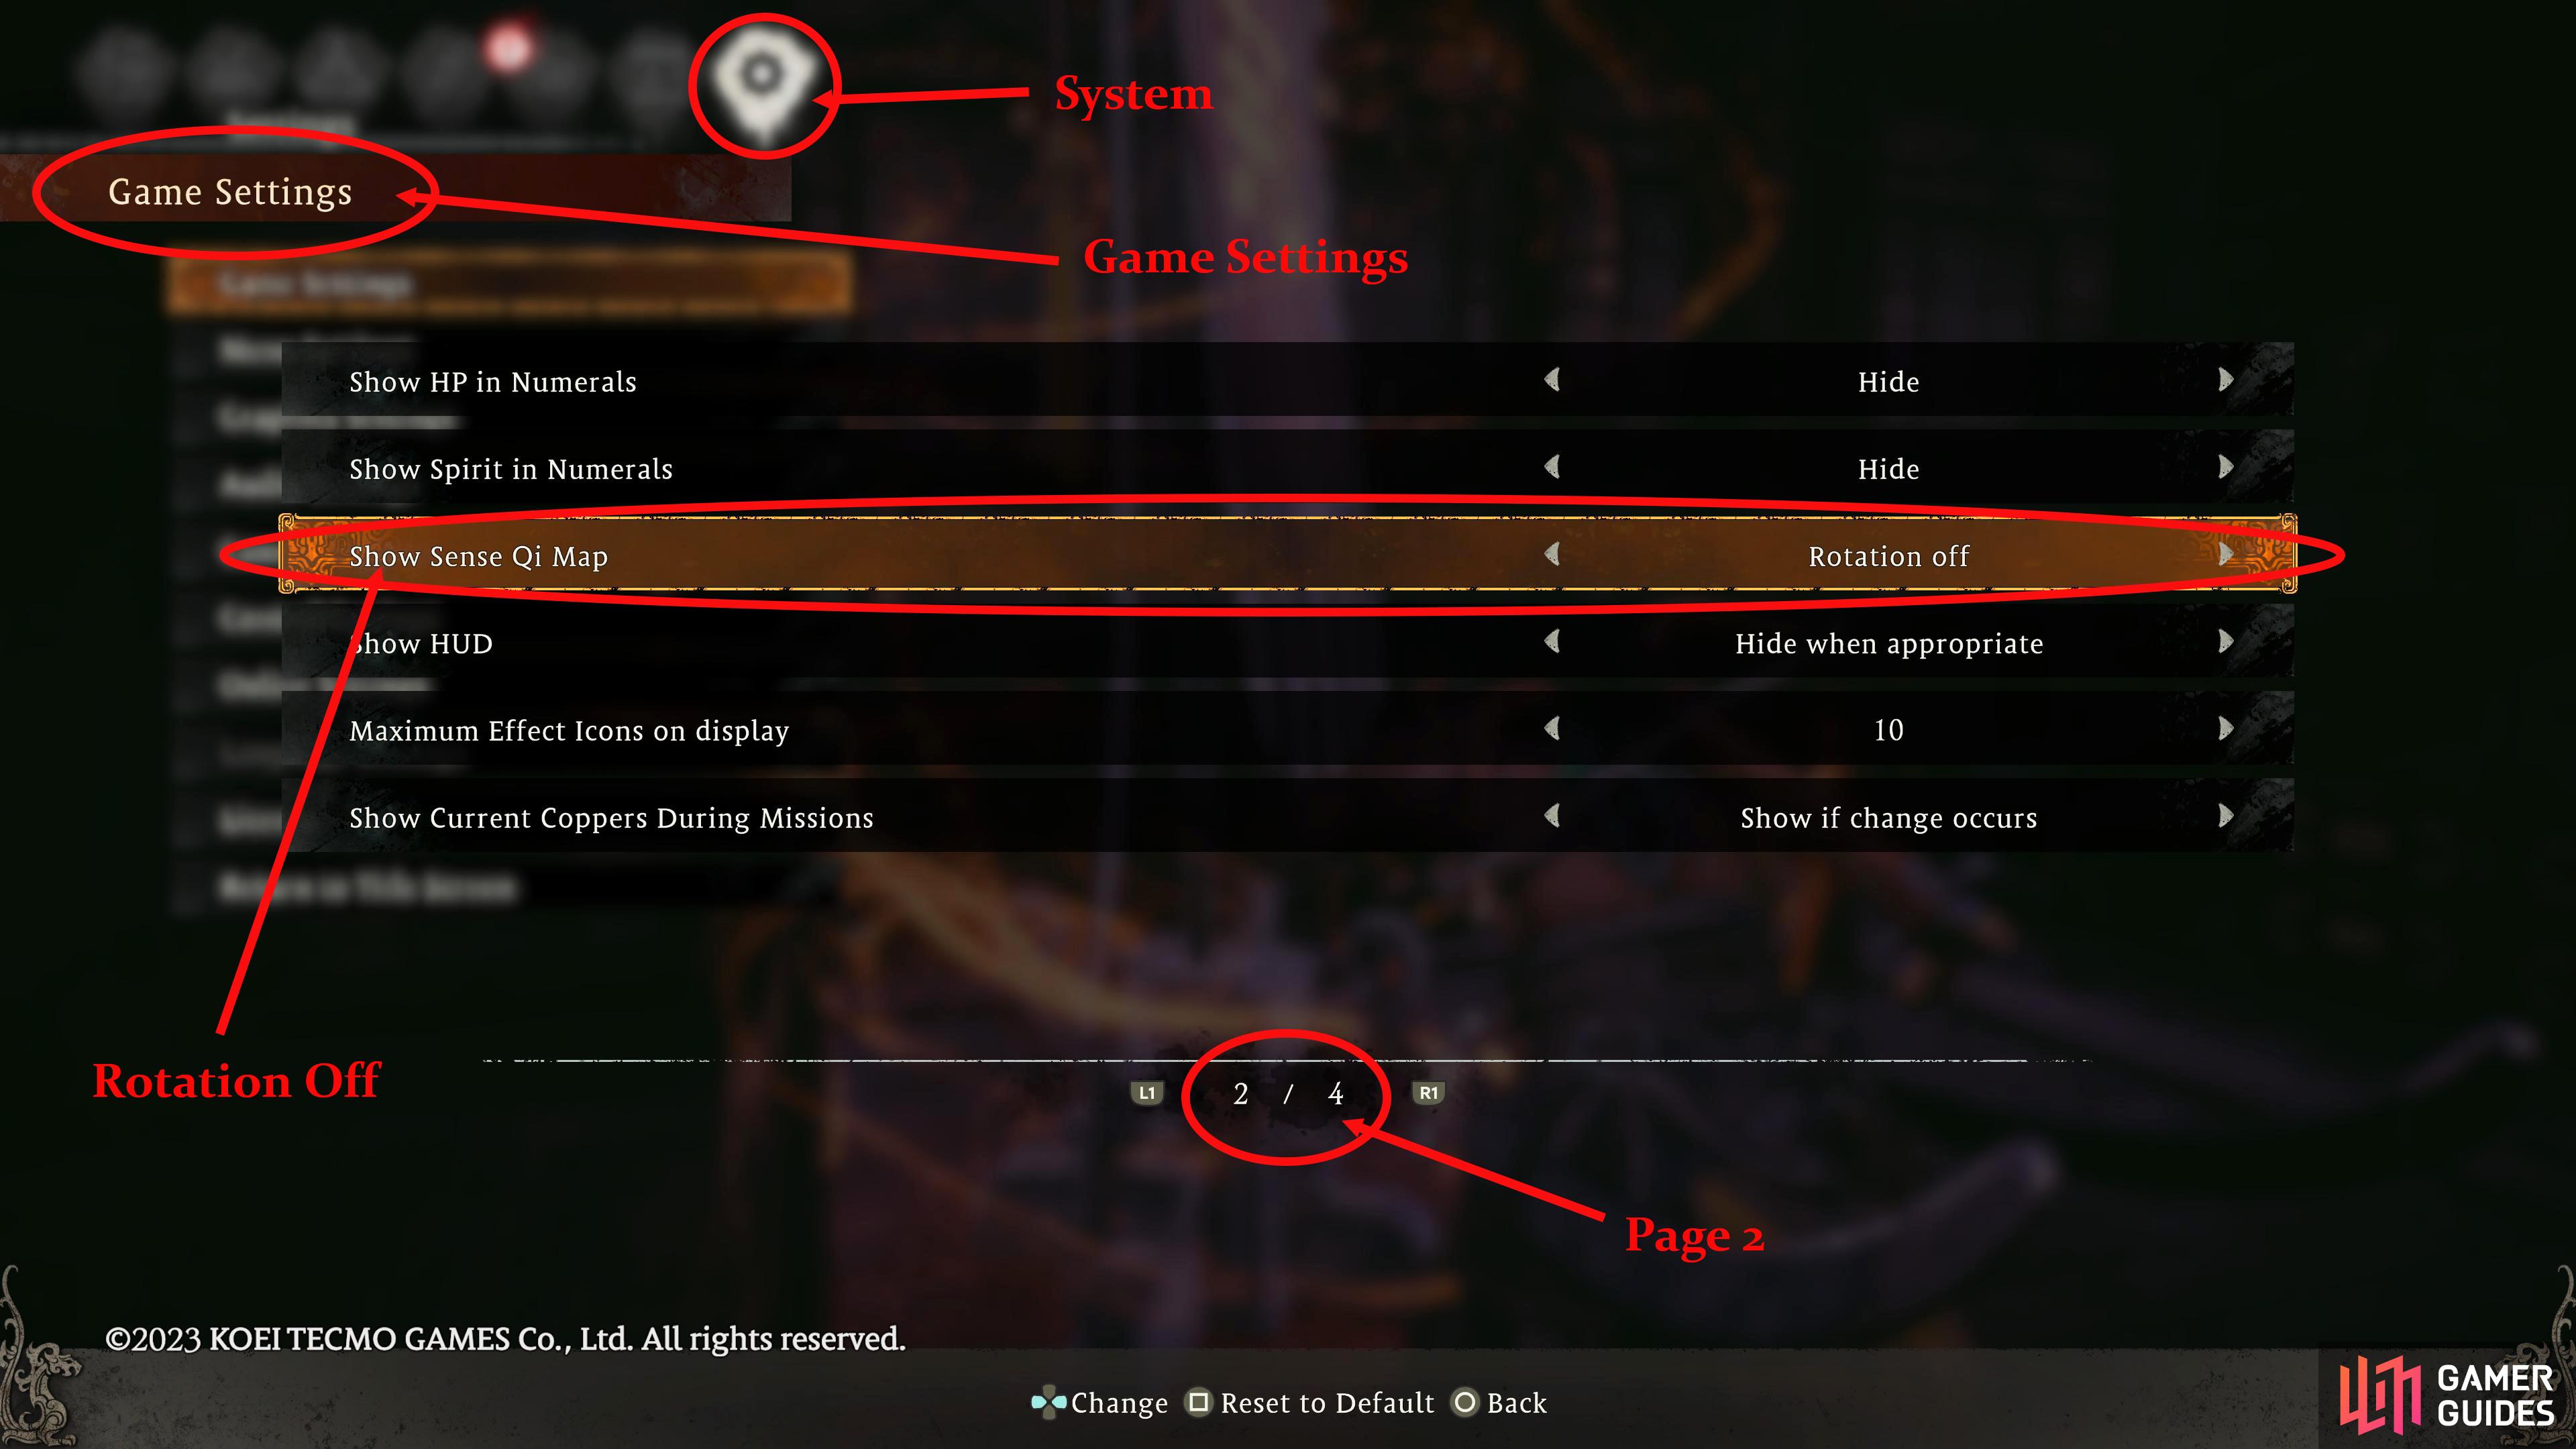
A helpful tip if you happen to miss any flags is to go through the level with one eye kept on the Sense Qi Map (mini-map) in the top-right corner of the screen. At first, this may not seem helpful, but if you turn off the Sense Qi Map rotation it will make your life easier. You can do this by going to the System Menu (cog) > Game Setting > Page 2 > Show Sense Qi Map > Rotation Off.
You may be wondering why you’d want to do this, but it helps navigate where the flags are. See, the flags will show up on the Sense Qi Map, even if you don’t have them yet, then you can follow it on the map. You can tell what direction you’re facing by a faint gray line on the edge of the map.
(1 of 2) Turn off the rotation on the Sense Qi Map to make finding the flags easier.
Turn off the rotation on the Sense Qi Map to make finding the flags easier. (left), That way, the soft gray line above it will show you what direction you’re facing. (right)


 Sign up
No Comments