After completing both the Tower of Hera and House of Gales and thus acquiring the Pendants of Power and Wisdom, Link will receive a telepathic message from Sahasrahla the moment he sets foot outside. With all three Pendants in possession, it’s now time to head to the Lost Woods and acquire the legendary Master Sword. Warp to Kakariko Village and then leave the village from the left exit in the top-left corner.
Chuck the small rocks out of the way and head up through the forest clearing, then stop halfway across the screen. Look to your right, where there’s a line of trees and search for the narrowest section–just one tree thick. Step in front of this section and go right, through the tree and to the other side. Next, head down and pound the wooden stumps with the Hammer; lift the small rock beyond to uncover Maimai #43 .
$$$item 3882
Once you’re done, make your way up and exit the screen at the very top. You will now be in the Lost Woods area–a spooky and misty area of woodland. Watch out for Blobs emerging from the ground and Crows lurking above. Go through the log tunnel ahead, which leads to the right. Past the tunnel, go in a south-easterly direction to find Maimai #44 perched on top of a tree–knock it off with a Pegasus Boots dash.
$$$item 3883
From the Maimai, head upwards, through another log tunnel, then turn right having passed it. Mow down the bushes in the way and lift the small rocks beyond to find Maimai #45 .
From here, go all the way left, past another log tunnel. After the tunnel is a signpost and a log tunnel going ahead. Continue left and mow down the bush in the corner to find Maimai #46, then return to the signpost. Ignore the warning like any good hero would and head through the log tunnel to its left. Here; you’ll be in the actual Lost Woods–a mysterious region where, if you’re not careful, you’ll go nowhere.
$$$item 3886
Continue upward and Link will be met by eight Poes; to proceed, you must follow the top-most Poe. However the Poes will all try to confuse you; they will circle slowly and then shuffle amongst themselves three times. Focus on the Poe you must follow and, after the final shuffle, go through the same tunnel as it. Fail and you’ll return to the start, but there will less Poes in the circle. Hint: the key Poe always ends up at the right-most position of the circle.
Succeed and the eight Poes will return with a different trick–now there are two Poes you mustn’t follow. Like before, the Poes will shuffle three times, before going their separate ways. This time, you have to focus on two Poes at the same time, which is no easy feat. After the final shuffle, note down the direction the two Poes went into and then head for the remaining direction. Fail and you’ll return to the start, but when you get back to this stage there’ll be less Poes in the circle. Hint: the two key Poes always end up at the top-most and bottom-most positions.
Head in the correction direction and you’ll receive a final challenge from the Poes–now there are three Poes you mustn’t follow. This is the exact same fare as before, but now you must focus on three Poes at the same time. This is a real test of concentration and co-ordination; good luck. Should you go in the wrong direction, you’ll be taken to the start again, but there will be less Poes in the circle when you return. (As far as we’re aware; the correct direction is always the way you came).
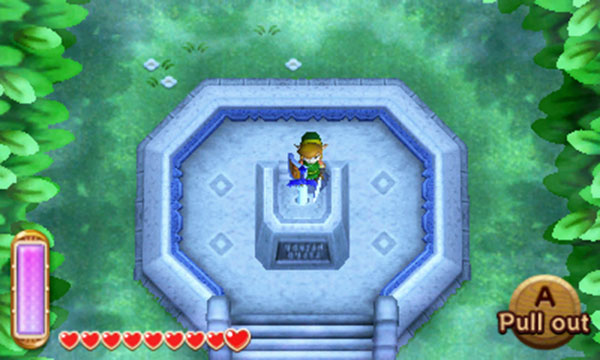
Triumph the Poes’ challenge and you’ll emerge into a quiet clearing. Go ahead to find the pedestal with the Master Sword; walk up the stairs and around the back of the Master Sword. Then press A and Link will pull out the Master Sword.
With this legendary blade in hand, Link will perform a sword beam attack when at full health. Having acquired the Master Sword, Link will receive a message from Sahasrahla, urging him to go to Hyrule Castle.
Before you go anywhere, warp to Link’s House and go inside to Ravio’s Shop. Link will learn that Ravio is now offering his items for permanent ownership, albeit for a rather steep price. Generously, Ravio will give you a half-price discount for the first item you purchase to own.
Compared to renting items, the obvious benefit of owning an item is that you won’t lose it should you lose all health. Additionally, you can upgrade owned items by returning lost Maimai to Mother Maimai in Lake Hylia.
- Bombs, Bow, Tornado Rod, Hammer, Hookshot, Boomerang: 800 rupees
- Ice Rod and Fire Rod: 1200 rupees


 Sign up
No Comments