Before tackling this dungeon, be sure to bring along bombs; the fact you must use a bomb to uncover the entrance is a clue they’ll be important. Upon stepping inside, the first thing you’ll realise is that it’s dark. Well, it is the “Dark” Palace after all… Flash out your lamp so you can see further ahead. In the first room (1F south), there’s a chasm ahead and many unlit torch blocks across the room. In typical Zelda fashion, you would light all the torches and expect something magical to happen, like a platform bridging the chasm. Not here though! In fact, later on, you will want to put out torches even.
To begin with, make your way to the top-right corner and bomb the cracked wall ahead; then go through (to 1F centre) and collect 5 rupees from the chest, before returning. Next (1F south), head for the top-left corner, all the way across the room and drop a bomb next to the round switch. Run back to the entrance and step on the platform with a circular pattern ahead.
When the bomb activates the round switch, the platform will move up across the chasm; at its destination, get off before it returns down. Should you need to return down, walk left and strike the round switch through the wall.
Helmasaurs are protected by a metal mask and charge at Link. You can wait for them to charge, then sidestep out of the way, before hitting their back. For an easier time, fire the hookshot at their mask to pull it off, making them vulnerable from all sides. You can also stun them with the Hammer’s shock wave or Tornado Rod or use a bomb to blow up their mask.
On the other side you’ll be in front of a tightly-shut door, with a disturbing eyeball to the left and some kind of black circle to the right. You can’t do anything with the eyeball, so clearly you must do something to the black circle. Look up and you may notice there’s a beam of light shining from a window and onto the eyeball; on the right, there looks to be a closed window with a hint of light coming through. Stand facing the closed window and cast the Fire Rod ahead to burn the planks blocking the window–light will shine below, activating the eyeball to the right. The door ahead will now open.
In the next room (1F centre), there’s a narrow path ahead and platforms to the left and right–the right platform contains a chest that you opened earlier. Light the nearby torch and something peculiar will happen–the platform to the left will vanish.Put out the torch flame with your sword and the platform will return.
For now; keep the torch lit so you can see ahead. Walk up, across the narrow path and watch out for a Helmasaur approaching. At the end is a locked door; it’s very likely somewhere in this room is a key you can use to progress.
Head for the top-left corner and step on the floor switch to make a Small Key appear in the bottom-left corner. Before going anywhere, plant a bomb on the cracked floor tiles below to destroy them, especially the tile where the beam of light is falling.
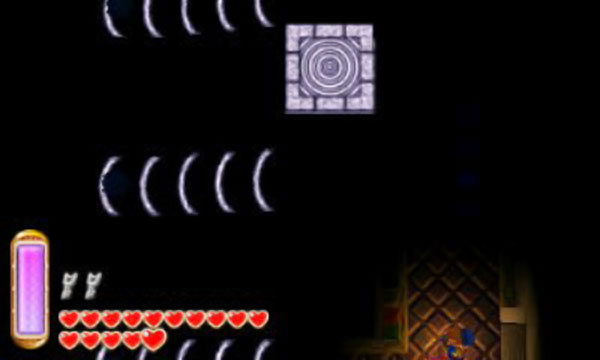
At this point; you may not realise the significance of this action, but it will save you time later. Wait a few moments and the torches will go off, plunging the room back into darkness. Still at the top-left corner, you should notice eerie wave patterns on the walls moving in a fixed direction.
Darkened rooms may have moving arrows to indicate a required route or highlight where the solution of a room puzzle is.
Remove your lamp and the room will become pitch black, but the wave patterns ahead of Link become clearer. Merge into the wall on the left and walk left, following the wave pattern. After you turn a corner, there’s a point where two wave patterns meet up–walk to this spot and emerge.
With luck you will land on the platform with the Small Key; go ahead and grab it. Next, merge back into the wall and continue left to return to the entrance of the room. From here, head up toward the locked door and thrust the key inside to open it.
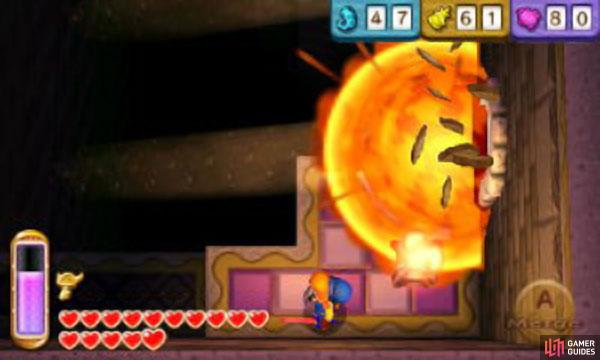
The next room (1F north) is dark and there aren’t any torches immediately nearby. From the entrance, head down the stairs to the right and light the torch at the end before the darkness drives you insane. Next, walk left a few paces and stop before getting flattened by a massive cannonball coming from above.
If you haven’t already noticed, this room is basically identical to the third room in the Eastern Palace dungeon, at the very beginning of the game. In fact, all the rooms bear some resemblance to the Eastern Palace rooms, although for some it’s mostly just the shape of the room.
Goriyas come in two colour variants–red and green. Both types mimic Link’s movements, moving in the opposite direction that Link moves. Green ones can be be slain with normal attacks. The red ones occasionally shoot fireballs and don’t take sword damage. For an easy kill, plant a bomb on the floor, then walk in a circle so the Red Goriya is hit by the explosion–two regular bombs will do the deed.
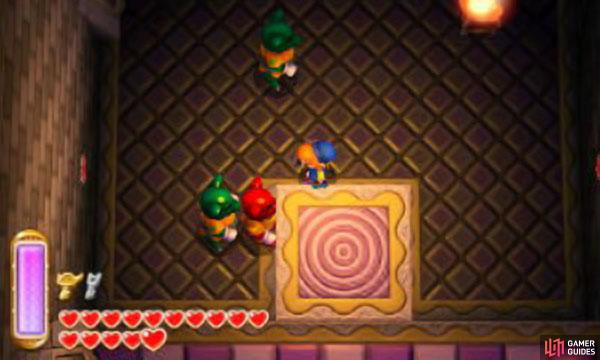
Merge into the wall above and walk all the way left, past the cannonball passageway. At the end, head through the door leading right. The next room (1F north-east) will lock and you’ll be stuck with three creepy monsters, known as Goriyas, which mimic Link’s movements. Defeat them to open the door and activate a lowering and rising platform in the room. Wait for the platform to lower, then walk down past it to enter a secret passageway leading down to the room below.
Here (1F east), you’ll be standing below a metal railing. To the left is a chest containing a Monster Tail ; in the top-right corner is a cracked floor tile that you can bomb to create a hole leading below. For now, avoid dropping through the hole–down below (B1 north-east) is a chest containing a Monster Horn , which isn’t important enough to warrant backtracking all the way here again (besides you get loads from killing monsters). Instead, return to the previous room (1F north-east) and ride the platform up to higher ground.
Face the bottom wall at its middle and strike at it to hear a “clink” sound–the tell-tale sign that you can blast the wall with a bomb. Go down through the gap in the wall to return to the room with the metal railing (1F east), except this time you’re on top.
Cautiously make your way down, being careful of the two ghosts floating around in the dark, and open the chest in the bottom-right corner to claim 50 rupees. Head back to the previous room again (1F north-east) and take the door to the left, which leads back to the cannonball room (1F north).
From the entrance, stand up a bit and face down, then cast the Fire Rod down to light the torch lower down. Next, head left across the overpass and go through the door leading left. In the next room (1F north-west), there’s a lowering and rising platform in the centre, with round switches to its left and right
Step on the platform and wait until it just begins rising, then place a bomb facing the wall below to reveal a secret passageway leading to the room below (1F west), where you can nab three fairies to replenish health.
Return to the platform (1F north-west) and place a bomb on the floor, then–with the A button–quickly pick it up and throw it right, towards the round switch on the right. Immediately, set another bomb and throw it at the round switch to the left. If you got the timing right, you will trigger the two round switches within the time limit and a chest will appear in the bottom-left corner; inside the chest is the Compass . Alternatively, if you step at the very edge of the platform, you can use the Ice Rod to hit the round switches.
Use your bombs (or the Fire Rod if you have it) on the boarded up windows to allow light into the room below (that allows access to the boss room).
Go through the door in the top-right corner to return to the cannonball room (1F north). This time, head all the way right, across the stairs and pass the two doors. At the end, go down and left, then take the narrow corridor leading down. Bomb the cracked floor tile below and drop through the hole to land next to a Small Key (B1 north).
Light the nearby torch and drop down ahead, then head left and take the door leading up, to return to the cannonball room again (1F centre). Along the way, be careful of the Dark Ghinis–you can only see them in the dark.
Next, open the locked door immediately to the right and go upstairs to Floor 2F. This next room (2F north) is quite clever. Hit the round switches and the middle part of the leftward and rightward walls will flip sides. If you hit the round switch and attempt to run for a wall before it flips, you won’t make it in time.
Place a bomb next to the round switch, then merge into the leftward wall, where the mask pattern is. After the bomb triggers the switch, the wall you’re on will flip to the other side, carrying you with it. Alternatively, stand in front of the mask pattern and fire an arrow diagonally down-right at the round switch.
On the other side, watch out for the fire-breathing Kodongo nearby. There’s a round switch on this side too, if you need to go back. For now, take the door leading left. Next (2F north-west), hastily make your way down the corridor and drop a bomb next to the round switch along the way to the right.
The floor tiles further down will collapse and if you’re not quick, your path will be blocked off or worse you’ll fall off and take damage. If you’re too late, simply merge into the wall to continue your way down. After the bomb sets off the round switch, rush through the door leading down before it slams shut.
In the next room (2F south), there are two Dark Ghinis that hide in the light (to the far sides of the room) and one Light Ghini that hides in the dark (near the middle); be prepared to switch on/off the torches and your lamp to banish them all. When the lights are off, keep close to the eerie wave patterns so you don’t fall into the chasm and don’t hesitate to take out the lamp again to get your bearings. Once all the Ghinis are gone, light the torches again so you can see where you’re going.
From the entrance, head down; to the left, there’s a boarded-up window in the middle–cast the Fire Rod in its direction to burn the planks and let the light in. Next, make your way to the round switch near the top of the room. Stand on the rectangular tile just above and strike the round switch to raise yourself up. Go up and merge into the wall above, then walk all the way right. At the end, use the Fire Rod to liberate the nearest closed window (near the top-right). Drop down above and merge into the wall below, then walk right to find a chest containing one Monster Guts .
From here, merge back into the wall again and continue right to cross the gap. Head left to find another round switch; ignore it for now. Return to the top-most round switch and hit it to deactivate it. This next part stumps a lot of adventurers and we spent a good hour or so before sussing out the solution.
Study the dungeon map–in the middle of this floor there’s a chest in a room with no entrance to it. Look nowhere else, because the way to reach that room is in this very room. Here’s hint: look ahead from the top-most round switch. Keep staring and you might just figure it out.
$$$item 3942
Go all the way down and plant a bomb on the bottom-most round switch, then quickly run up and strike the top-most round switch to lift yourself up; finally merge onto the wall with the masked pattern and wait. Once the bomb triggers the bottom-most switch, the wall will flip over, taking you to the secret room (2F centre).
Emerge to find a big chest containing a Master Ore . To return (to 2F south), plant a bomb next to the round switch in this room and repeat what you just did. If you ask us, this is probably the cleverest puzzle in the game, so props to you if you figured it out yourself!
With this floor conquered, head right and exit the room via the top-right corner. In the next room (2F north-east), go up the corner and exit via the top-left corner. Like in the room opposite, the floor tiles ahead will collapse; if you’re not quick enough, merge into the wall to cross the gap. Back in the room with the rotating walls (2F north), watch out for a Helmasaur nearby. Bomb the cracked floor tile in the bottom-right corner; leap through the hole to the cannonball room below (1F north), where you’ll land on a ledge with a chest containing 50 rupees.
From here, head left and stop after crossing the wire mesh overpass. Merge into the wall above and walk all the way right to reach a secluded area. At the end, blast the cracked floor tiles and leap down below (to B1 north) to score yourself some nice rupees. Drop down above and take the door immediately to the left.
This next room (B1 north-west) is a bit mind-boggling. With the lights on, try to walk and you’ll be obstructed by invisible walls. Instead, swipe your sword at the torch ahead and put away your lamp too. While in complete darkness you can see a maze of glow-in-the-dark walls, with small gaps in the wall here and there.
There’s small openings in the walls of the maze; so you’ll need to merge with the vaious walls and slip past the openings to make it through.
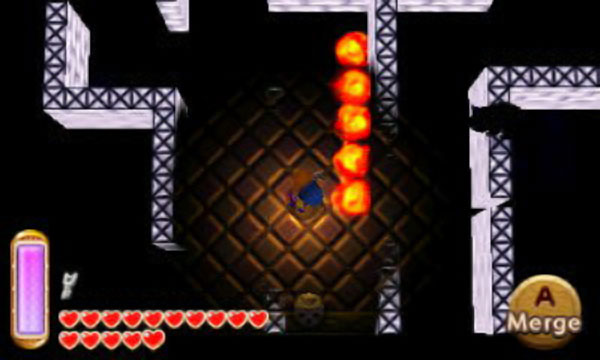
Make your way through the maze, first passing through the gap to the right. Avoid the fire-breathing Kodongos and the lines of fire moving along the walls. Bring out the lamp again if you need to get your bearings or find it easier to navigate with.
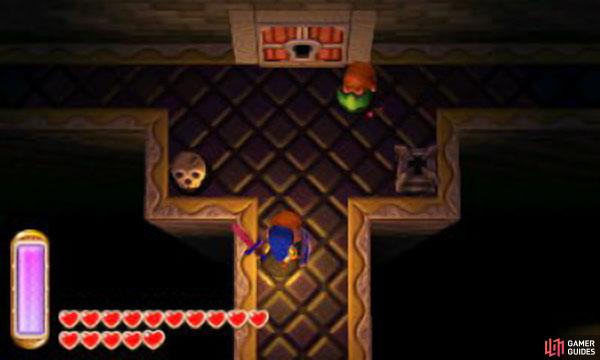
Make your way to the top-left corner and smash the skull at the end to discover a hidden floor switch–step on this to reveal a chest in the bottom-left corner. Head for the chest and open it to obtain an elusive Small Key . Finally, take the exit in the bottom-right corner; afterwards, you can flash out the lamp again.
The next room (B1 south) contains the big door, which leads to the boss, but you can’t reach it because there’s a gruesome barrier in the way. Besides you don’t have the big key. Head for the top-right corner and take the door above to the room. Here (B1 north-east), the entire floor is pitch black, conveniently masking the perilous chasms.
Put out the torch ahead and put away your lamp too. Despite the complete darkness, you can now see clearly thanks to the glow-in-the-dark platforms. Carefully navigate the platform, watching out for the Helmasaurs, and make your way to the top-right corner to collect a Small Key .
Return to the previous room (B1 south) and go through the locked door in the bottom-left corner (to B1 south-west). Just before the chasm, pick up a bomb and throw it left to activate a round switch. Next, step onto the moving platform and throw two more bombs at the remaining round switches to the left.
Once all three switches are hit, a big chest will appear in the top-right corner–open it up to find the dungeon’s Big Key . Head back to the previous room (B1 south) and this time go through the locked door in the bottom-right corner.
Don’t forget to save your progress before opening the door to the boss’ room!
Inside (B1 south-east), the doors will lock and you’ll have to slay some Goriyas to proceed. However this time they’re on top of the metal railing, while you’re standing below. Luckily there’s a gap in the railing in the centre, so just walk around until all three Goriyas fall down to your level and then pummel them like last time.
Afterwards; the doors will open and a warp zone to the entrance will appear higher up. Additionally, a lowering and rising platform will appear in the centre; ride the platform upstairs and go through the door to the left.
Back in the room with the big door (B1 south), merge onto the wall just below the door and walk all the way right, following the hearts and rupees. At the middle, there’s a platform you can use to rest the energy gauge. When ready, merge back into the wall and continue right. At the end, strike the round switch to reveal a hidden eyeball. At this point, provided you followed this guide carefully, all four eyeballs will now be lit and the barrier to the big door will open up.
When ready, head through the big door. In the boss room, light the torch blocks in the top-left corner and bottom-right corner. Afterwards, the entire room will light up and the boss will appear in the middle.
Boss: Gemasaur King
This guy is basically a massive Helmasaur; unlike the little guys, he’s much tougher to take down though. At the beginning, keep your distance as the boss stampedes around the room. If the boss gets too close, merge into the wall to avoid getting hit.
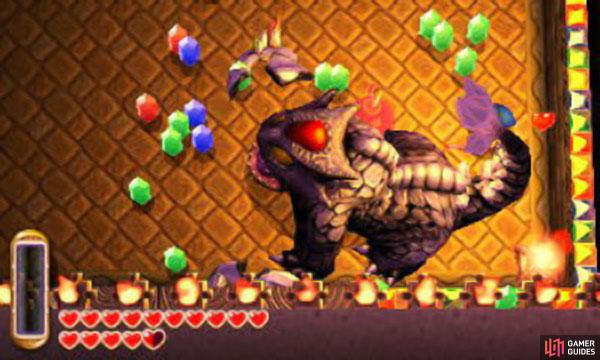
Wait for the boss to stop and grunt–it will attempt to shoot spikes at you with its tail. Immediately plant a bomb in front of the boss and step away; raise your shield to deflect the spikes. With luck, the bomb blast will shatter the boss’s mask slightly and rupees will come flying out.
After a couple of blasts, the boss’s mask will come off and a ton of rupees will fly out. In this form, slash the boss’s head when it pauses or strike while perpendicular so you don’t get stampeded over. Raise the shield to deflect its spike attack like before. Once its taken a few hits, the boss will scream and the lights will turn off. Now the boss means business; it will quickly dash around the room. Run to the corners and light the torches again; merge into the wall to avoid getting hit.
Once both torches are lit, the boss will become vulnerable again; use the same tactics as before. Keep the hits coming and the boss will croak before long; when it’s dead, pick up the heart container and Gulley’s Painting .

 Sign up
No Comments