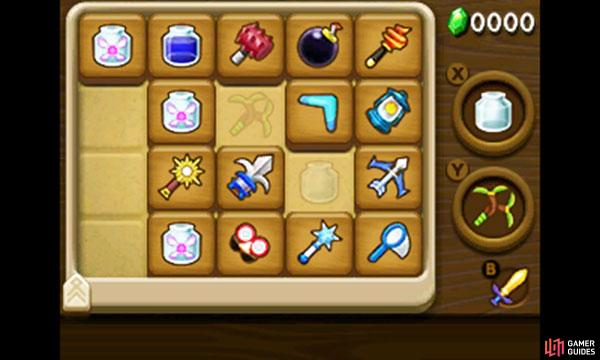
There are two type of equippable items–ones that are automatically equipped and ones that must be equipped to the X or Y button before you can use them.
At the bottom of the touch screen, touch the “Gear” tab to display the Gear menu; here, you can view Link’s important possessions, including all the items he’s automatically equipped. Touch the “Item” tab to open the Item menu; here, you can view Link’s adventuring gadgets, which must be equipped manually.
In the Item menu, you can use the stylus to drag the items around and swap their positions around. Drag an item onto the right-hand box with “Y” in its corner to equip it to the Y button. You can also use the circle pad to highlight the item and then press Y to do the same thing. With the item equipped to the Y button, Link will use that item whenever you press the Y button. Later, you can equip items to the X button as well–the method of equipping is exactly the same.
When the bottom screen is displaying the map, touch the items on the right-hand side to trigger “Quick Equip”. A scroll bar will appear on the right side of the bottom screen and a list of items will appear on the right side of the top screen. Touch the arrows on the scroll bar to select an item.
Once you’ve chosen the correct item for the job, touch the button to the left of the scroll bar that says “Select” to confirm your selection. In the Item menu, touch the arrow in the bottom-left corner and drag it to restrict the items that appear during Quick Equip.


 Sign up
No Comments