In previous One Piece video games, you’ve had Brawlers, Fighters, and even Open-World Action games. This time around One Piece Odyssey goes one step further and offers you a fully-fledged turn-based JRPG similar to other genre staples such as Dragon Quest, and Final Fantasy. If you’re new, or even a veteran to the genre you may have trouble understanding the combat system mainly due to the in-game tutorial not being very helpful. This page will help you understand the finer points of the combat system.
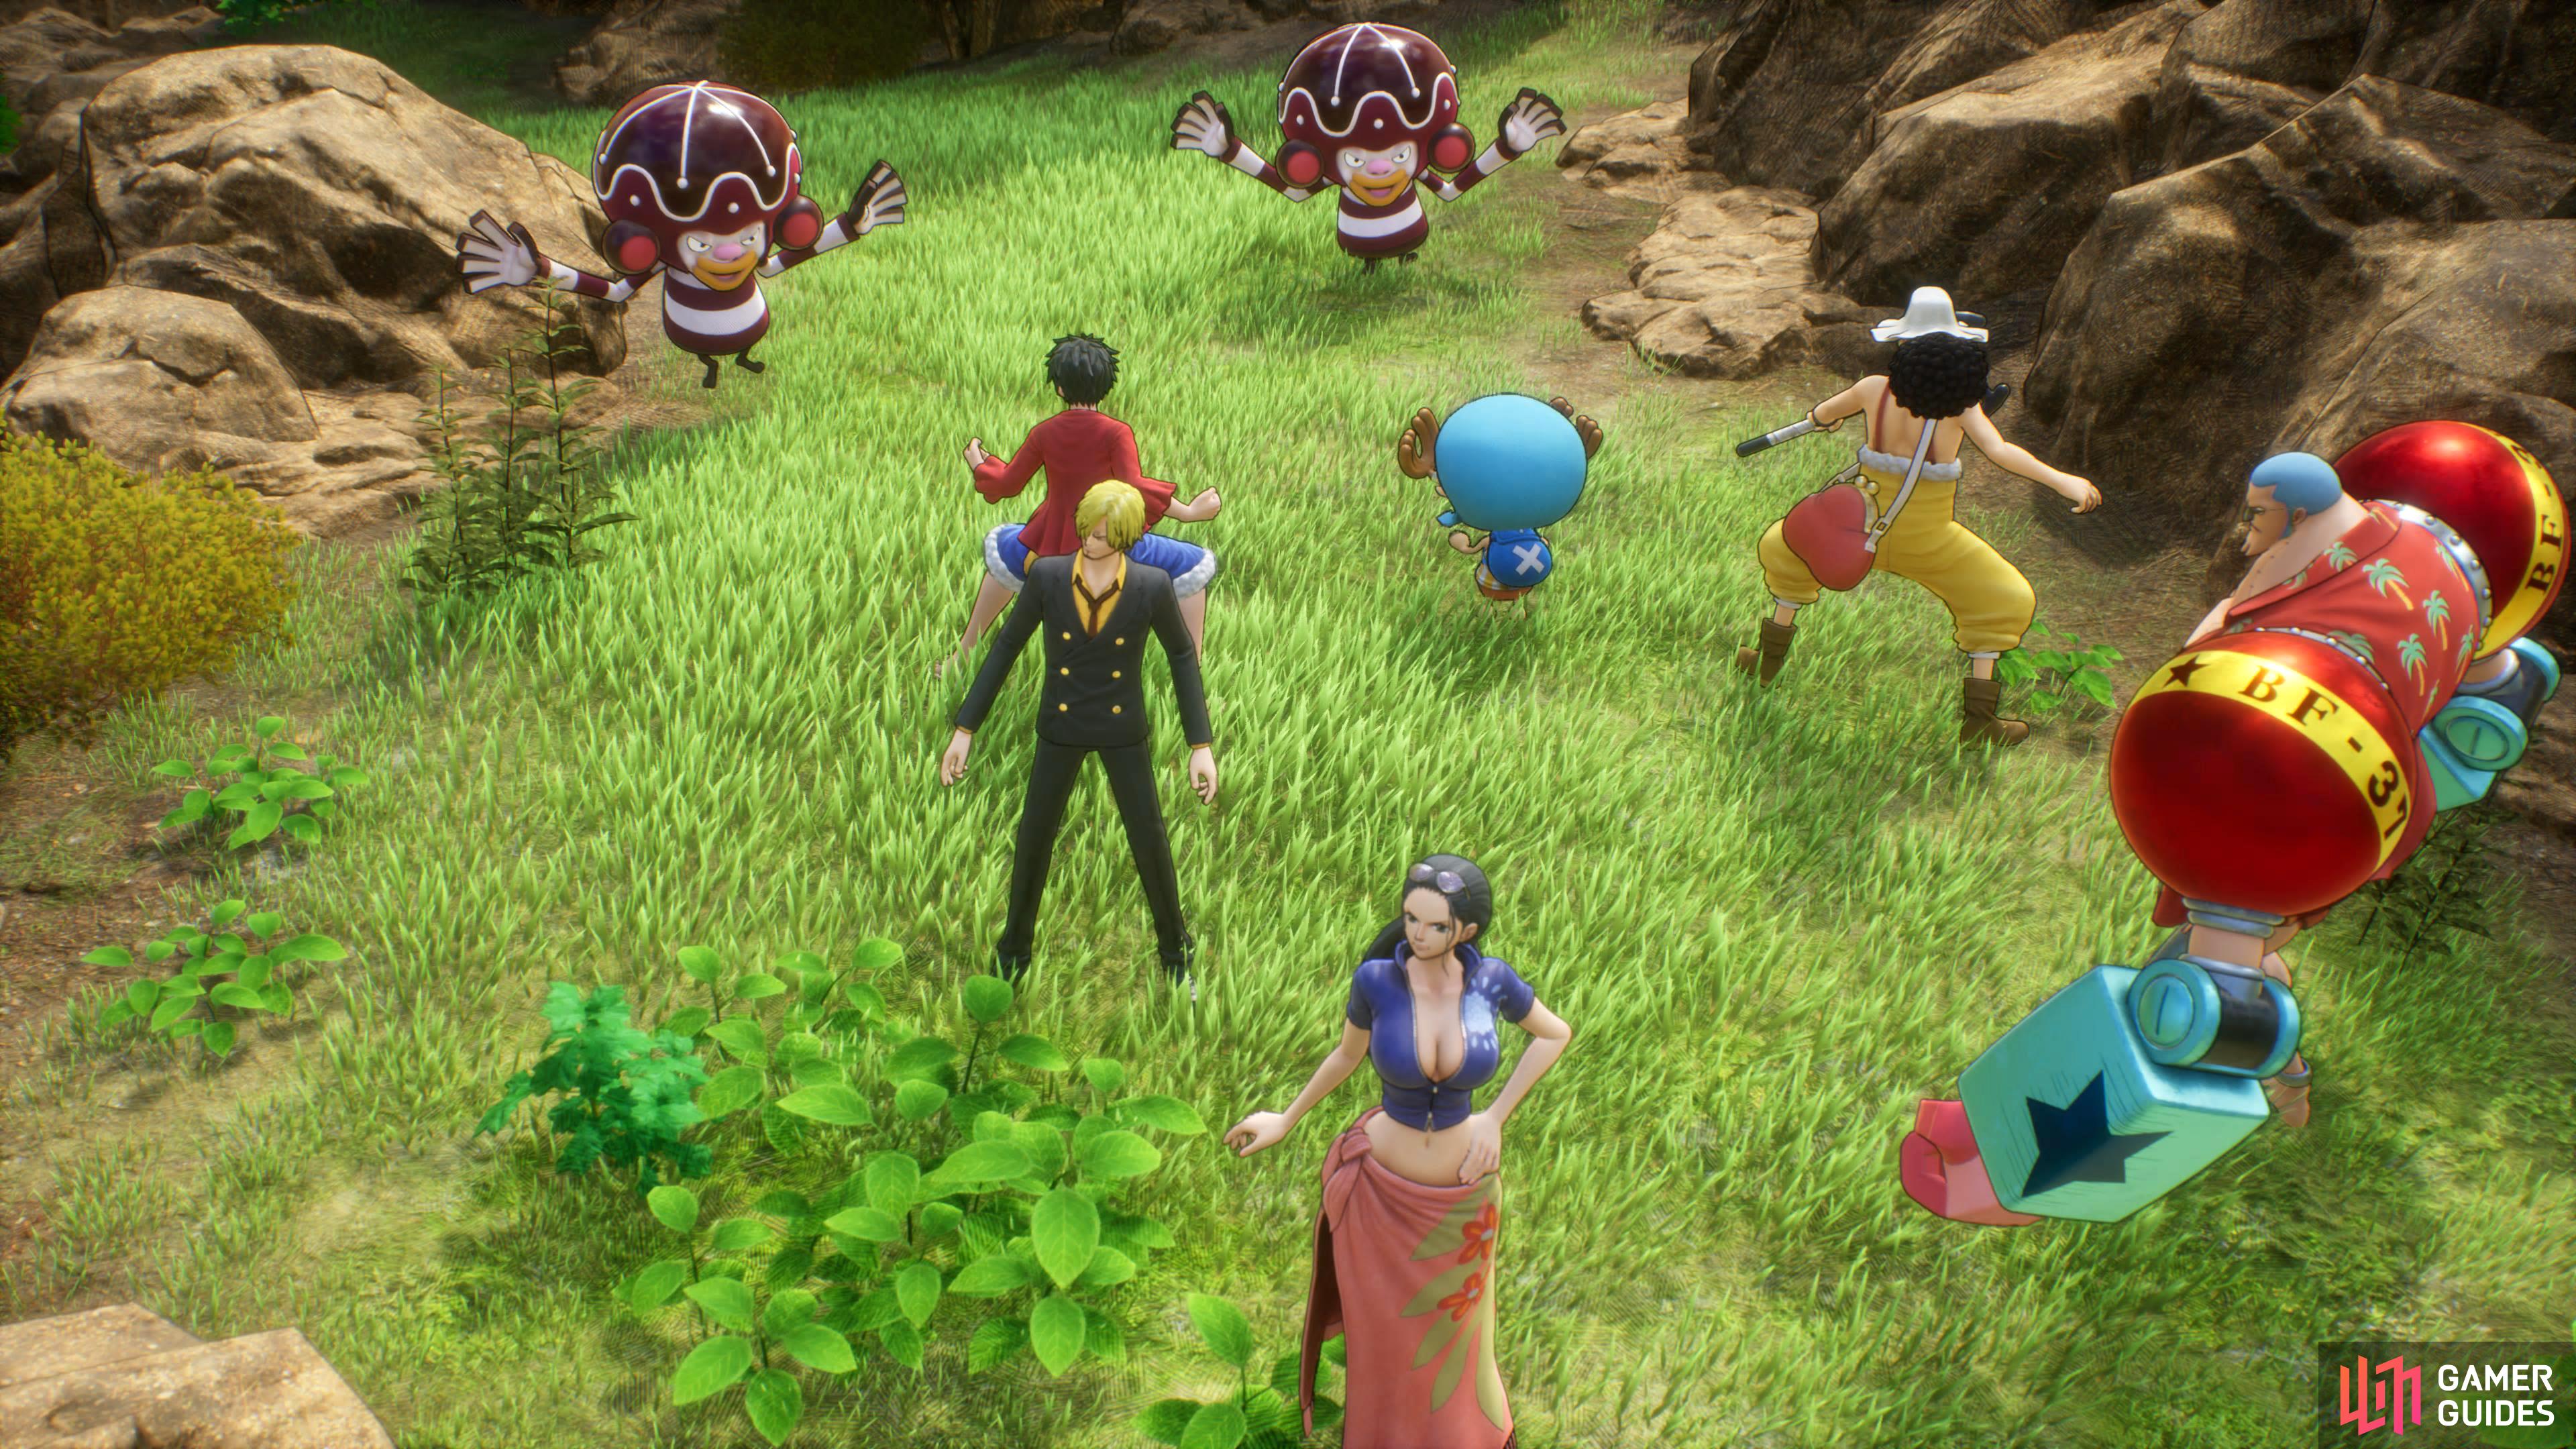
It appears that the party are in a sticky situation.
One Piece Odyssey Combat Guide
First things first, you’ll need to start a battle, and to do this you’ll want to walk into an enemy to initiate an encounter. The enemies are visible on the screen, so it’s up to you if you want to start the encounter or not. If you choose to start a battle, try to attack the enemy’s rear as it’ll catch them unaware, leading you to get a combat bonus that’ll allow you to start your turn first. But this works both ways, and if you’re caught unaware instead, the enemies will gain an advantage which can cause problems for you later on in the game.
Areas
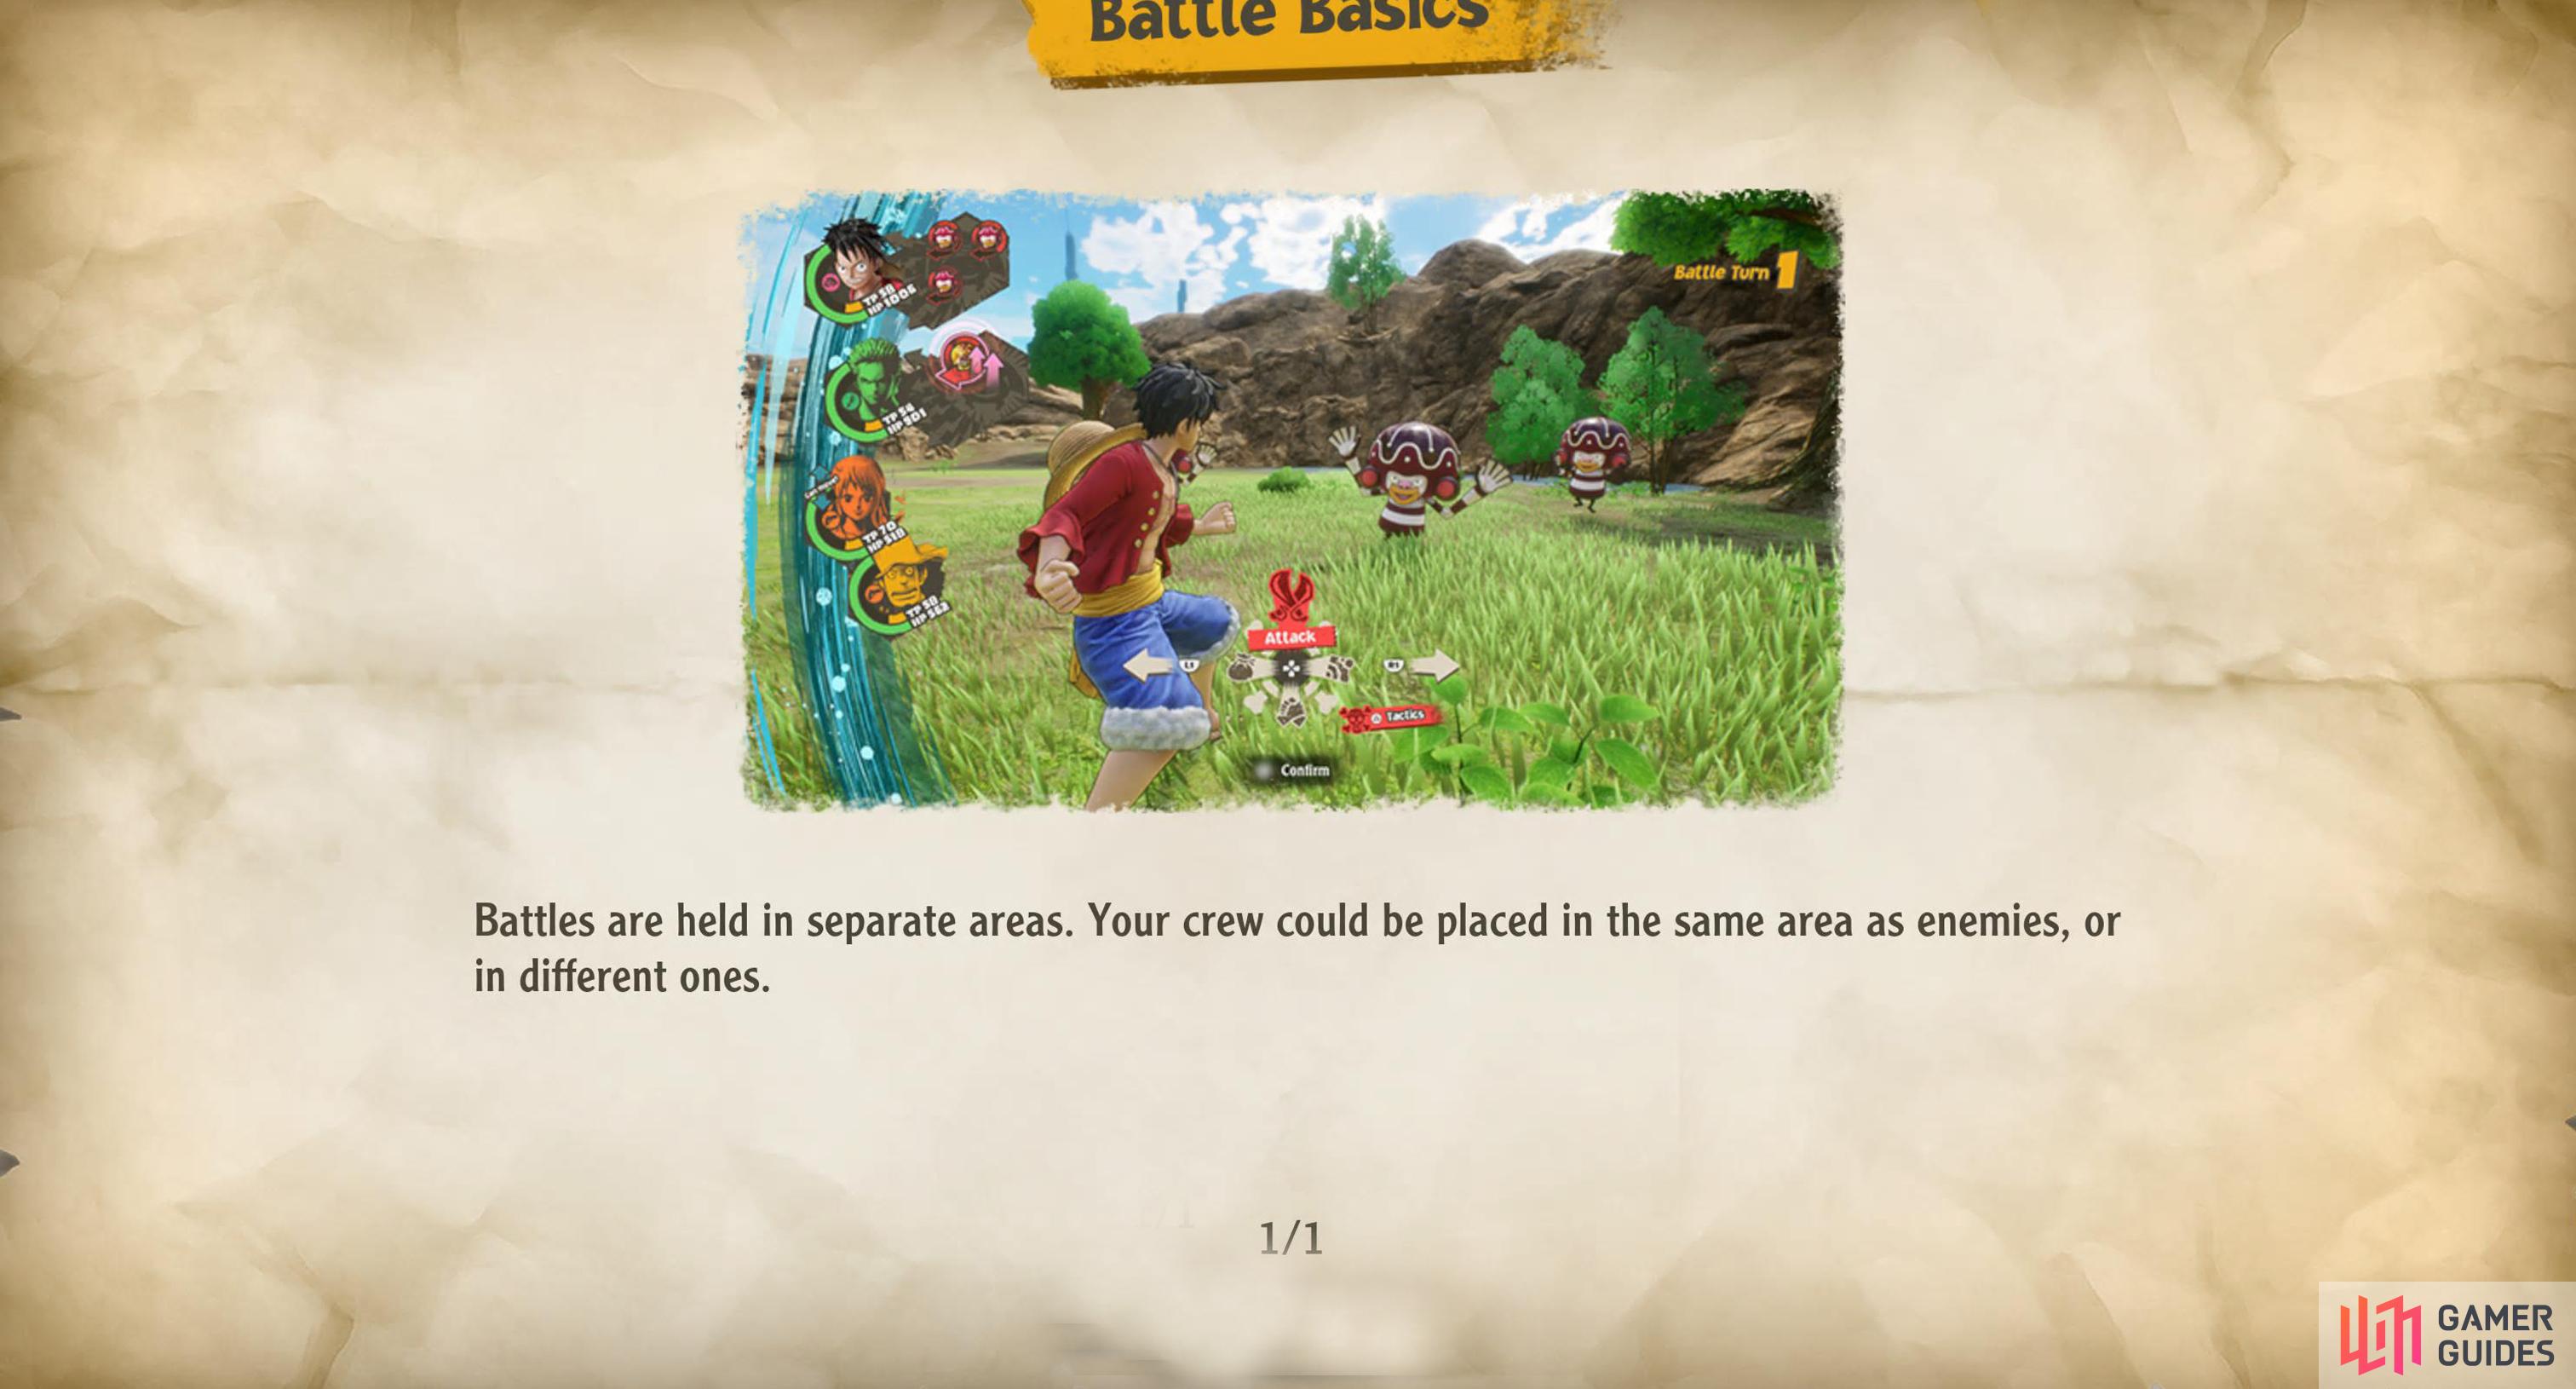
Now, you’re in a battle, and you’ve probably seen the tutorial, but you’re still not entirely sure what’s happening as the UI can be difficult to understand at first. Although this is a turn-based battle system, One Piece Odyssey changes some things. The battle arena is separated into “areas”, and your party members can be either all grouped up in the same area, or they can be separated into different areas with their own enemies to defeat. If you want to move your party into another area, you’ll need to defeat the enemy in their area first before you can use an attack on the enemy in the area you want to move into. You’ll know when the character can move as the UI will have a small icon in the top left of their portrait that says “Can Move!”.
(1 of 2) The battle arena is separated into smaller areas where some party members will be grouped up while some others won’t.
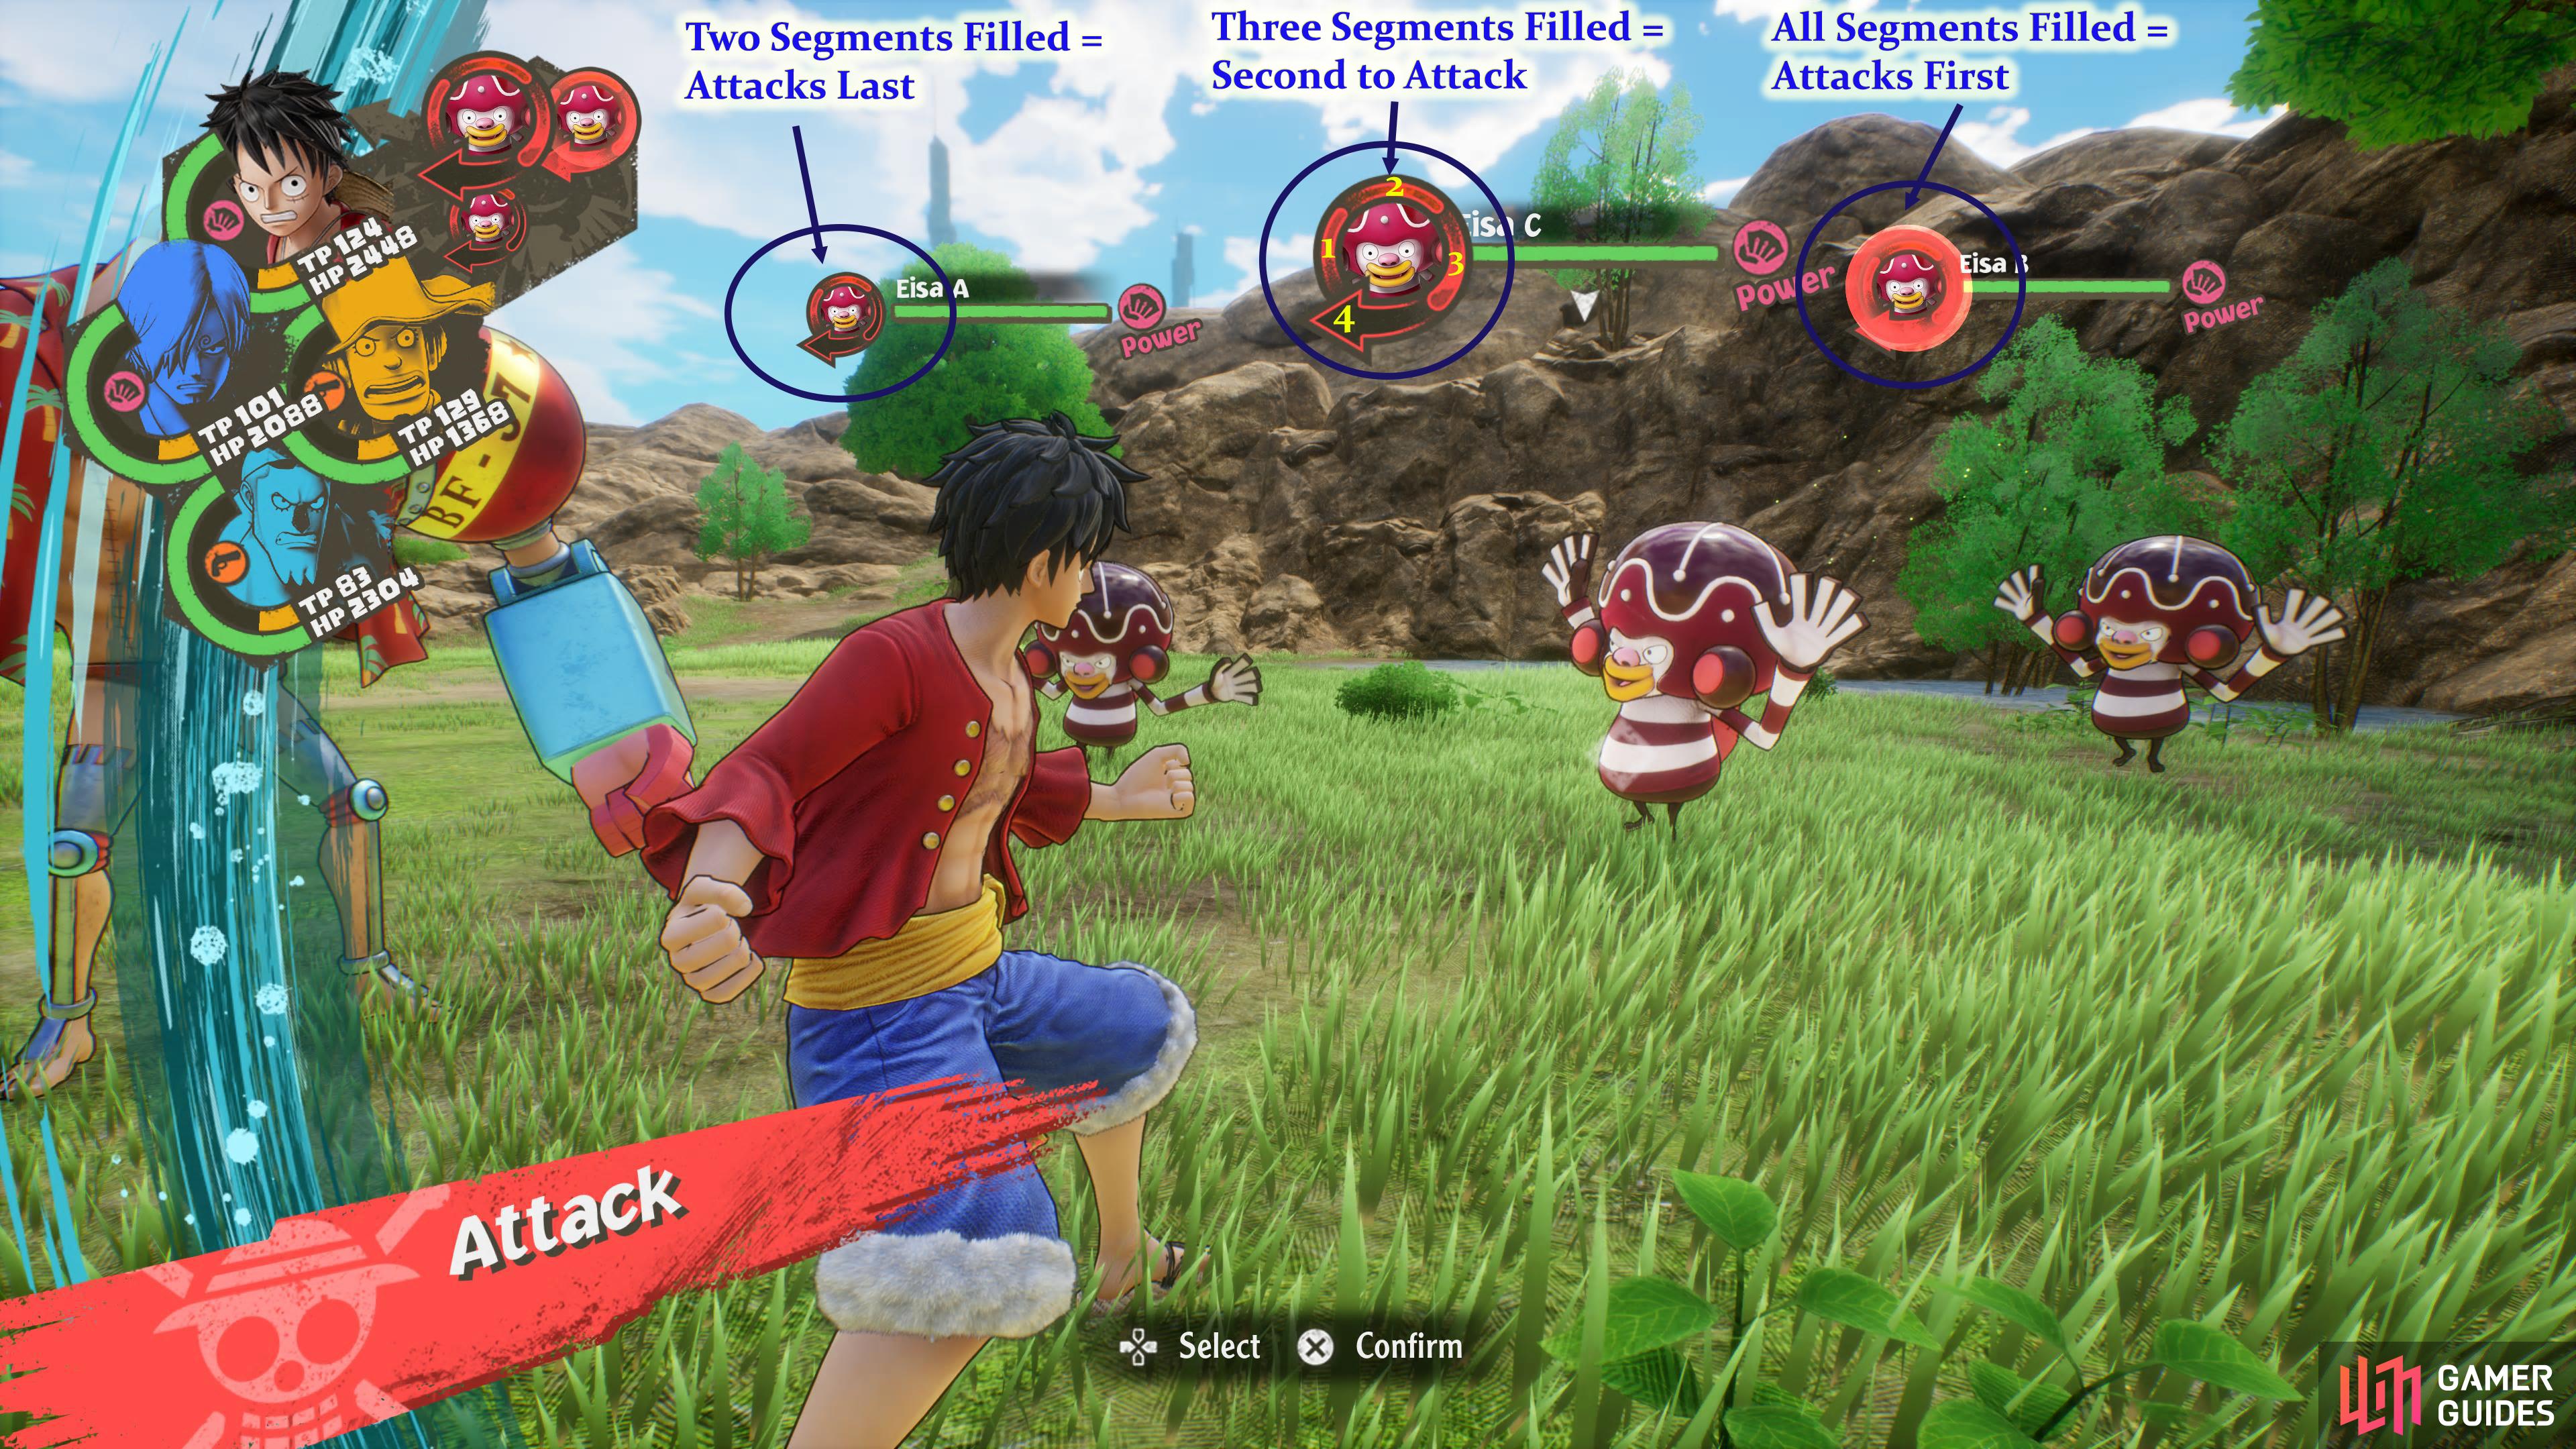
The battle arena is separated into smaller areas where some party members will be grouped up while some others won’t. (left), There are four segments around the enemies’ portrait. The enemy that has the most segments filled will act sooner. (right)
Turn Order
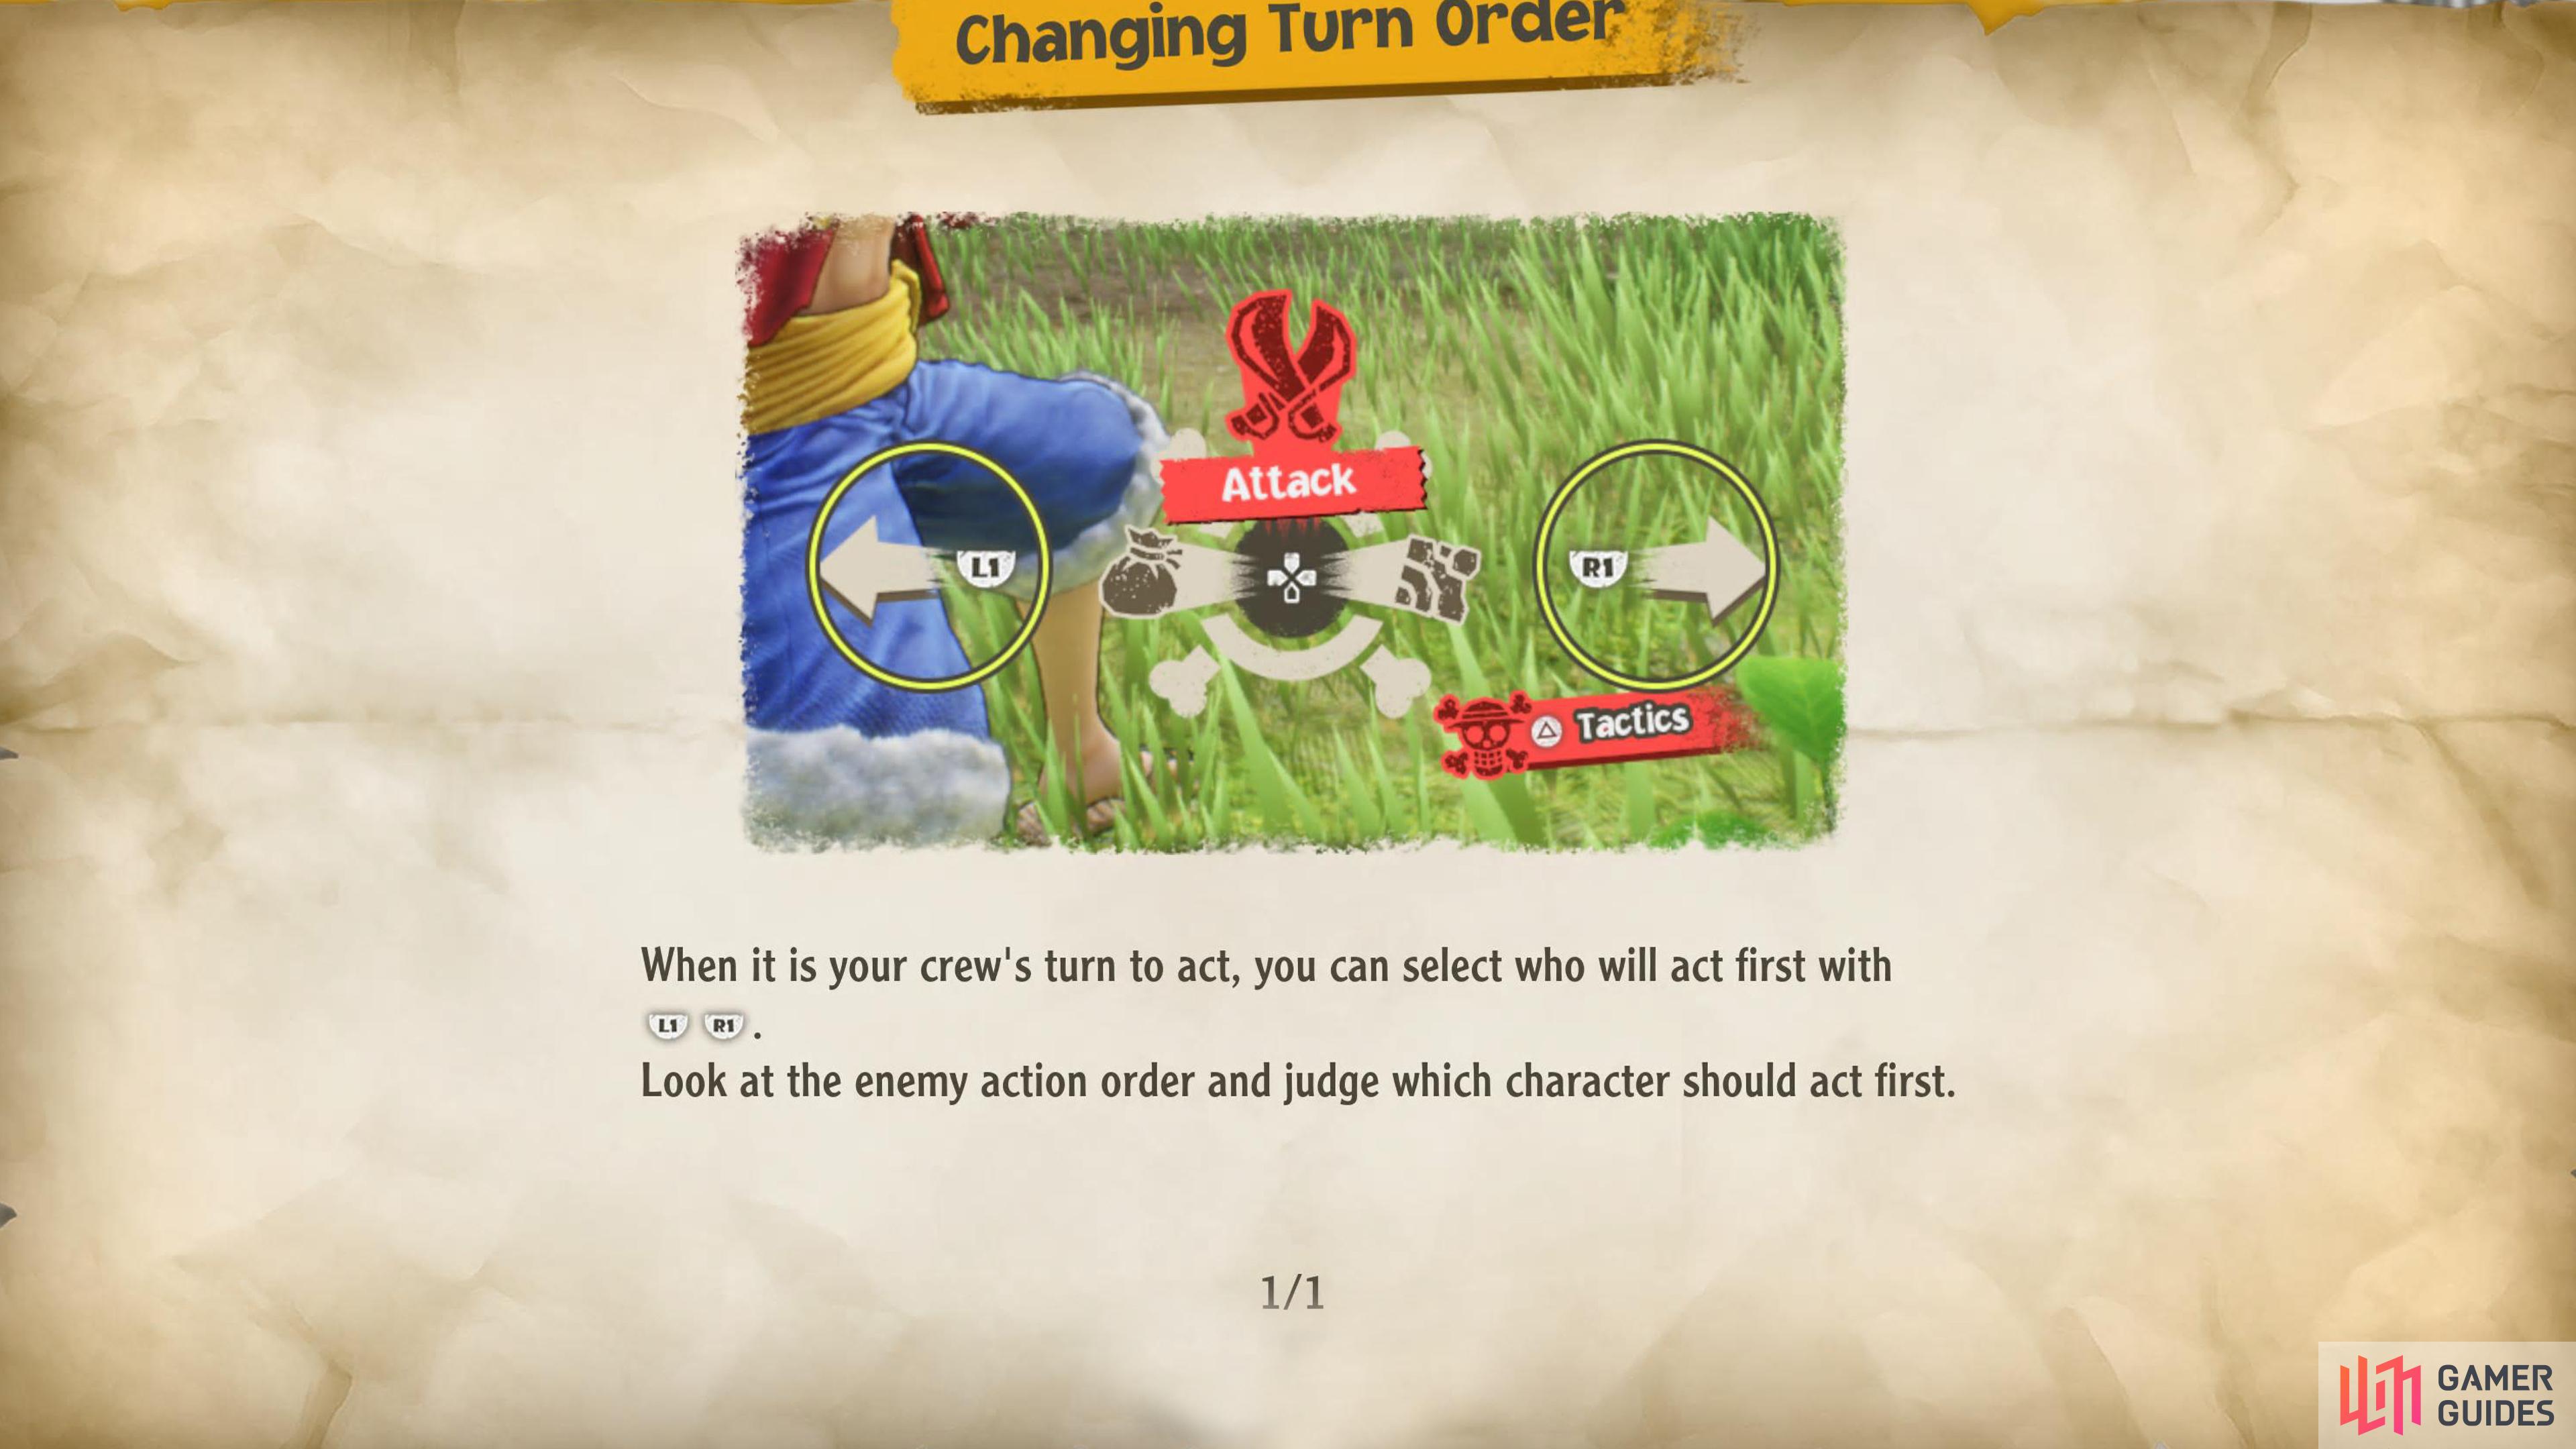
Another nice change is that you have the freedom to choose what party member gets to act first which adds a nice strategic element to the encounter, but the real reason behind it is so you can target the enemy who’s going next. This is indicated by a red circular arrow that encompasses the enemy portrait, and that is split into four segments. The more segments that are filled up, the sooner the enemy gets to act.
Weakness and ATK Types
All attacks in One Piece Odyssey have a rock/paper/scissors mechanic similar to the Fire Emblem games, and each of your party members will be given an ATK type which will be either Power, Speed, or Technique. When you target an enemy, they too will have a type, and this will be displayed to the right of their health bar. What you want to do is attack the enemy with the type that’s weak too. For example, if the enemy is a Technique type, you’ll want to attack it with a party member that has the Speed type due to Technique being weak to Speed. This allows you to deal more damage to the enemy.
- Power: This is displayed as a red fist icon, and it’s strong to Speed, but weak to Technique.
- Speed: This is displayed as an orange gun icon, and it’s strong to Technique, but weak to Power.
- Technique: This is displayed as a green sword icon, and it’s strong to Power, but weak to Speed.
(1 of 2) There are three ATK Types in One Piece Odyssey, and they work similarly to Rock/Paper/Scissor.
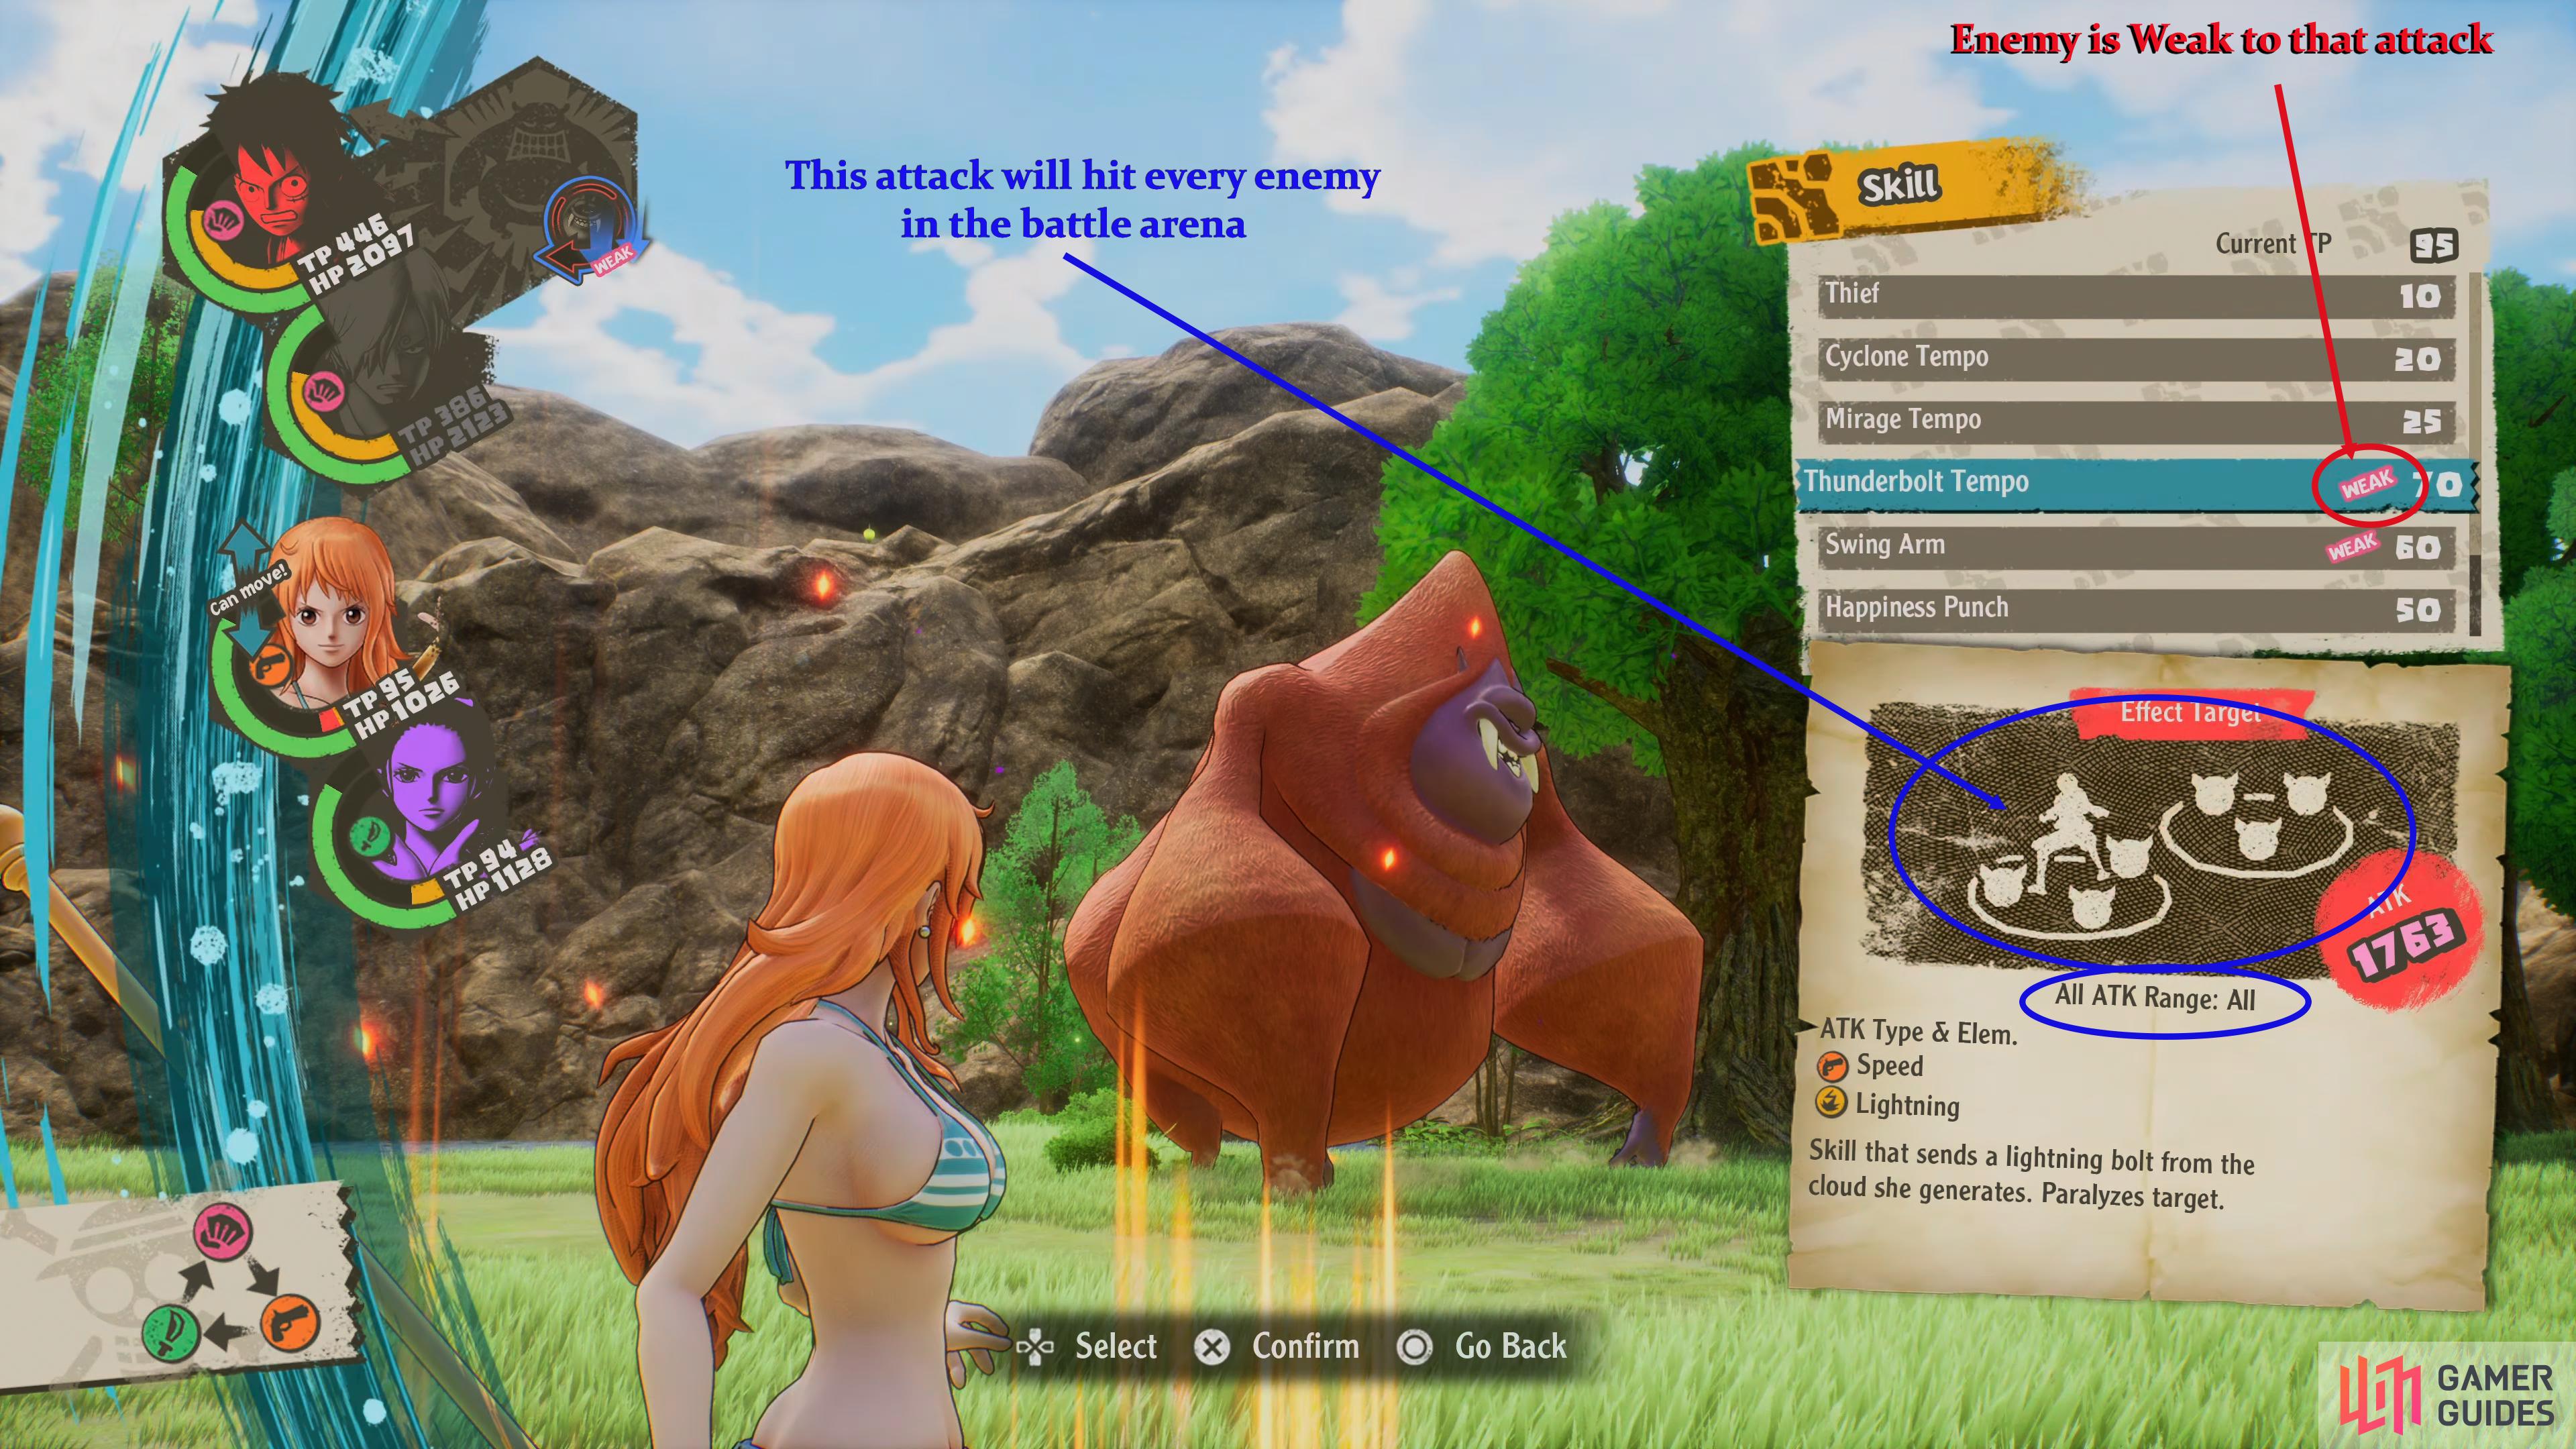
There are three ATK Types in One Piece Odyssey, and they work similarly to Rock/Paper/Scissor. (left), You’ll know if an enemy is weak to your attack by checking next to the TP. If you see Weak next to it, the enemy will take extra damage from it. (right)
Thankfully you don’t need to remember this yourself as the game does a great job of showing you this in the UI. When you target an enemy, their portrait in the top left corner will have a set of arrows in the bottom right corner. These will either be red arrows pointing upwards or blue arrows pointing downwards. The latter shows you that you’ll deal less damage to the enemy with that character while the former will show you that you’ll deal more damage.
There are other weaknesses to consider too, some enemies will be weak to a specific element such as Burn, Freeze, Lightning, etc. And your skills can inflict these elements. When you’re choosing what skill to use, look to the right of the skill name, and it’ll have “Weak” next to the TP cost. This can also be seen under the enemy’s portrait.
Party Member Switching
At any stage during your turn order, you can switch out a party member for another, and unlike other games that do this, you won’t lose a turn. If you wanted, you could change the entire party, and still get your turn! You may be thinking why would you want to do this? But what if you happen to get into an encounter or boss fight that happens to all be Power ATK-type enemies? You may want to switch out the majority of your Power-type party members for Technique types, so you can exploit the enemy’s weakness. There’s almost no limit to switching your party members other than if they have a status effect on them or if they’ve had all their health depleted.
You can switch which character goes next by choosing left or right.
Skills
With the basics covered, we move on to the fun part, skills. Each party member will have an arsenal of skills to attack the enemies with, and these cost TP (Technical Points) to use them. Once you’ve expended your TP, you’ll need to replenish it which can be done by using normal attacks on the enemy or using an item such as an ![]() Excite Apple.
Excite Apple.
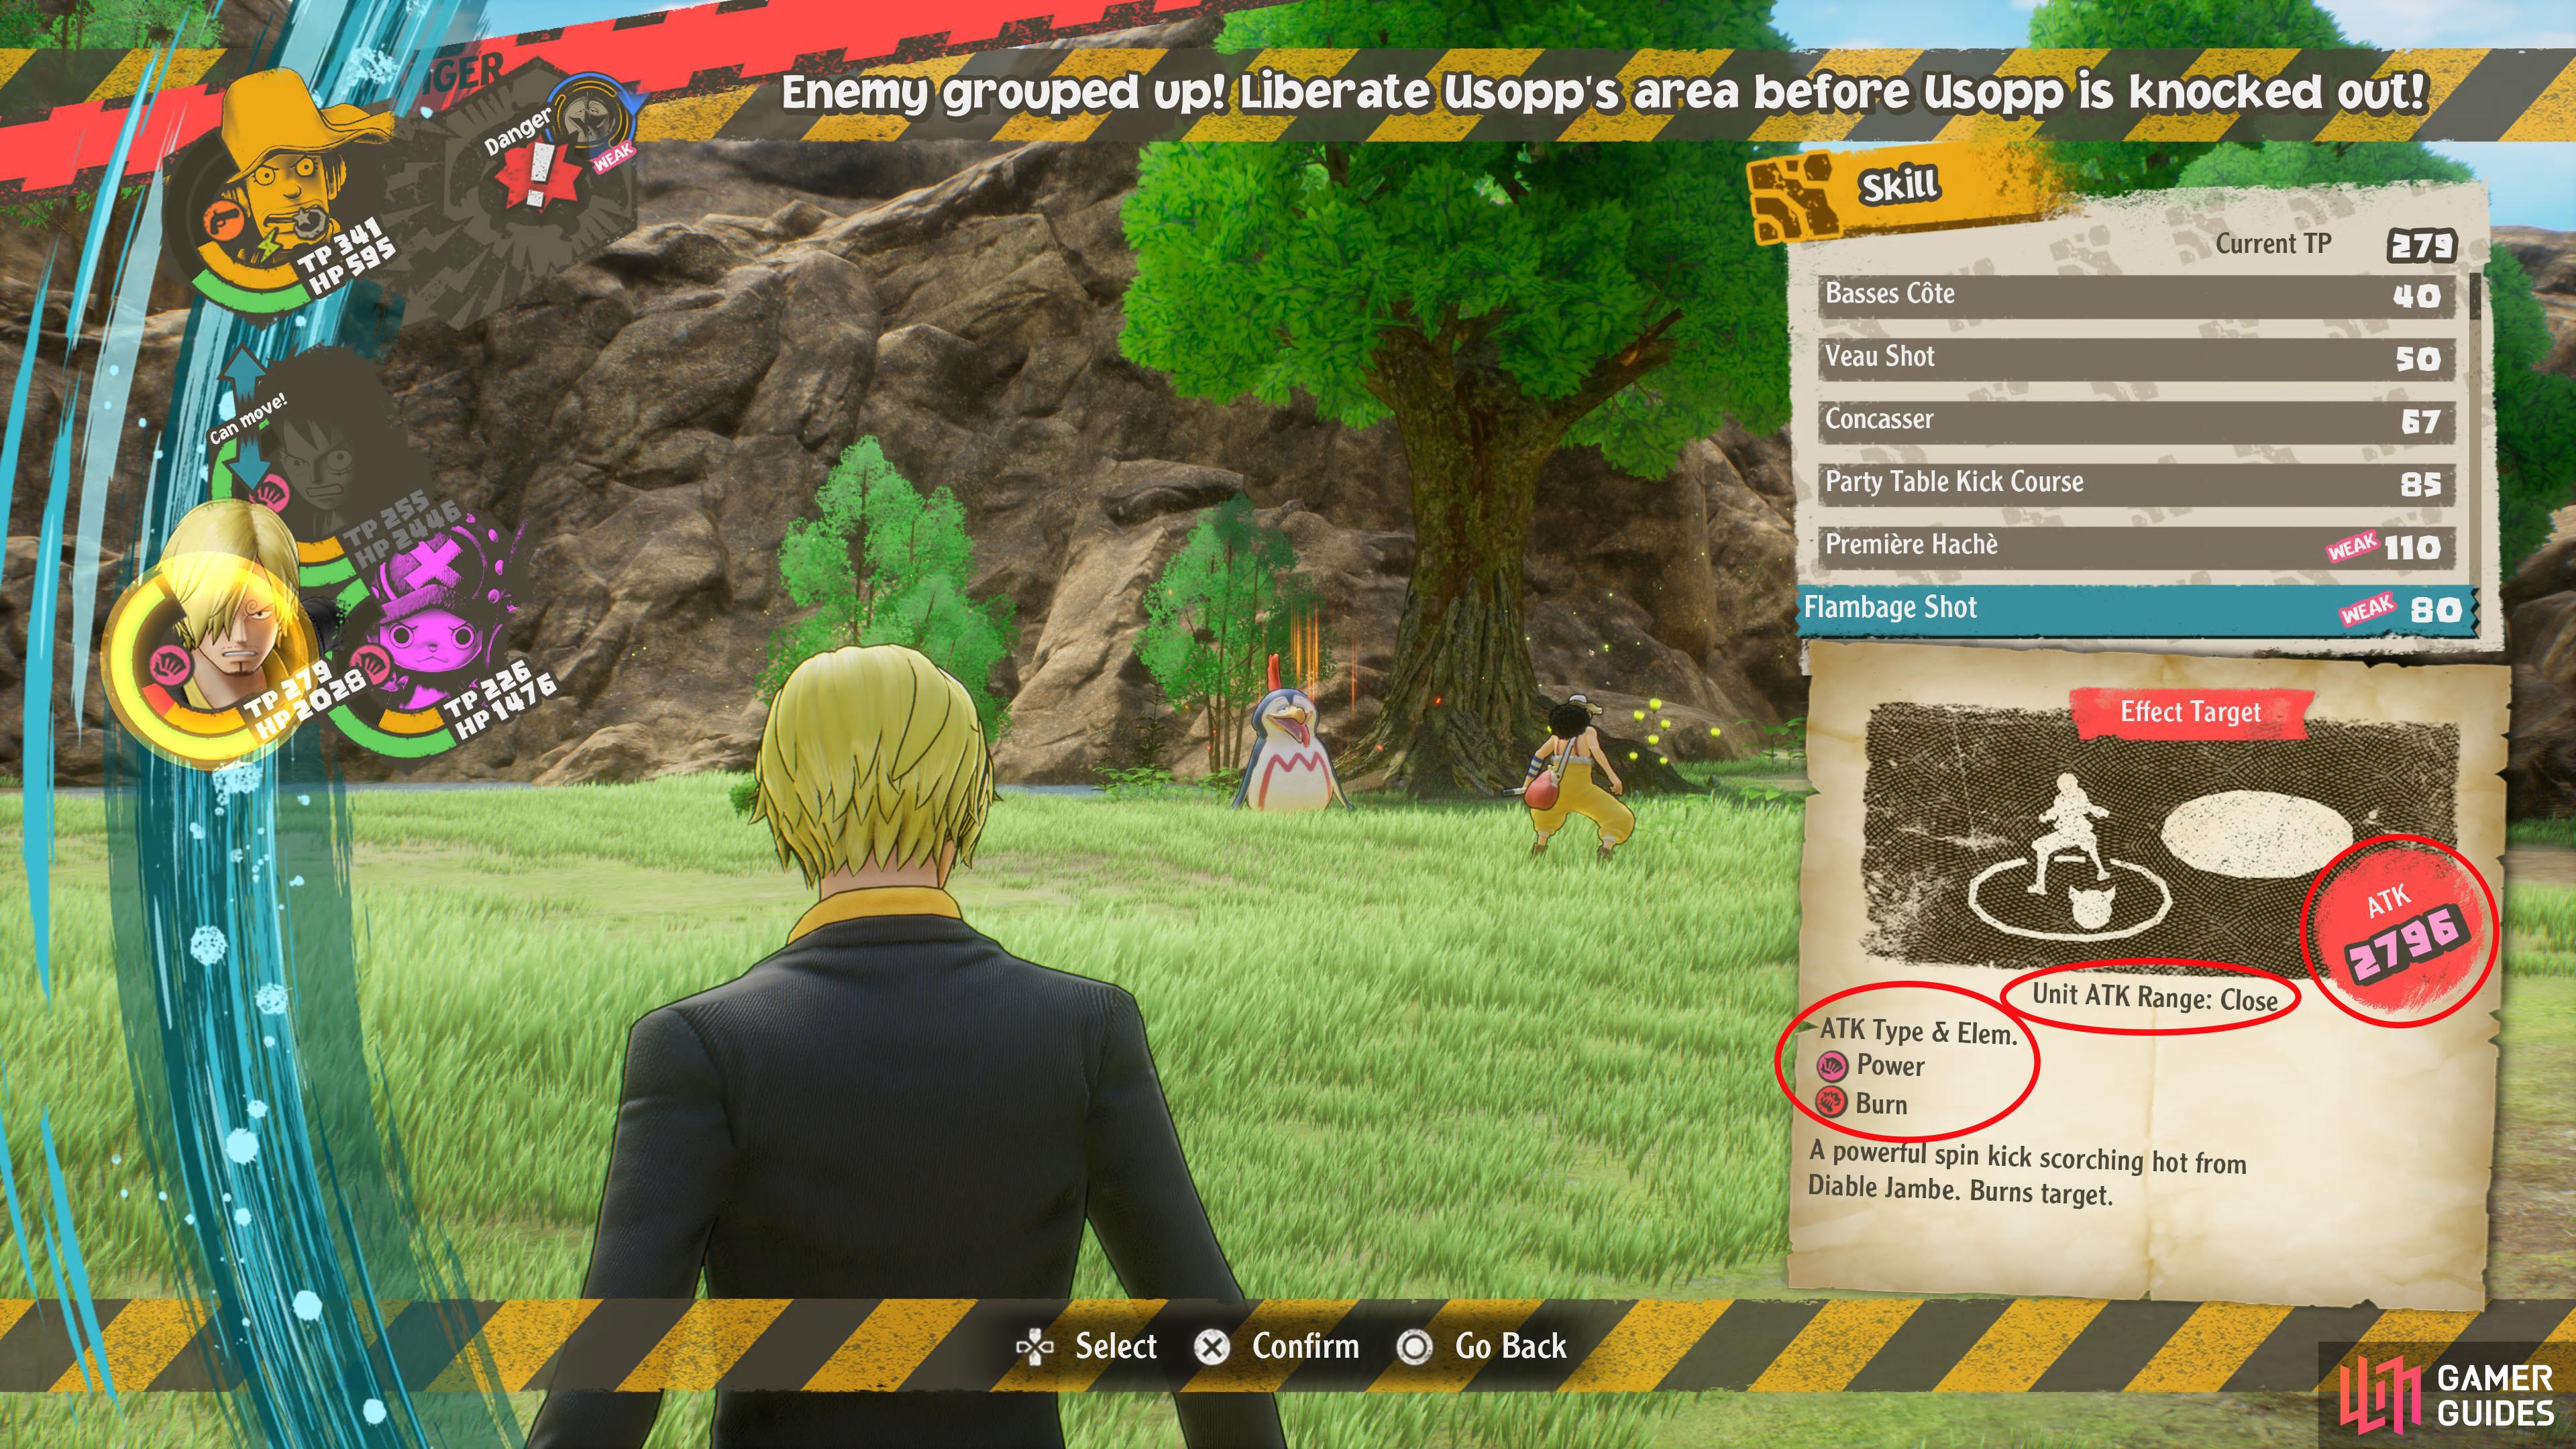
Looking at the skills, when you hover over a specific skill you’ll see what the overall power of the attack is which is indicated by a large red circle, the ATK range (either close or long), and the ATK type and element. Take a look at ![]() Sanji’s skill “Flamberge Shot”. It will tell you that the power of the attack is 2796, it can only attack enemies in proximity to it, so the same area, and it is a Power ATK type with the Burn element.
Sanji’s skill “Flamberge Shot”. It will tell you that the power of the attack is 2796, it can only attack enemies in proximity to it, so the same area, and it is a Power ATK type with the Burn element.
Breaking it down, this skill is strong against Speed ATK types, but weak against Technique. It can only hit enemies in the same area as Sanji due to its Close Unit ATK Range, and it has a chance to Burn the target, especially if they’re weak to that specific element.
(1 of 3) This skill is Flamberge Shot, the description to your right will tell you that the attack has 2736 ATK, it’s close-range, and it’s a Power ATK Type with the Burn element.
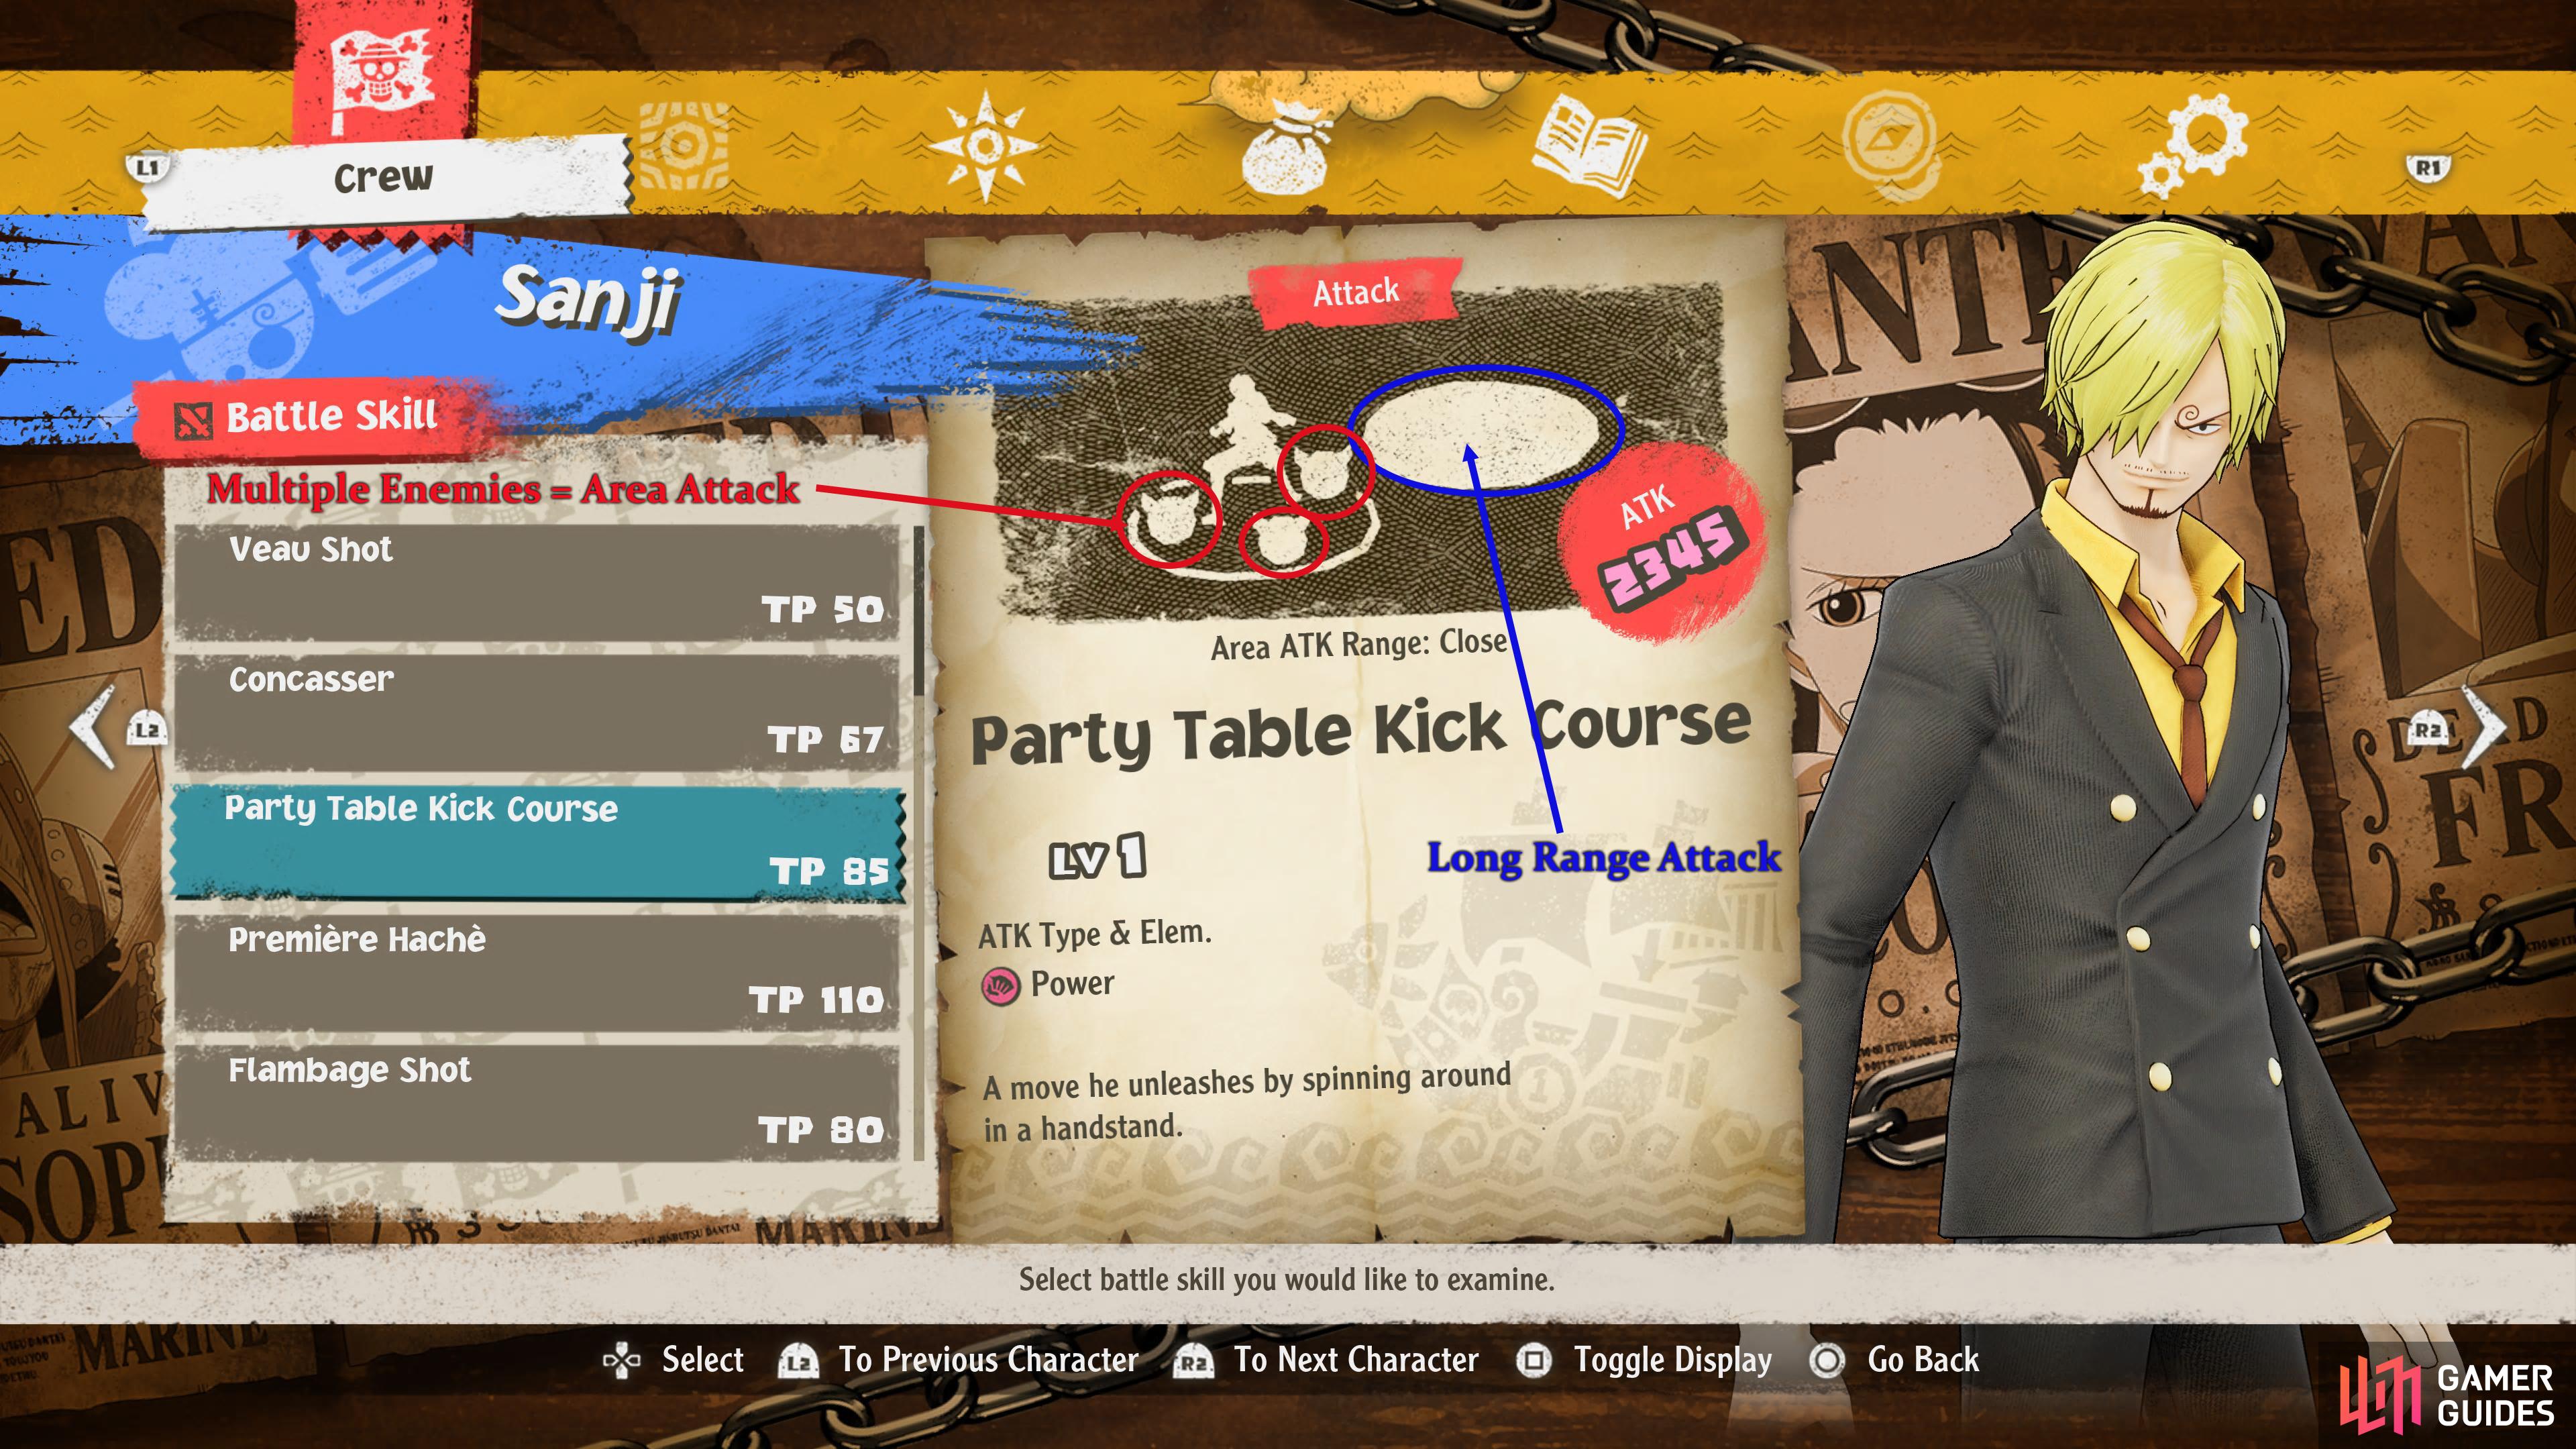
Now take a look at Sanji’s “Premiere Hache”, and “Party Table Kick Course” attacks. In the image for the former, you’ll see two circles, one with your character standing in it, and the other circle will have enemy icons. Because the enemy icons are in the opposite circle to your character it means that the attack range is long, and because it has multiple enemy icons in it the attack will hit multiple enemies (AoE).
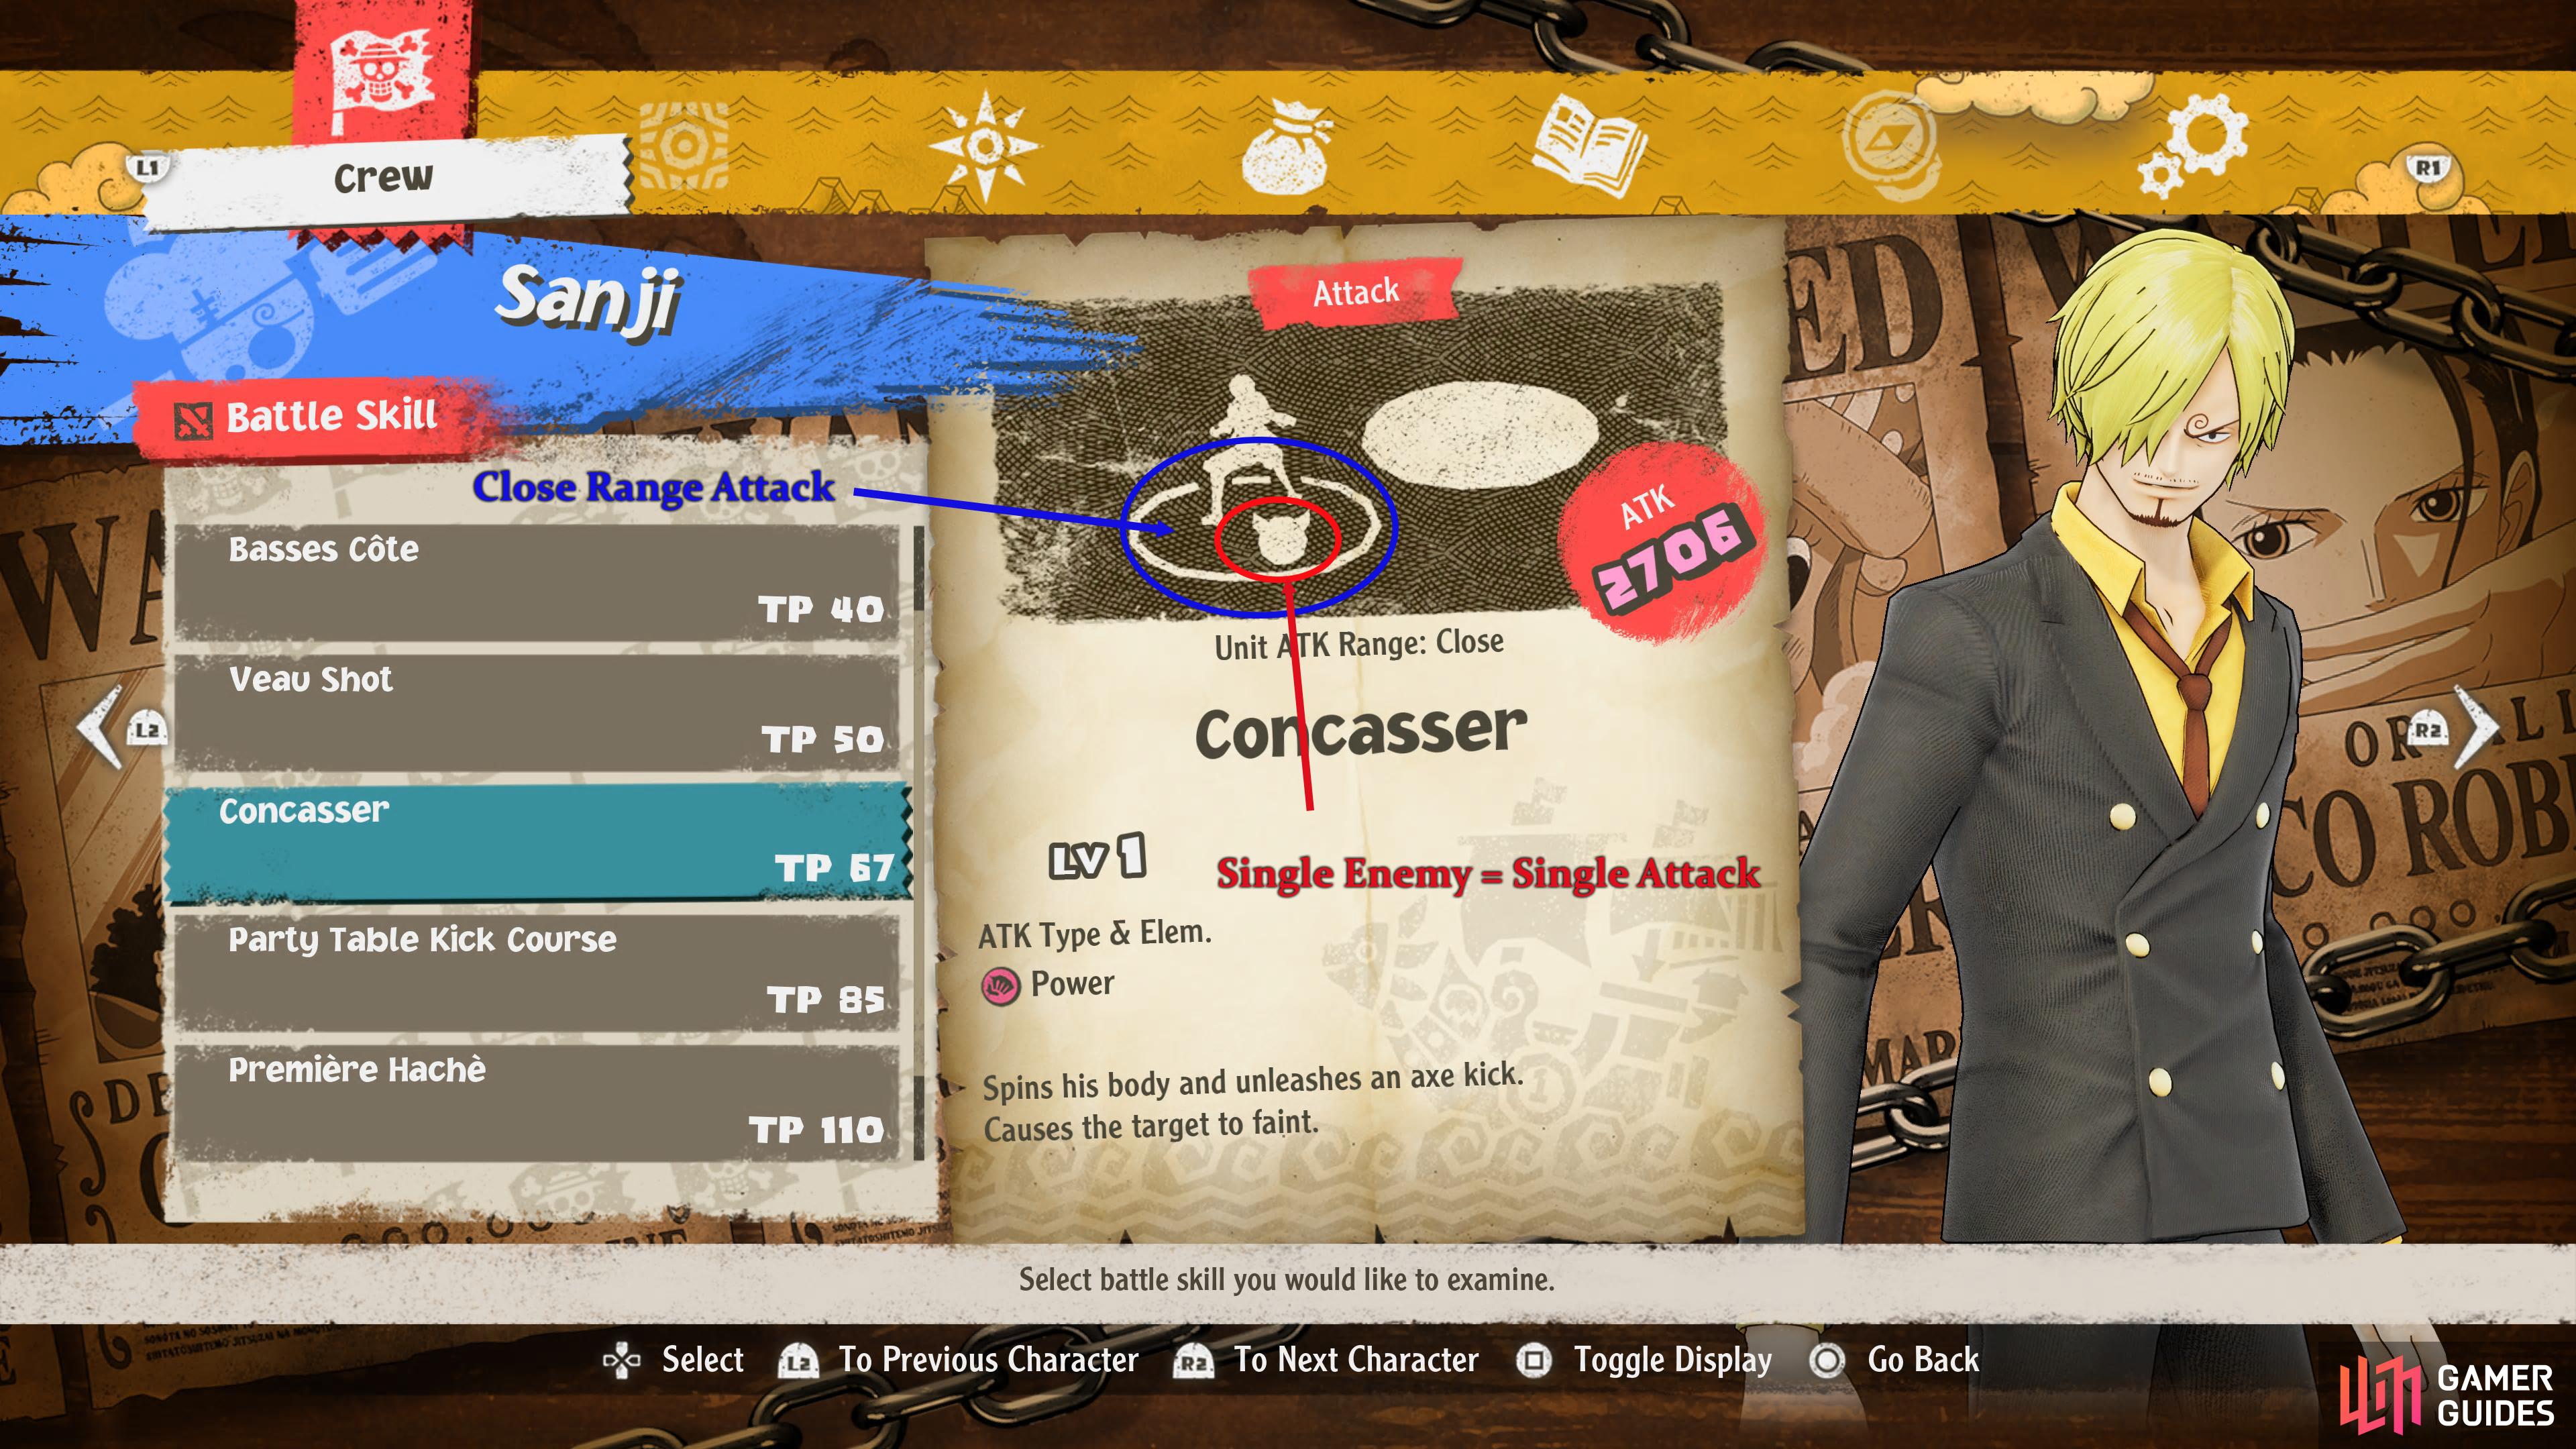
With “Party Table Kick Course” the enemy icons are in the same circle your character is standing in, this means it’s a close-range attack, but it’s still an AoE because there are multiple enemy icons in it. Sanji’s “Concasser” skill on the other hand only has a singular enemy icon in the circle which means the attack will only target one enemy.
Dramatic Battles
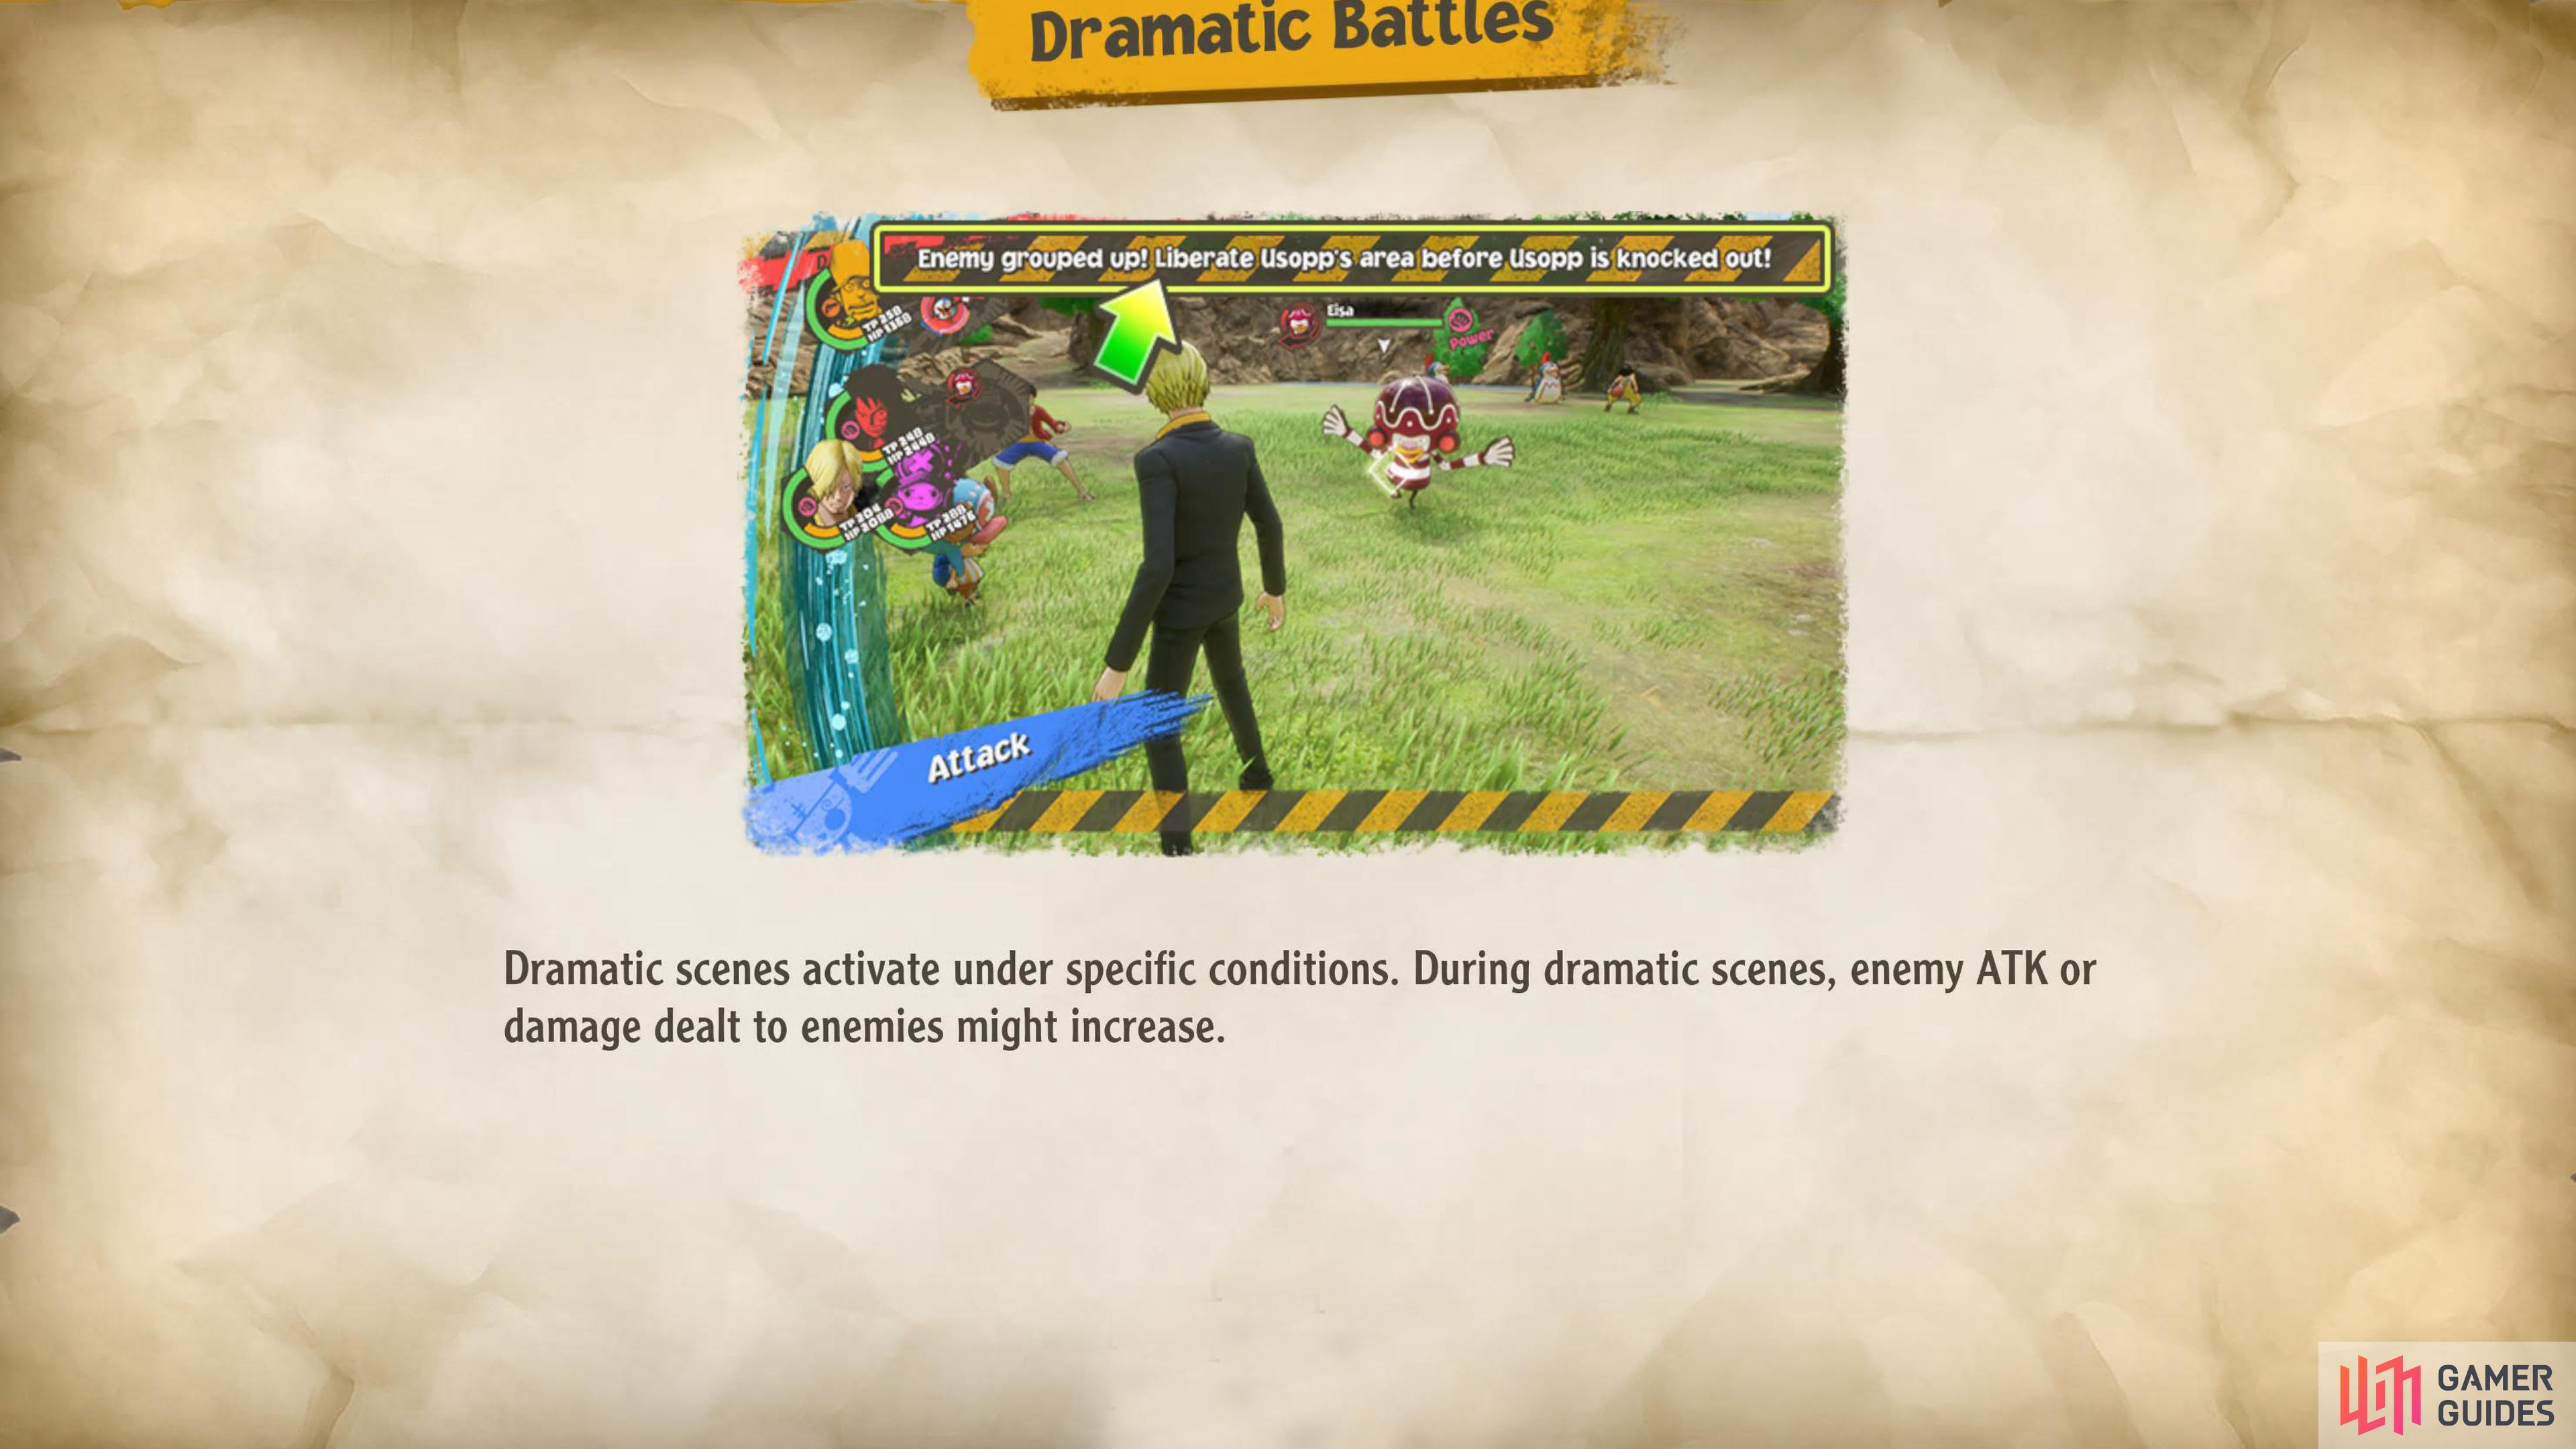
Throughout your travels, you’ll get battle scenarios called “Dramatic Battles”. The tutorials in-game will show you two occasions where this happens. The first is when ![]() Usopp gets paralyzed, and you have to defeat the enemies before Usopp is downed. A bit later, you’ll have to heal
Usopp gets paralyzed, and you have to defeat the enemies before Usopp is downed. A bit later, you’ll have to heal ![]() Nami for 25% of her health before she gets downed. Succeeding in these tasks will reward you with an EXP bonus. There are more of these throughout the game where you’ll need to complete a task during battle, and you’ll get rewarded for your efforts.
Nami for 25% of her health before she gets downed. Succeeding in these tasks will reward you with an EXP bonus. There are more of these throughout the game where you’ll need to complete a task during battle, and you’ll get rewarded for your efforts.
Dramatic Battles will reward you more EXP for completing small battle-related tasks.
Formations
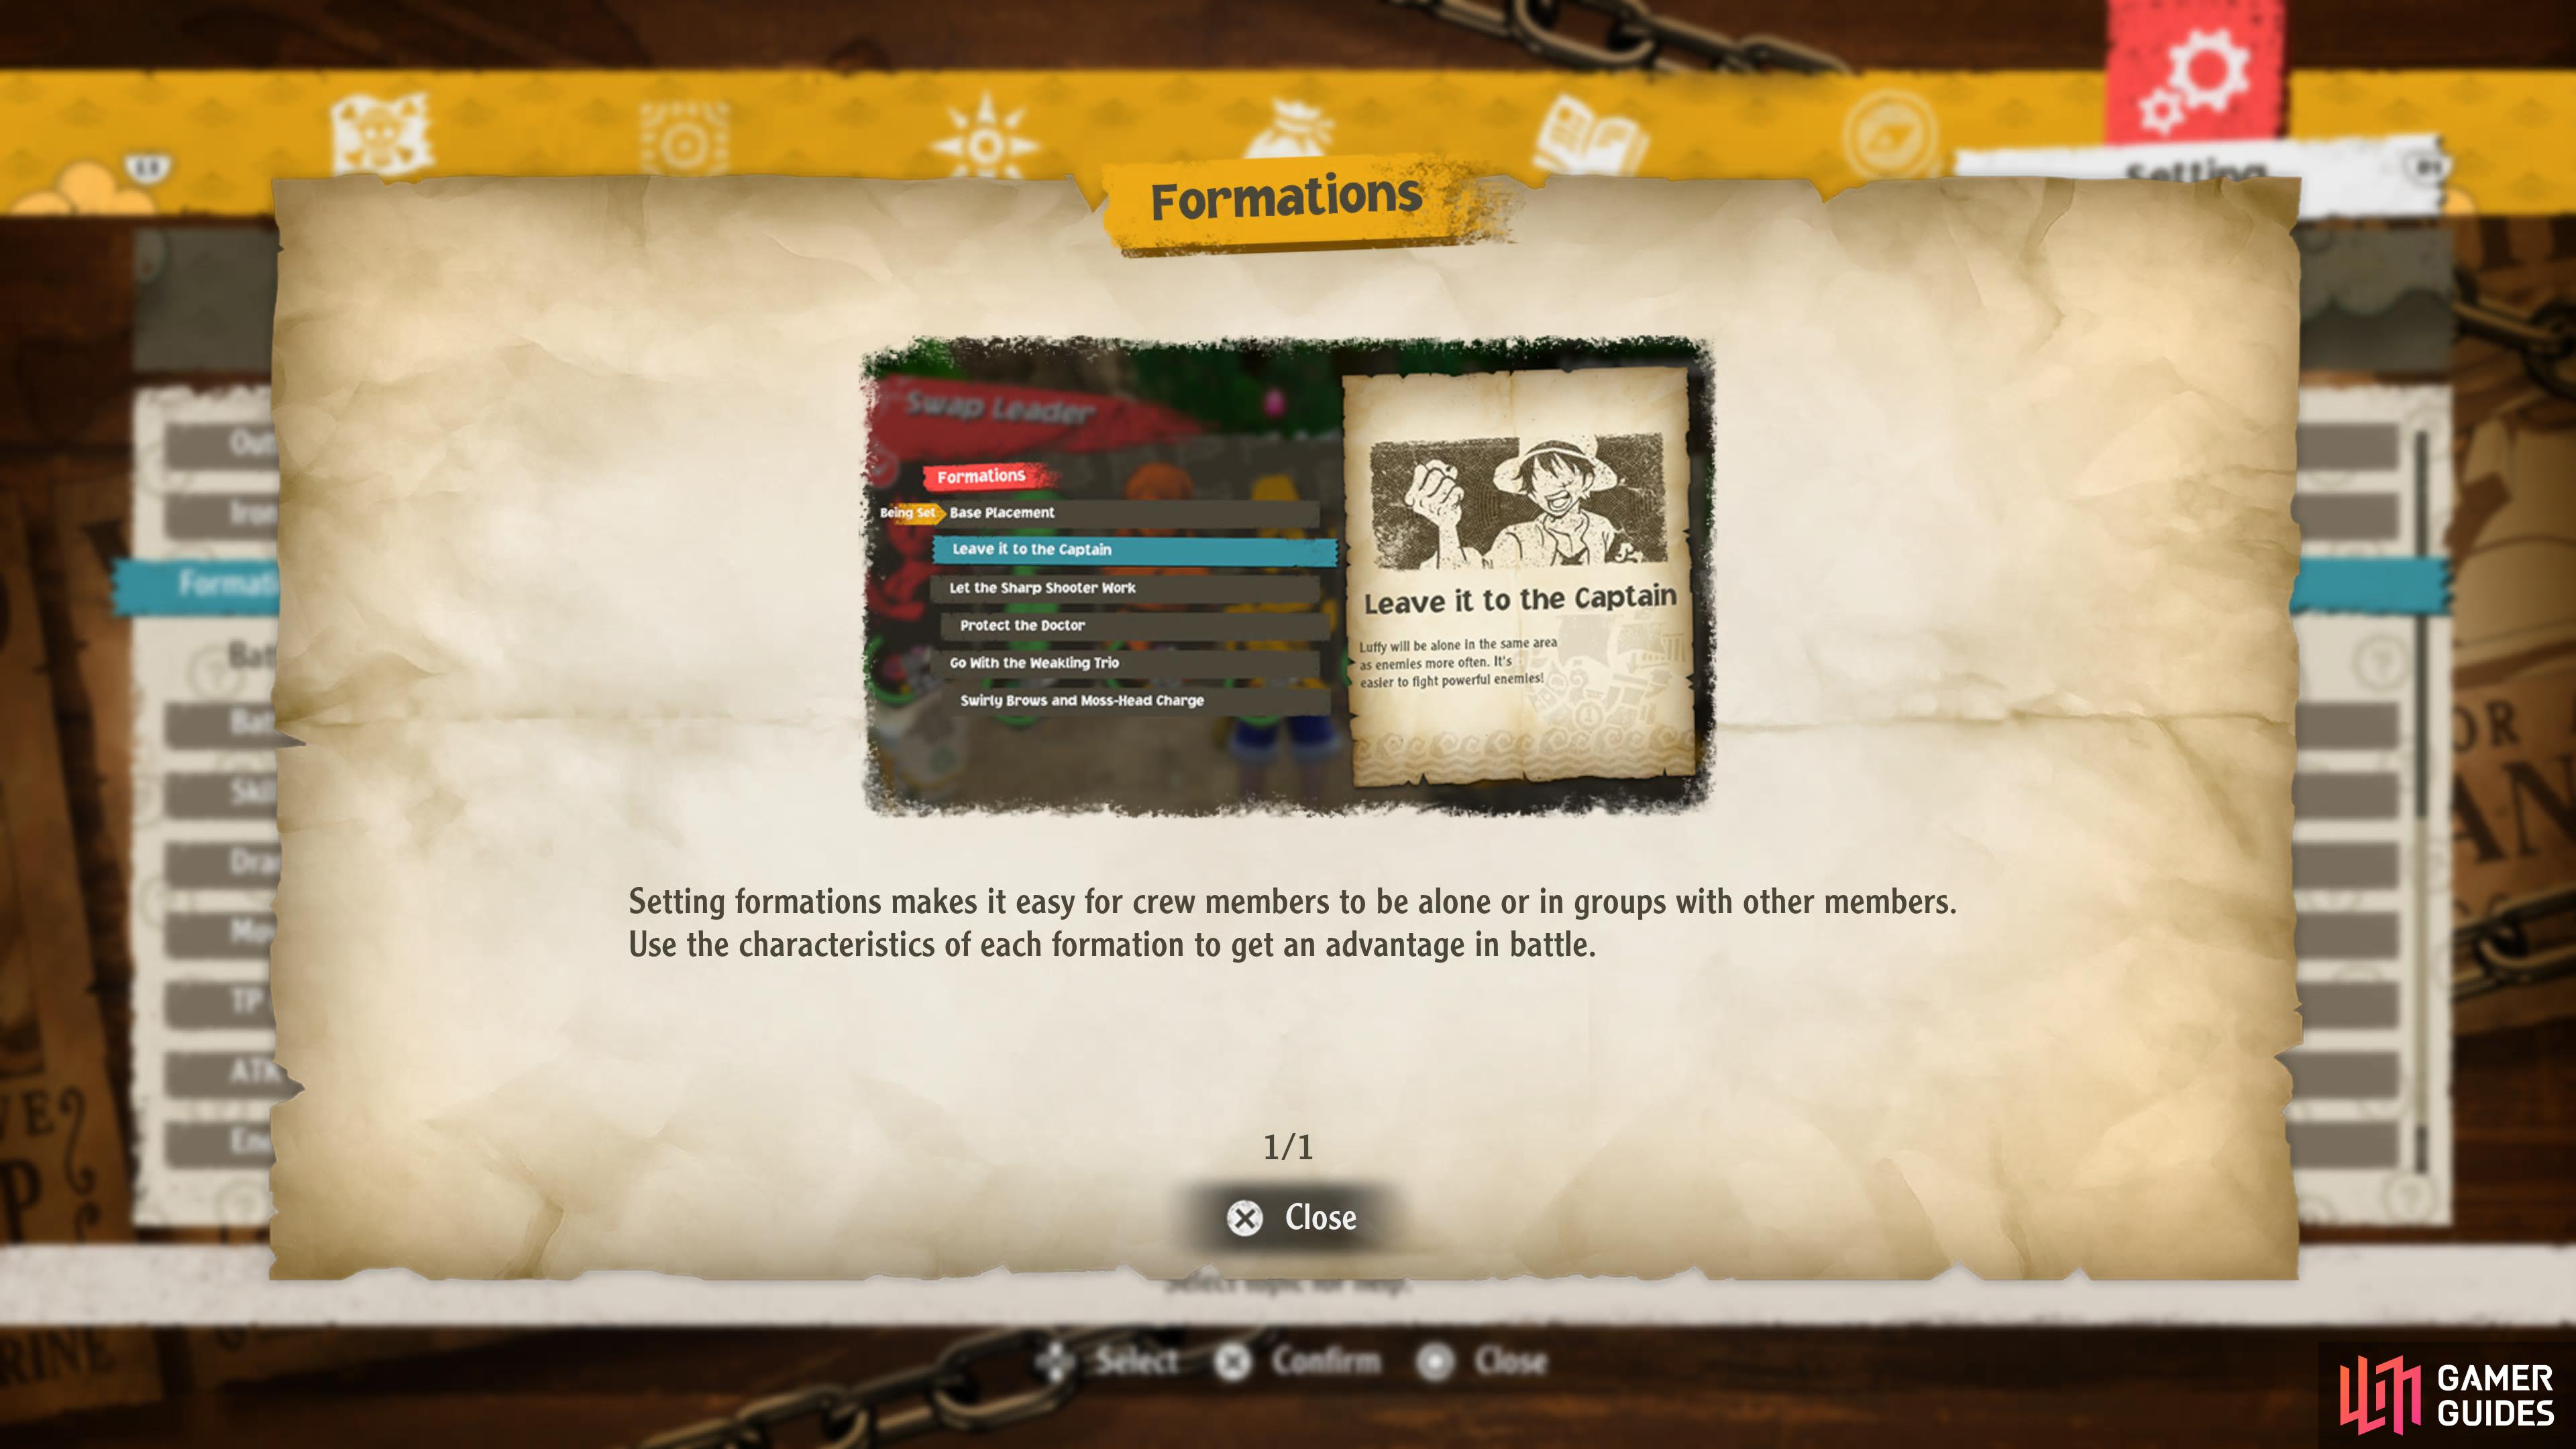
Finally, we have Formations. These allow you to choose what areas you want the characters to start the battle in whether that be alone or with specific party members. You can access this menu by selecting Swap Leader, and the option to pick Formations will be on your right. There are six formations that do the following things:
You can access the Formation menu from the Switch Leader menu.
| Icon | Formation | Description |
|---|---|---|
 |
Base Placement | Distribute throughout areas evenly. |
 |
Leave it to the Captain | |
 |
Let the Sharp Shooter Work | |
 |
Protect the Doctor | |
 |
Go With the Weakling Trio | |
 |
Swirly Brows and Moss-Head Charge |

 Sign up
No Comments