(1 of 2)
Boss
| Name | Class | Level | Items |
|---|---|---|---|
| ??? | Sorcerer | 20 | Goetia |
Strategies for all difficulties
If you’re playing by the European DLC timetable, prepare for a massive spike in difficulty.
Whereas the previous maps (Infinite Regalia withstanding) were primarily geared towards entry-level teams, the following two set of maps (The Future Past and Rogues and Redeemers) are aimed at postgame teams–ideally those with lots of green, maxed stats.
If you’re not at that stage yet, but seek new DLC adventures, skip these maps for now and start from the Lost Bloodlines missions instead, then come back later.
This particular mission can be rather daunting even for a postgame team, moreso if you haven’t been training the parents of Cynthia, Kjelle, Noire and Nah. If that applies to you, don’t panic–follow this guide carefully and you’ll do fine. In any case, do make sure to bring a lot of strong units.
To make things easier, have these on as many characters as possible: Brave weapons (to increase the number of attacks), the Galeforce skill (lets you move twice per turn) and good support partners (either A or S Rank).
Additionally, bring units with Locktouch, Door Keys or Master Keys to unlock the doors and save the NPC children ASAP.
Failing that, just bring somebody who can wield Mire (dark magic that can be purchased from Raydrik or Gharnef via the Bonus Box), to snipe the enemies in the cells, and somebody with Physic or Fortify, to heal the kids from afar.
Aversa, who can be recruited from a bonus sidequest, is a good unit to bring because she can wield Mire and has Galeforce, letting her kill two troublesome enemies in one turn.
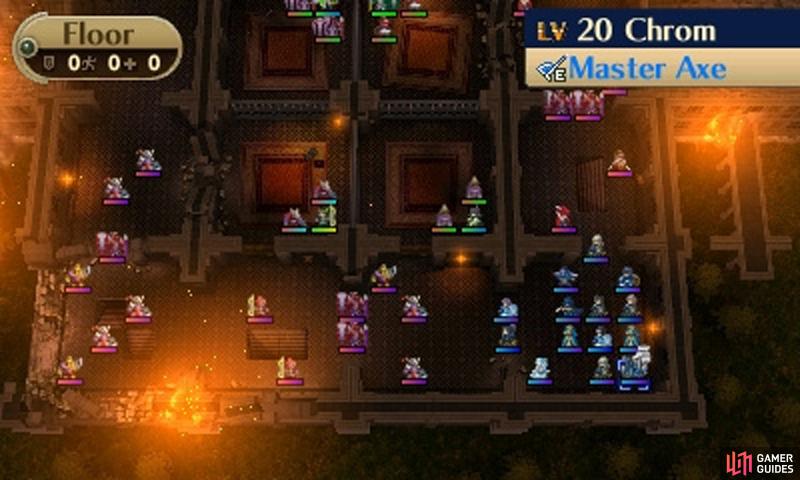
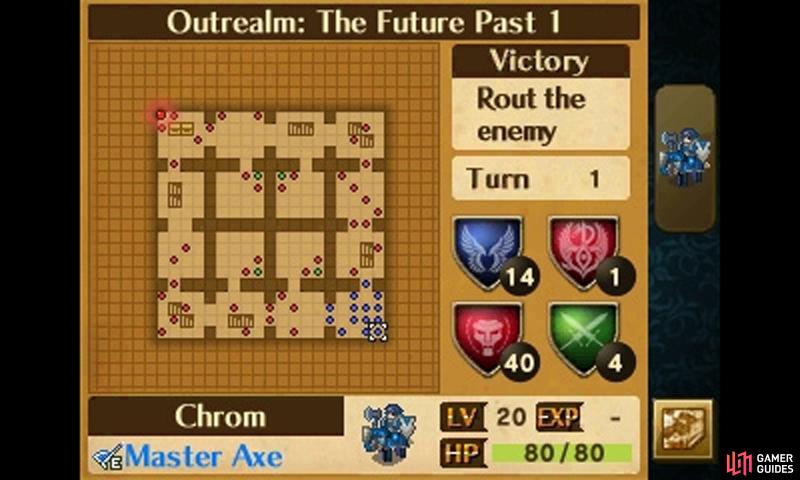
The first turn is the toughest one and don’t hesitate to reset the mission if it doesn’t go to plan. As soon as the mission begins, pair up your main attackers and crush the two Snipers and two Generals towards the south-west of the map.
This is to ensure Noire doesn’t die on the first turn. If you have a Galeforce pair (two units with Galeforce paired together), they can potentially kill 3 enemies in one turn, by alternating the active unit after each kill.
In particular, the Generals can be quite stubborn and may not go down in one round, rendering Galeforce useless and oft forcing a reset.
After those four are down, kill the two Generals north of your starting position (or at least the left one), to ensure Nah’s safety. From here, it’s possible your army will be spread out rather dangerously and you may suffer a fatality during the enemy’s next turn.
Hence why I mentioned this turn being the hardest. However, should your units be strong enough and your strategy skilful, you should be able to save Noire and Nah, while keeping your own units safe, at least eventually!
Turn 2, mop up any nearby allies and, if possible, snipe enemies in the cell. Mire is useful for this, because of its long-range, but only Sorcerers or Shadowgift users (eg. Aversa) can wield it. If you don’t have Mire, you can still snipe a couple of cell-bound enemies with bows and etc.
You can also unlock the doors to the cells and kill the enemies that way too. Otherwise, just cast Physic and/or Fortify to heal the kids when they run out of healing items and are approaching dangerously low HP.
If you married off Tharja, you can have Tharja equip Tomebreaker as her last skill before beginning this mission and Noire will come with it, raising her survivability against the Sages. Ideally you shouldn’t let the Sages get an attack in in the first place.
Turn 3, continue advancing through the map, sniping enemies in the cells when an opportunity arises. Don’t move the two units sitting on the staircases, as two more Sages will appear from there on the enemy’s next turn.
Additionally, have four units block all the staircases towards the most north-east and south-west corners of the map; in particular, a Sorcerer with Mire will spawn from the south-west corner (top-left staircase), spelling doom for the nearby NPC kids.
Turn 3-5, bait the boss into range. If you’re feeling merciful, unequip your Avatar (or another sturdy character) and place them in range.
Next turn, have your Avatar wait next to the boss and–after a spell of dialogue–the boss will automatically flee the map. Otherwise, just gleefully stab them in the face… with a ranged character at least, to avoid Counter.
Turn 4, continue to plug in the north-eastern stairs, to prevent 2 Sages from appearing the next turn; these guys can make short work of Kjelle and Cynthia.
From Turn 5, providing you fought well and made the necessary preparations, you should be in a position to finish the map, or soon at least.
If you have some spare hands, now would be a good time to begin talking to the NPC children–you can place their biological father, mother or themselves next to them and wait to trigger new dialogue.
Although, if you do have spare time, first plug in the two staircases directly above Kjelle or you’ll be met by a Trickster and Mire-equipped Sorcerer on the enemy’s turn.
Turn 6, if you’re still around, keep the north-eastern and south-western corner staircases plugged in, to stop more annoying reinforcements from ruining your day.
Turn 7, on the enemy’s turn, two Warriors will spawn from the western stairs (left of Cynthia) and a Trickster, Swordmaster from the eastern stairs (right of Nah). These guys aren’t immediately dangerous to the kids, but don’t leave any weak units by the stairs before ending your turn; plug them in if you want.
As soon as Turn 8 begins, all the cell doors will magically slam wide open. If you didn’t bring anybody to open doors, now you can finally speak with the kids and/or finish off their cell guardians.
On the enemy’s turn, the same reinforcements as Turn 7 will spawn. After that, no more reinforcements will appear, signalling the end of hardships.


 Sign up
No Comments