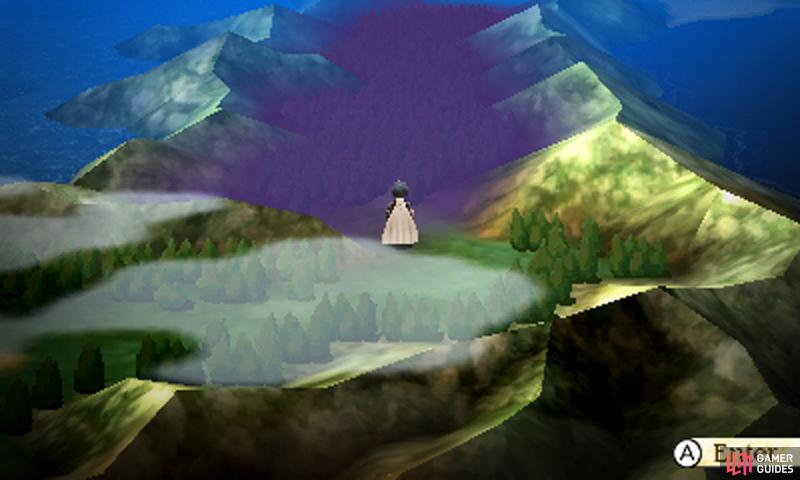
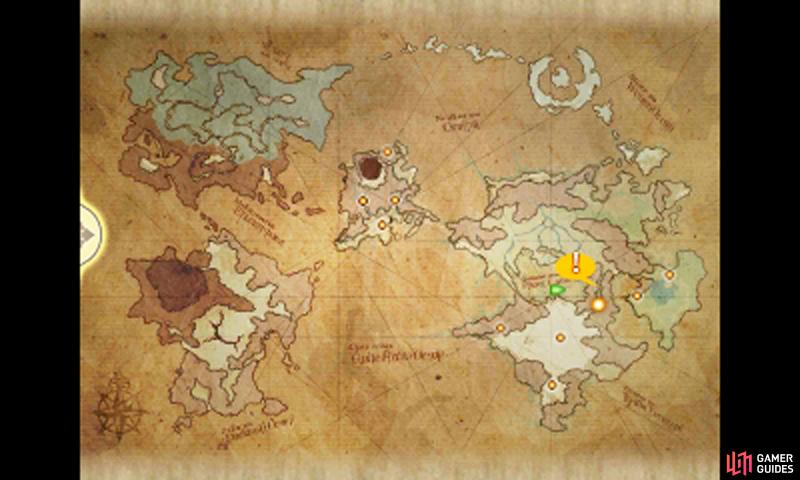
(1 of 2) To find Miasma Woods, head due north-east from Ancheim City.
To find Miasma Woods, head due north-east from Ancheim City. (left), (right)
This chapter begins with a rather unpleasant turn, as you must navigate the highly toxic Miasma Woods. Thanks to the Wind Crystal’s blessing, the toxic mists that plagued the woods have dissipated so you can now advance.
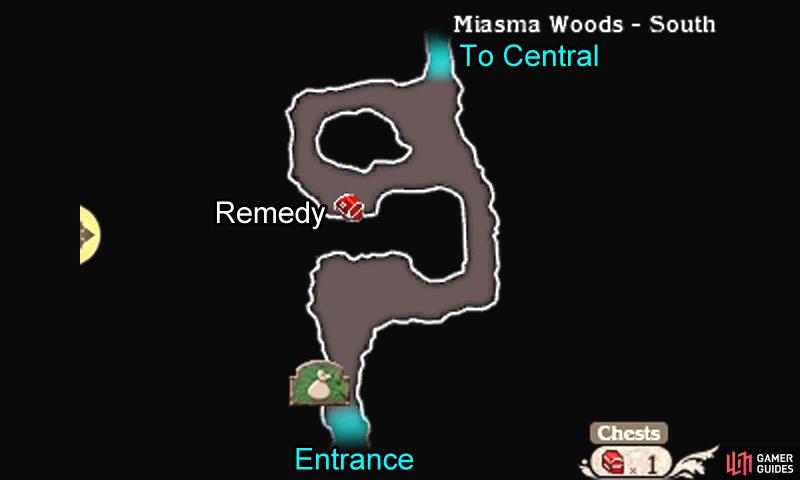
However the toxic swamps still remain; so tread carefully to avoid the dark patches on the ground or your whole party will get poisoned. By the entrance, the Adventurer’s animal companion is running a makeshift shop (same stock as in Yulyana Woods), so do take a gander before setting forth.
South and Central
(1 of 2)
You’ll begin in the south part of the woods, where the path is straightforward. Near the center, there’s a chest containing a Remedy–if you’re avoiding the toxic swamp, you’ll need to follow the path clock-wise. Once you reach the central part of the woods, the road will become more complicated.
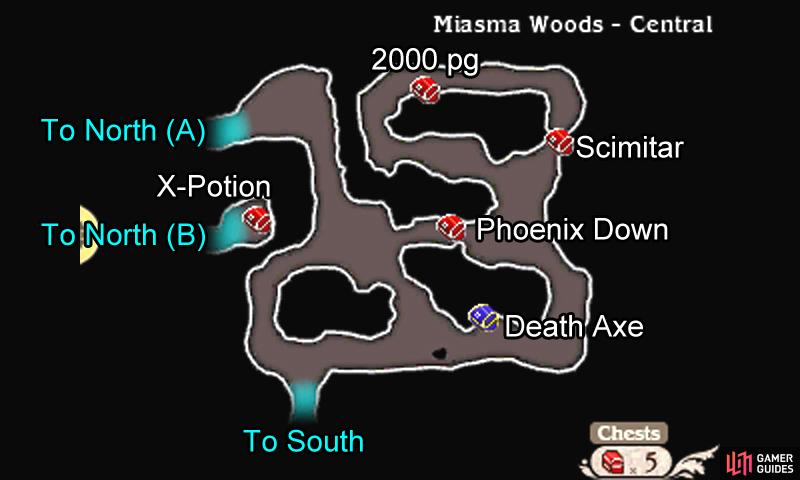
Follow the path right first and you’ll come across a blue locked chest, then chests containing 2000 pg and a Scimitar in the top-right corner. Next, return to the junction just before the blue chest and head north instead to find a chest with a Phoenix Down and the entrance to the next zone.
North
The north–and final–part of the woods is particularly tricky, with many narrow paths between the poisonous swamp. Head left along the narrow path, hugging the wall to the north, to find a chest with a Hi-Potion. Go back around and follow the path down until you reach a junction.
From here, head right to return to the central woods where a chest with an X-Potion awaits. Back at the junction, go left and then follow the path up for a chest with an Ether. Return to the point where you turned the corner, then continue left and follow the nearest path leading down.
At the end of the winding path, you’ll come across a chest with an Earthing Rod inside. Before you travelled downwards, continue left again and head down the next path. Here, the path between the swamp is super narrow–nudge the circle pad out slightly to walk or you may accidentally run into the venom.
In the bottom-left corner you’ll find a chest with a Turbo Ether for your efforts. Skilfully cross backwards and finally follow the remainder of the path left and then up. You’ll find a chest with a Remedy by the right and the Adventurer waiting at the end.


 Sign up
No Comments